Lenovo THINKSERVER TS100 6434 User Manual
Page 39
3.
Unlock
the
side
cover
(the
bezel
will
not
disengage
from
the
server
if
the
cover
is
locked).
4.
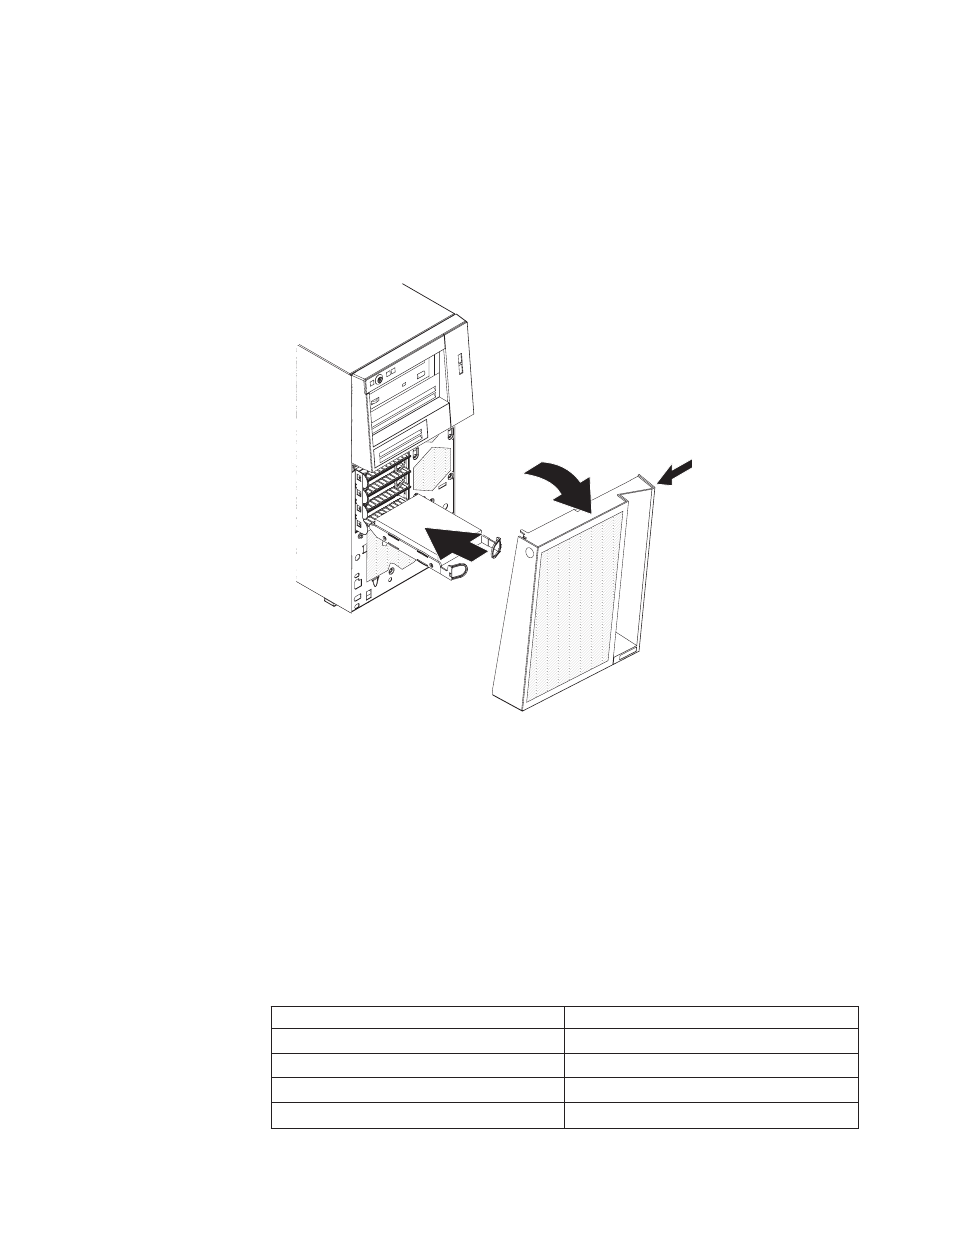
Remove
the
lower
bezel
(see
5.
Touch
the
static-protective
package
that
contains
the
drive
to
any
unpainted
metal
surface
on
the
server;
then,
remove
the
drive
from
the
package
and
place
it
on
a
static-protective
surface.
6.
Align
the
drive
assembly
with
the
guide
rails
in
the
bay
(the
connector
end
of
the
drive
goes
in
first).
7.
Pull
the
loops
of
the
drive
assembly
toward
each
other;
then,
carefully
slide
the
drive
assembly
into
the
drive
bay
until
it
stops,
and
release
the
loops.
Note:
Do
not
release
the
loops
on
the
drive
assembly
until
it
is
completely
seated.
If
you
have
other
devices
to
install
or
remove,
do
so
now;
otherwise,
go
to
The
simple-swap-drive
backplate
controls
the
IDs
of
the
internal
simple-swap
drive
bays.
The
following
table
lists
the
IDs
of
the
hard
disk
drives
and
backplate
in
simple-swap
models.
This
table
applies
only
to
server
models
that
support
four
hard
disk
drives.
Table
9.
Drive
bay
IDs
for
simple-swap
models
Drive
bay
ID
4
0
5
1
6
2
7
3
Chapter
2.
Installing
optional
devices
25