Server function, Image store/delete mode (continued) – Konica Minolta 7075 User Manual
Page 207
Server Function 11-5
Server Function
Image Store/Delete Mode (continued)
To Store Image Data in HDD (continued)
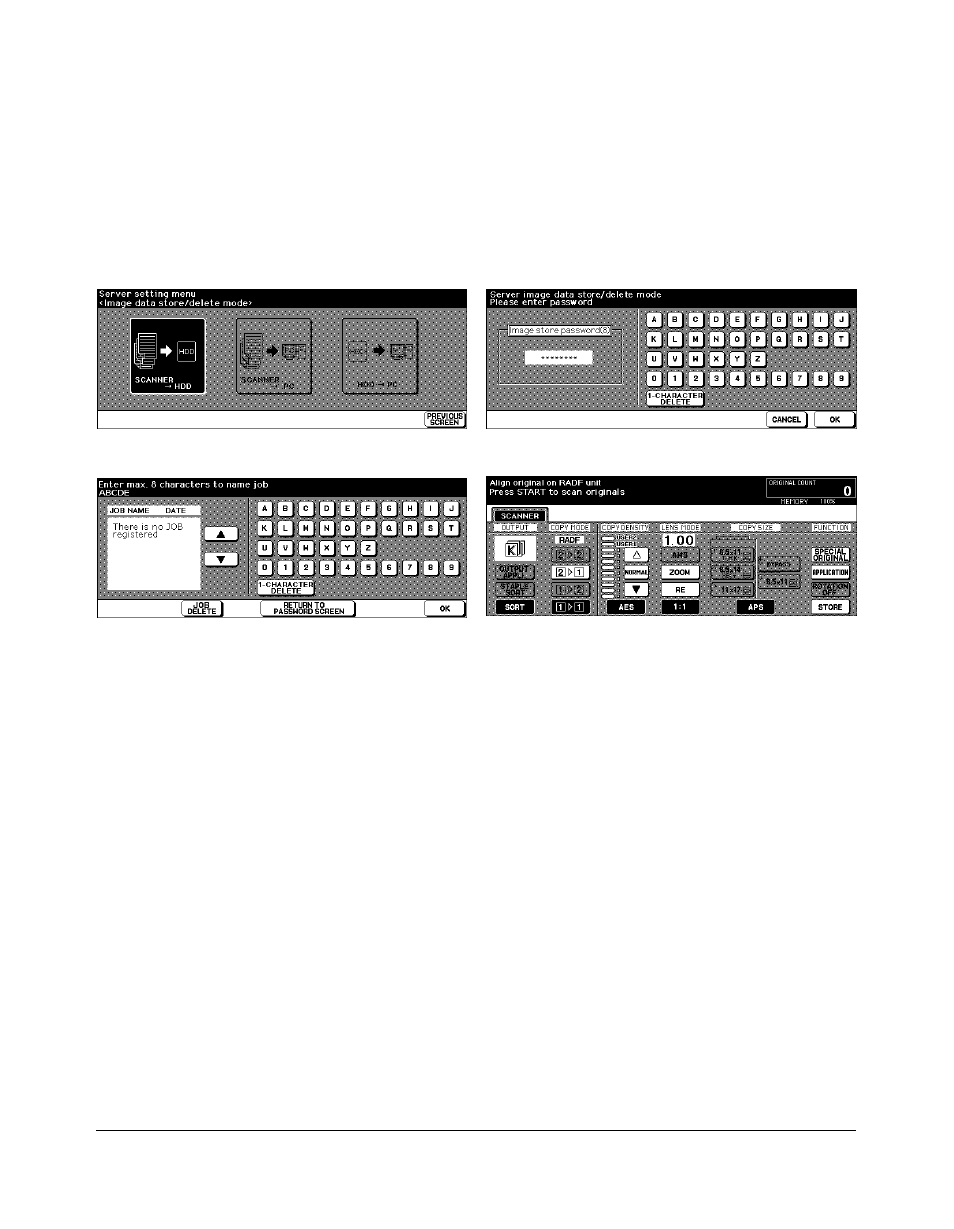
Image Data Password Entry Screen
Job Name Entry Screen
Image Data Store/Delete Site Selection Screen
1 Press [
MODE
] to light up the [
SCANNER/SERVER
] LED. The Scanner/Server Setting
Menu Screen will be displayed.
2 Touch
IMAGE STORE/DELETE
to display the Image Data Store/Delete Site Selection
Screen.
3 Touch
SCANNER
→
HDD
. The Image Data Password Entry Screen will be displayed.
4 Enter the desired image data password in up to 8 characters from the touch screen
keypad.
To correct an entry, touch
1-CHARACTER DELETE
repeatedly to delete each character,
then enter the correct password.
5 If the password is correct, touch
OK
to display the Job Name Entry Screen.
Enter the desired job name in up to 8 characters from the touch screen keypad.
To correct an entry, touch
1-CHARACTER DELETE
repeatedly to delete each character,
then enter the correct job name.
6 If the job name is correct, touch
OK
to display the Scanner Setting Screen.
7 Select the desired scanning conditions. Print quantity cannot be entered.
8 Position original(s) FACE UP in the document feeder or FACE DOWN on the platen
glass.
When using Platen store mode, see p. 6-28 to p. 6-29.
When using RADF store mode, see p. 6-30.
Scanner Setting Screen