Smart Technologies Smart Board Interactive Whiteboard Systems 600i4 User Manual
Page 34
18 |
CHAPTER 2 – ADDITIONAL DETAILS FOR INSTALLING YOUR INTERACTIVE
WHITEBOARD SYSTEM
If you already secured your pen tray brackets to the wall, you might need to remove
the pen tray before you lock it with a security cable.
NOTE
You don’t need to wear ESD protection when performing the following procedure.
To remove the pen tray
1. Turn off your interactive whiteboard by disconnecting the USB cable to your
computer or by disconnecting the expansion module’s power supply, as
appropriate.
2. Remove the pens and the eraser from the pen tray.
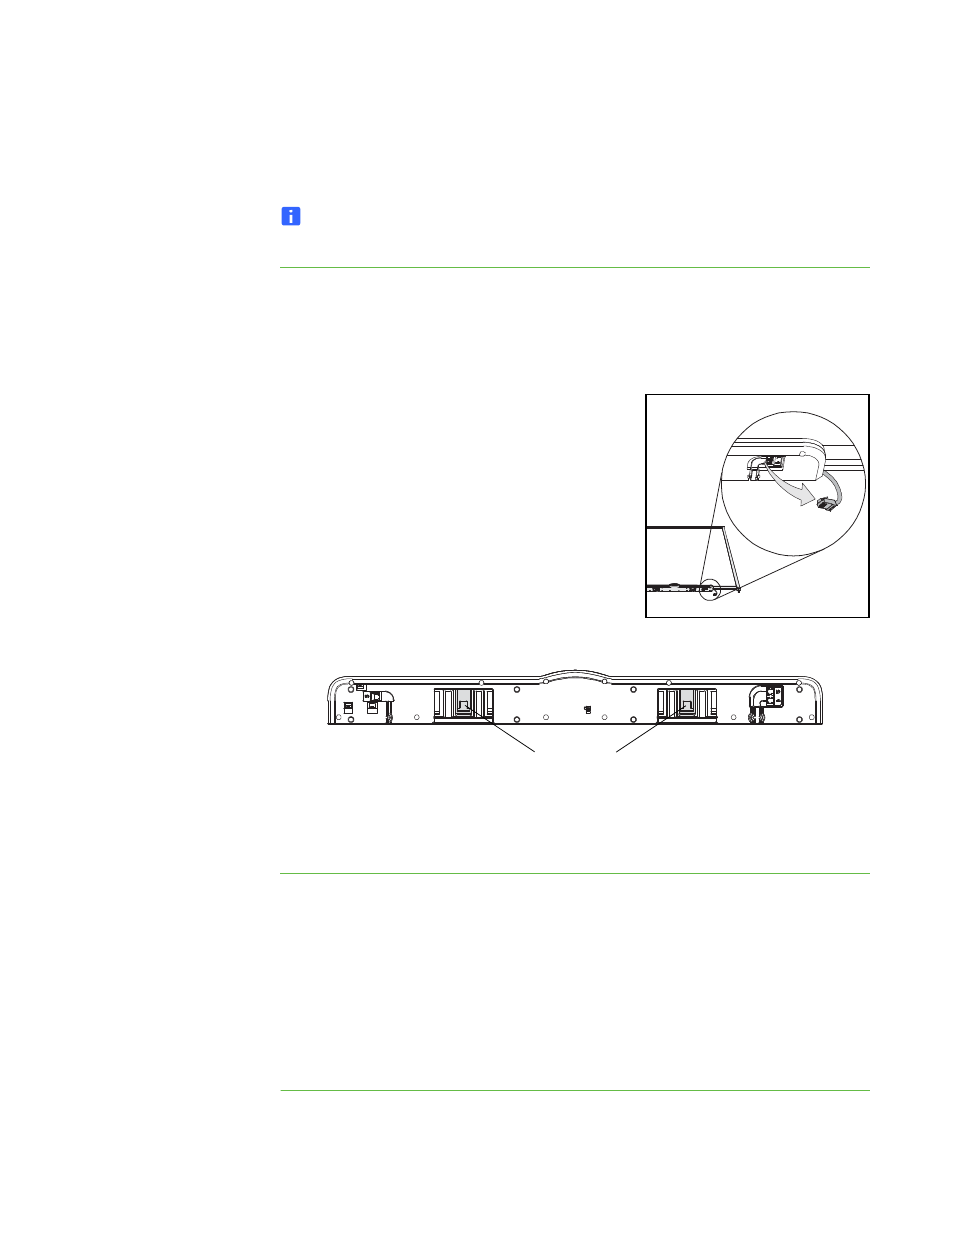
3. Reach under the pen tray and disconnect the
modular cable.
4. If you secured the pen tray to its brackets using
two screws as described in the previous
section, remove these screws.
5. If you secured the pen tray using a Kensington
lock or similar device, unlock and remove the
lock.
6. Reach under the pen tray and pull down on the
two large plastic clips. Because the ends of
these clips project slightly downward, they’re easy to locate.
7. While applying downward pressure to the clips, gently slide the pen tray toward
you until it detaches from the two L-shaped metal brackets.
To lock the pen tray
to your interactive
whiteboard
1. Before you secure your pen tray brackets to the wall, loop your security cable
behind the brackets.
2. Thread the lock end of the cable through the loop end of the cable.
3. Verify that the cable is tight enough that you can’t remove the pen tray while the
lock is in place, and then install the pen tray.
4. Insert the prong end of the security cable into the security slot, and then complete
the pen tray installation by securing it to the wall.
Plastic Clips
The Pen Tray from the Bottom