Sub-Zero 427R User Manual
Page 43
Model WS-30 Installation
43
subzero.com
Panel Installation
Before you install the front panel, refer to panel specifica-
tions for framed, overlay or flush inset applications and be
sure you are working with the panel design called for in
your installation. If your customer has chosen the stainless
steel design, the unit has been shipped complete with a
finished stainless steel look. It will not be necessary to
install a front panel or handle hardware. In your final
preparation for stainless steel units, use a stainless steel
cleaner to remove any marks. Abrasive cleaners should
not be used, as they may scratch the surface.
If your customer has ordered either a framed or overlay
model, you will be installing a front panel to give the unit
the custom Sub-Zero look.
IMPORTANT NOTE:
For overlay models, there are two
design applications—overlay and flush inset. Be sure to
use the correct panel size for your application.
Complete the Installation—Model WS-30/S
For framed, overlay and flush inset applications, refer to
the following pages for front and side panel information.
Before installing the kickplate, be sure to reinstall the drain
pan. Once the drain pan is in place, screw the kickplate
the to brackets attached to the inside surface of each
roller base. Reinstall the grille following the instructions on
page 37. Turn power back on to the electrical outlet.
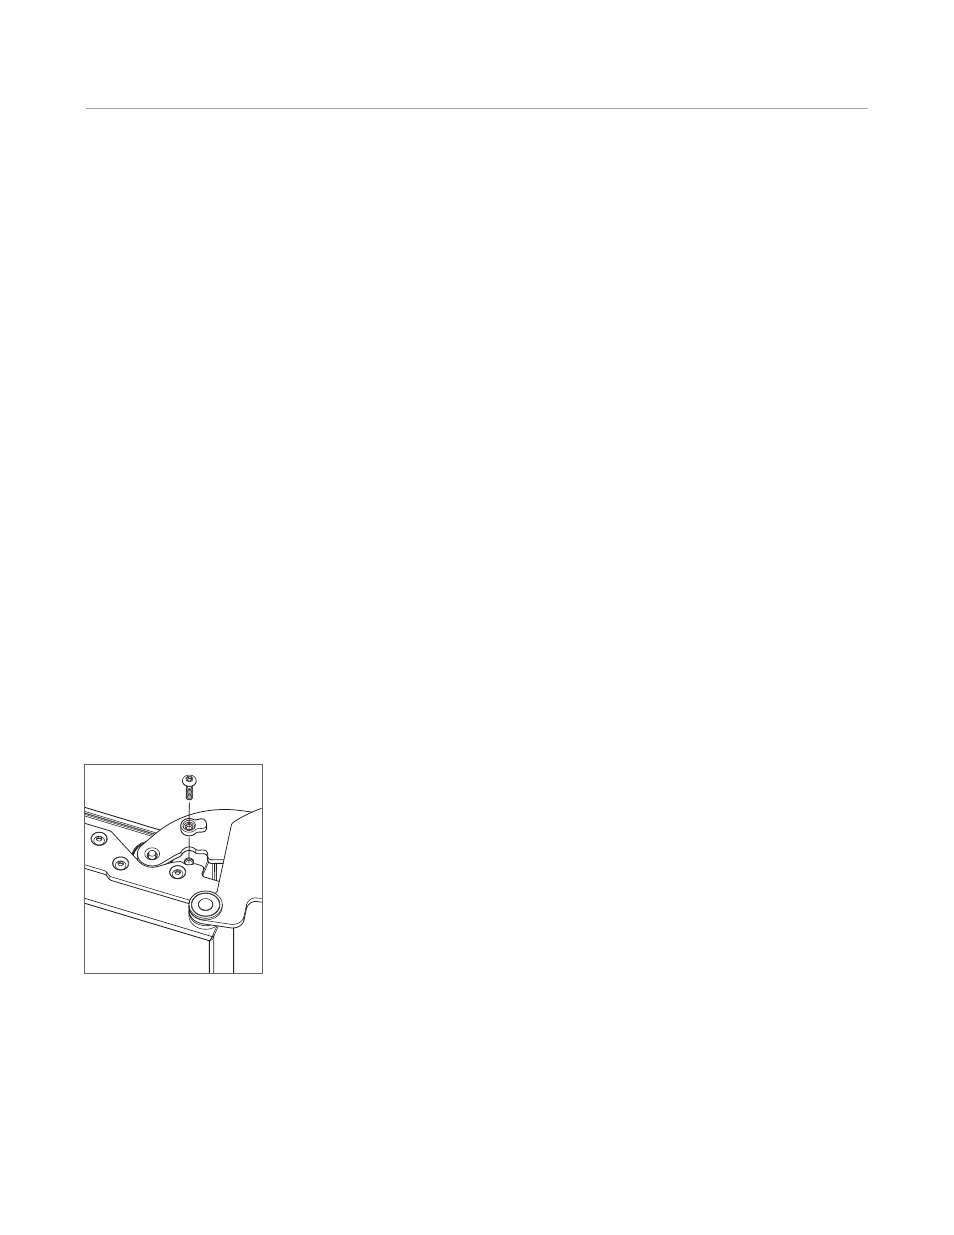
90° Door Stop
The door of the model WS-30 opens to 110°. A 90° door
stop ships with the unit and is located behind the flip-up
grille. Additional 90° door stop kits are available through
your authorized Sub-Zero dealer. To obtain local dealer
information, visit the showroom locator section of our
website, subzero.com.
The 90° door stop will be installed in the top hinge of the
door. To install, open the door to approximately 90°. At the
top of the door, insert the door stop down between the
door hinge and the door closer arm. Insert the screw
through the door stop and into the door as shown in the
illustration below.
90° door stop.