2 using pdz-1 proxy browsing software, 2-1 carrying out a clip list playback, 50 5-2-1 carrying out a clip list playback – Sony PDW-1500 User Manual
Page 50: System requirements, Using a clip list
Chap
te
E
d
it
ing
50
5-2 Using PDZ-1 Proxy Browsing Software
5-2 Using PDZ-1 Proxy
Browsing Software
When a computer with the PDZ-1 Proxy Browsing
Software installed is connected to this unit, you can
transfer the proxy AV data and metadata files recorded on
a disc to the computer. On the computer side, PDZ-1
enables you to browse the proxy AV data, add or modify
metadata (titles, comments, essence marks, etc.), or create
a clip list.
The modified metadata and the created clip list can then be
written back to the disc loaded in this unit.
System requirements
The following are required to use PDZ-1.
• Computer: PC with Intel Pentium III CPU, at least 1
GHz
Installed memory: at least 512 MB
• Operating system: Microsoft Windows 2000 Service
Pack 4 or higher, or Microsoft Windows XP
Professional Service Pack 1 or higher
• Web browser: Internet Explorer 6.0 Service Pack 1 or
higher
• DirectX: DirectX 8.1b or higher
To install PDZ-1
Insert the supplied CD-ROM in the CD-ROM drive of the
computer and execute the Setup.exe file, then follow the
installation instructions.
Notes
• Make sure that the hard disk drive on which the work
folder to store the material transferred from this unit has
adequate free space. One minute of proxy AV data
amounts to approximately 16 MB.
• To transfer files between the computer and this unit
requires this unit’s IP address and other network-related
settings to be made.
For details of the network-related settings, see “To
change network settings” (page 72).
5-2-1 Carrying Out a Clip List
Playback
Using a clip list
1)
created with PDZ-1, you can carry out a
clip list playback on this unit.
1) Clip list: An edit list comprising clips recorded on a single Professional
Disc.
To carry out a clip list playback, insert a disc containing
the clip list created with PDZ-1 into this unit, then do as
follows.
For the method of recording a clip list created with PDZ-
1 on the disc loaded in this unit, refer to PDZ-1 Help.
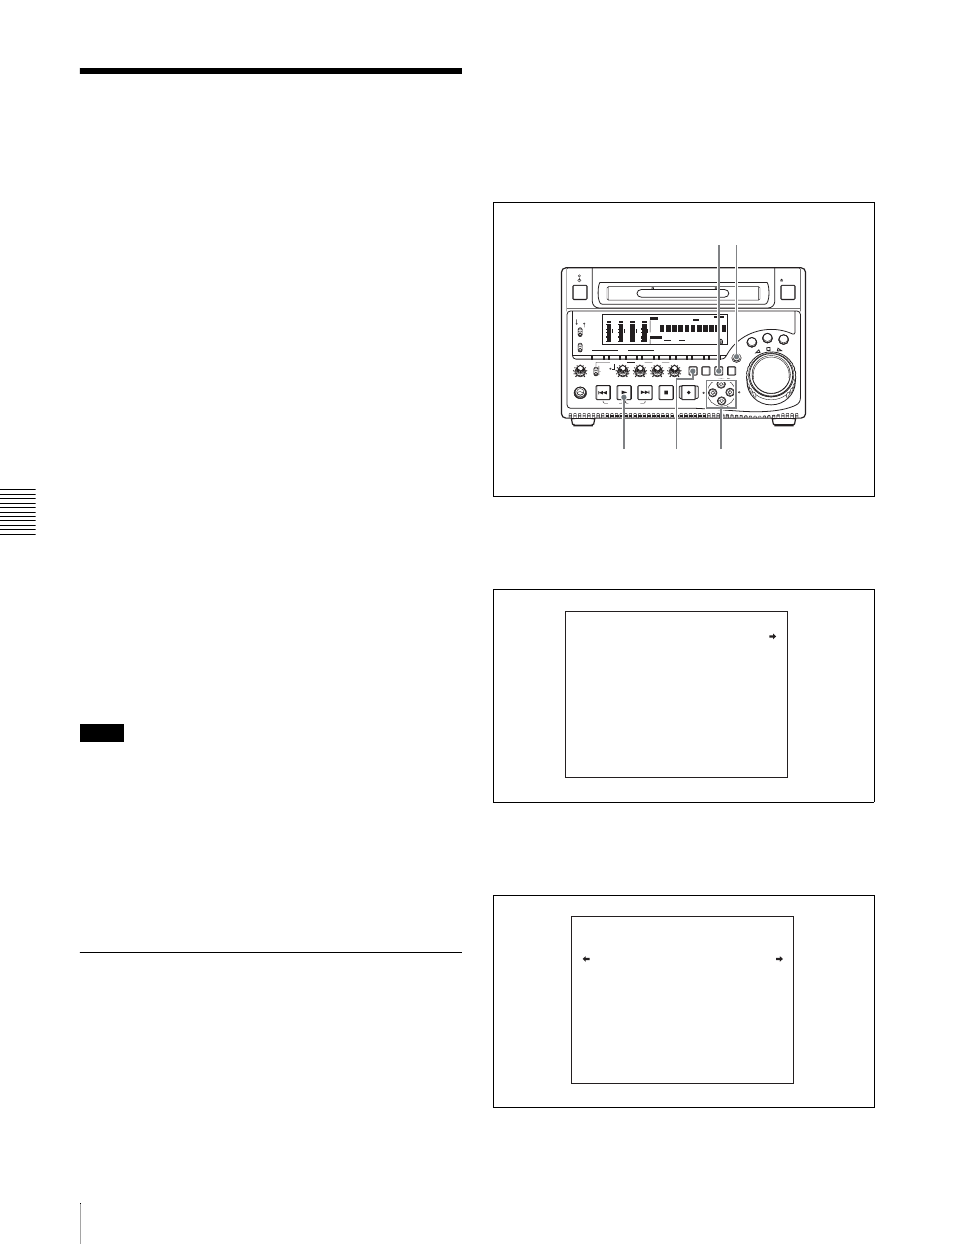
1
Holding down the SHIFT button, press the SUB CLIP
button.
The CLIP MENU appears.
2
Select “LOAD” using the
F button or f button, then
press the
g button.
The clip lists recorded on the disc are displayed.
To return to the previous menu screen
REC
VARIABLE
PRESET
PB
L
MIX
R
MONITOR
NETWORK
LOCAL
REMOTE
ACCESS
PHONES
TOP
F REV
F FWD
END
PREV
NEXT
PLAY
AUDIO
MONITOR SEL METER SEL
INPUT CH
INPUT SEL
VIDEO
INPUT SEL
COUNTER
SELECT
SUB
CLIP
THUMB
NAIL
SET RESET
SHIFT
EJECT
HOLD
STOP
REC
SH
UTT
LE
JOG
VAR
MARK1
ESSENCE
MARK
S.SEL
MARK2
IN
OUT
ALL/CH-1
CH-2
CH-3
CH-4
OVER
dB
-12
-20
-30
-40
-60
0
CH-
15
BQ DATA
ANA SDI
AE8/EBU
OVER
dB
-12
-20
-30
-40
-60
0
CH-
26
BQ DATA
ANA SDI
AE8/EBU
OVER
dB
-12
-20
-30
-40
-60
0
CH-
37
BQ DATA
ANA SDI
AE8/EBU
OVER
dB
-12
-20
-30
-40
-60
0
CH-
48
BQ DATA
ANA SDI
HOURS
MINUTES
SECONDS
FRAMES
AE8/EBU
VITC
VITC
COUNTER
REC INH
VIUB
EDIT
KEY INH
REMOTE [9P iLINK]
INPUT
i.LINK
SDI
1/2
5/6
3/4
7/8
625
525
IMX[50 40 30]
DVCAM
4 8 CH
18 24 BIT
CMPST
Y-R,B
SG
ALARM
MONITOR
AUDIO
SYS MENU
MENU
1
2,3
1,5
6
4
LOAD
CLIP MENU
LOAD
E0001 04/01/22 17:28
E0002 04/01/22 17:29
CLIP MENU