1-2 recording time code and user bit values, 1-2 recording time code and user bit, Values – Sony PDW-1500 User Manual
Page 42: Setting the recording format, Manually adjusting the audio recording levels, Press the hold button
Cha
p
te
r 4
Recor
d
ing
/P
la
y
bac
k
42
4-1 Recording
Setting the recording format
Before recording, it is necessary to set the recording format
for each of video and audio.
Note
It is not possible to combine different recording formats on
a single disc.
To set the video recording format
Use basic menu item 031 “RECORDING FORMAT” to
select the video recording format from MPEG IMX 50
Mbps, MPEG IMX 40 Mbps, MPEG IMX 30 Mbps, and
DVCAM.
The factory default setting is IMX50.
For details of the basic menu operations, see 6-2-2 “Basic
Menu Operations” on page 56.
To set the audio recording format
When using the MPEG IMX 50Mbps/40Mbps/30Mbps for
video: Use the maintenance menu item “AUDIO
CONFIG” to select 16 bits/8 channels or 24 bits/4
channels.
The factory default setting is 16 bits/8 channels.
When using the DVCAM format for video: Selection is not
necessary. The format of 16 bits/8 channels is selected
automatically.
For details of the maintenance menu operations, see 6-4-2
“Maintenance Menu Operations” on page 71.
To adjust the audio recording levels
When carrying out audio recording at a reference
level
Set the VARIABLE switch (see page 22) to PRESET. The
audio signals will be recorded at a preset reference level.
Use the maintenance menu item “AUDIO CONFIG” to set
the audio input level and reference level.
For details of the maintenance menu operations, see 6-4-2
“Maintenance Menu Operations” on page 71.
Manually adjusting the audio recording
levels
Set the VARIABLE switch (see page 22) to REC and
adjust the ALL/CH-1 and CH-2 to CH-4 adjustment knobs
so that the audio level indications on the audio level meters
(see page 21) do not exceed 0 dB for a maximum volume.
Carry out the adjustment in E-E mode.
To select the E-E mode, see extended menu item 108
“AUTO EE SELECT.”
To adjust the audio recording levels for channels 1 to 8
simultaneously, set extended menu item 131 “AUDIO
VOLUME” to “all” and turn the ALL/CH-1 adjustment
knob.
4-1-2 Recording Time Code and User
Bit Values
There are the following two ways of recording time code:
• Setting an initial value, then recording the output of the
internal time code generator
• Recording the output of the internal time code generator
synchronized to an external time code generator
To record the time code after setting an
initial value
Set an initial value as described in the following, then carry
out recording (see page 44).
To set an initial value
Set extended menu item 626 “TC MODE” to “int preset”
beforehand, then do as follows.
For details of the extended menu operations, see 6-3-2
“Extended Menu Operations” on page 67.
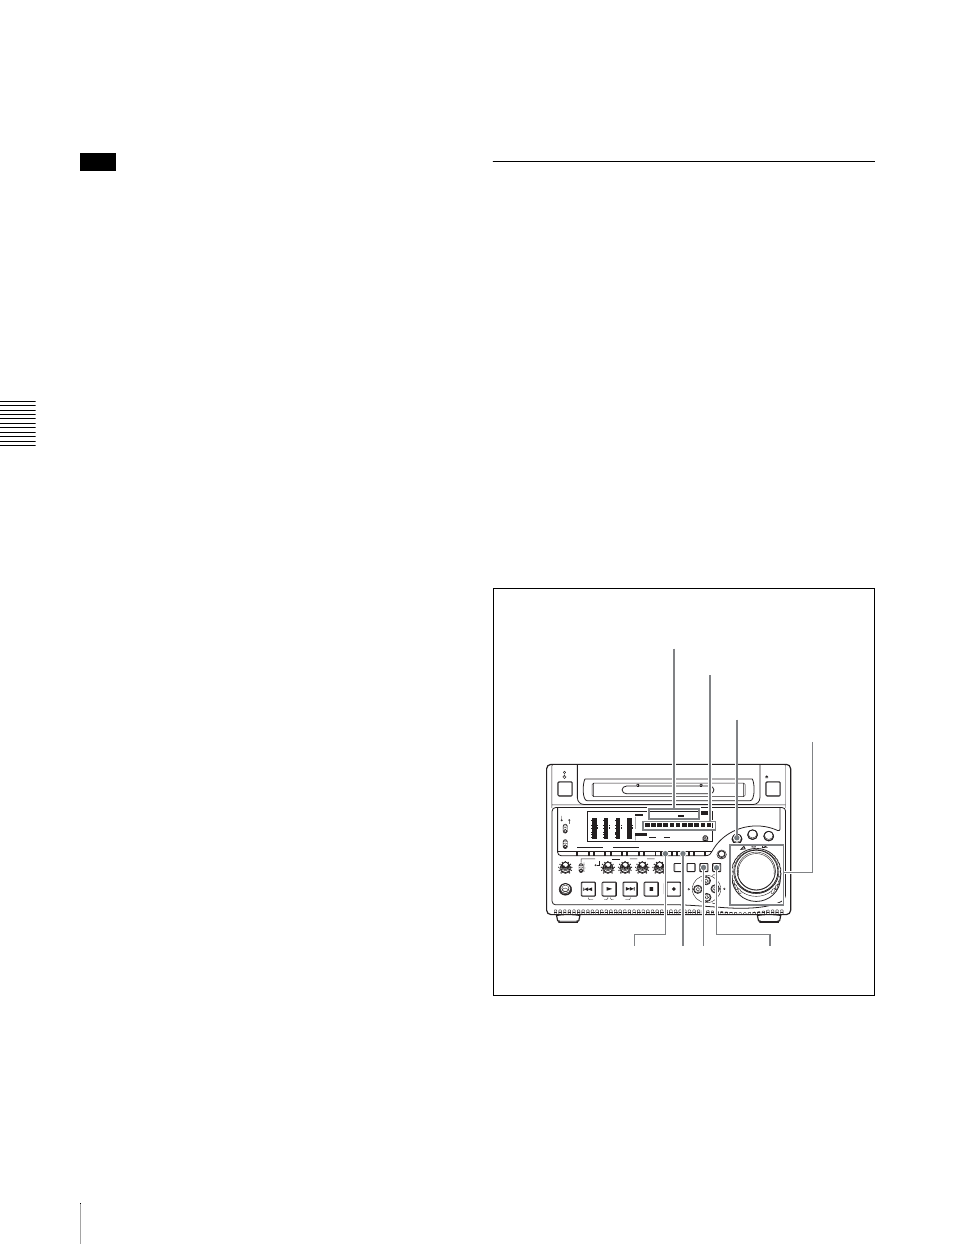
1
Watching the indicators above the time data display,
press the COUNTER SELECT button to select TC.
2
Press the HOLD button.
REC
VARIABLE
PRESET
PB
L
MIX
R
MONITOR
NETWORK
LOCAL
REMOTE
ACCESS
PHONES
TOP
F REV
F FWD
END
PREV
NEXT
PLAY
AUDIO
MONITOR SEL METER SEL
INPUT CH
INPUT SEL
VIDEO
INPUT SEL
COUNTER
SELECT
SUB
CLIP
THUMB
NAIL
SET RESET
SHIFT
EJECT
HOLD
STOP
REC
SH
UTT
LE
JOG
VAR
MARK1
ESSENCE
MARK
S.SEL
MARK2
IN
OUT
ALL/CH-1
CH-2
CH-3
CH-4
OVER
dB
-12
-20
-30
-40
-60
0
CH-
15
BQ DATA
ANA SDI
AE8/EBU
OVER
dB
-12
-20
-30
-40
-60
0
CH-
26
BQ DATA
ANA SDI
AE8/EBU
OVER
dB
-12
-20
-30
-40
-60
0
CH-
37
BQ DATA
ANA SDI
AE8/EBU
OVER
dB
-12
-20
-30
-40
-60
0
CH-
48
BQ DATA
ANA SDI
HOURS
MINUTES
SECONDS
FRAMES
AE8/EBU
VITC
VITC
COUNTER
REC INH
VIUB
EDIT
KEY INH
REMOTE [9P iLINK]
INPUT
i.LINK
SDI
1/2
5/6
3/4
7/8
625
525
IMX[50 40 30]
DVCAM
4 8 CH
18 24 BIT
CMPST
Y-R,B
SG
ALARM
MONITOR
AUDIO
SYS MENU
MENU
4
6
2
1
3,4
Indicators above the time
data display
Time data display
SHUTTLE button
RESET button