Jackson Chemical Sanatizing Singal and Dual Rack Upright Door Dishmachines CONSERVER XL2-CML User Manual
Page 62
Conserver XL Series Technical Manual 7610-002-10-23
Issued: 11-28-2007 Revised: N/A
SECTION 5: PARTS SECTION
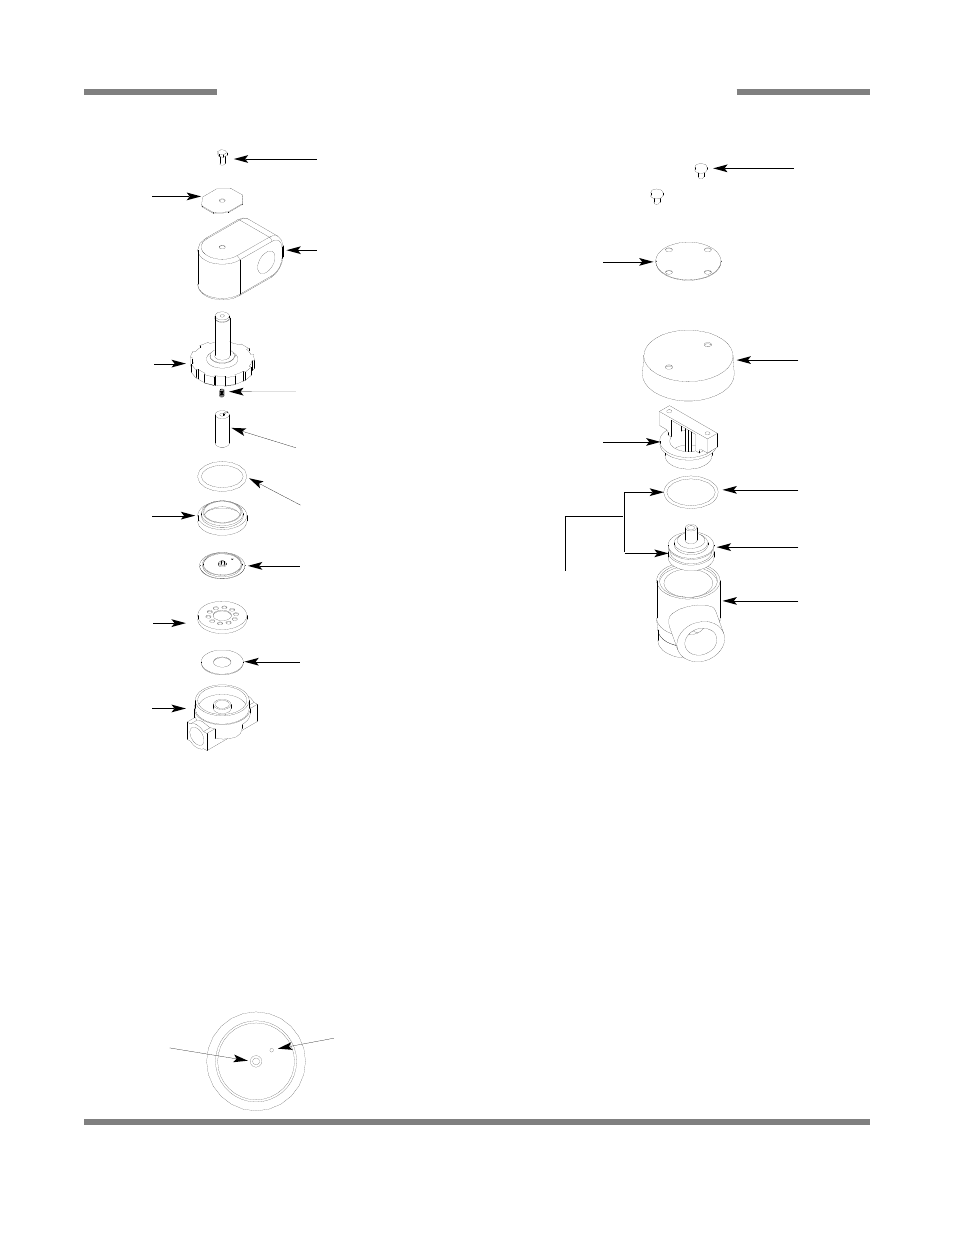
3/4” SOLENOID VALVE & 3/4” NPT VACUUM BREAKER REPAIR PARTS KITS
55
Screw
Data Plate
Coil & Housing
Valve Bonnet
Spring
06401-003-07-40
Plunger
06401-003-07-40
O-Ring
06401-003-07-42
Diaphragm
Retainer
Diaphragm
06401-003-07-42
Screen
Retainer
Mesh Screen
Valve Body
Complete 110 Volt Solenoid Valve Assembly
04810-100-53-00
Coil & Housing only
04810-200-01-18
Complete 240 Volt Solenoid Valve Assembly
04810-100-03-18
Coil & Housing only
04810-200-02-18
Complete Vacuum Breaker Assembly
04820-002-53-77
Components of Repair Kit
06401-003-06-24
Cap Screw
Data Plate
Cap
O-Ring
Plunger
Body
Cap Retainer
1
2
TO TAKE THE SOLENOID VALVE APART
DISASSEMBLY - These valves may be taken apart by
unscrewing the bonnet and the enclosing tube assembly from
the valve body assembly. After unscrewing, carefully lift off the
bonnet and enclosing tube assembly. Don’t drop the plunger.
The o-ring seal and diaphragm cartridge can now be lifted out.
Be careful not to damage the machined faces while the valve
is apart.
TO REASSEMBLE - Place the diaphragm cartridge in the
body with the pilot port extension UP. Hold the plunger with the
synthetic seat against the pilot port. Make sure the o-ring is in
place, then lower the bonnet and enclosing tube assembly
over the plunger. Screw the bonnet assembly snugly down on
the body assembly.
Possible Problems:
1. Pilot port extension #1 clogged. Clean hole.
2. Hole #2 Clogged. Pass heated straight pin through hole.
- Chemical Sanatizing Singal and Dual Rack Upright Door Dishmachines CONSERVER AXL2-CMR Chemical Sanatizing Singal and Dual Rack Upright Door Dishmachines CONSERVER XL Chemical Sanatizing Singal and Dual Rack Upright Door Dishmachines CONSEVER AXL Chemical Sanatizing Singal and Dual Rack Upright Door Dishmachines CONSERVER AXL2-CML Chemical Sanatizing Singal and Dual Rack Upright Door Dishmachines CONSERVER XL2 Chemical Sanatizing Singal and Dual Rack Upright Door Dishmachines CONSEVER XL2-CMR Chemical Sanatizing Singal and Dual Rack Upright Door Dishmachines CONSERVER AXL2