Removing and installing the bezel assembly, Removing the bezel assembly, Removing – IBM BladeCenter T Type 8720 User Manual
Page 53: Installing, Bezel, Assembly
Removing
and
installing
the
bezel
assembly
The
BladeCenter
T
unit
comes
with
a
bezel
assembly
containing
a
removable
and
replaceable
air
filter.
There
are
software
features
in
the
management-module
that
detect
a
clogged
filter
and
generate
system
alerts
based
on
the
severity
of
the
airflow
reduction.
The
typical
service
interval
for
the
filter
is
approximately
three
to
six
months
depending
on
your
environment.
Be
sure
to
replace
the
air
filter
when
indicated.
Important:
If
the
BladeCenter
T
unit
contains
any
blade
servers
with
standard
(high-profile)
release
levers,
the
bezel
assembly
will
not
fit
on
the
chassis.
The
bezel
assembly
and
air
filter
can
be
used
only
if
all
blade
servers
in
the
chassis
have
low-profile
release
levers.
See
for
instructions
for
removing
and
replacing
the
bezel
air
filter.
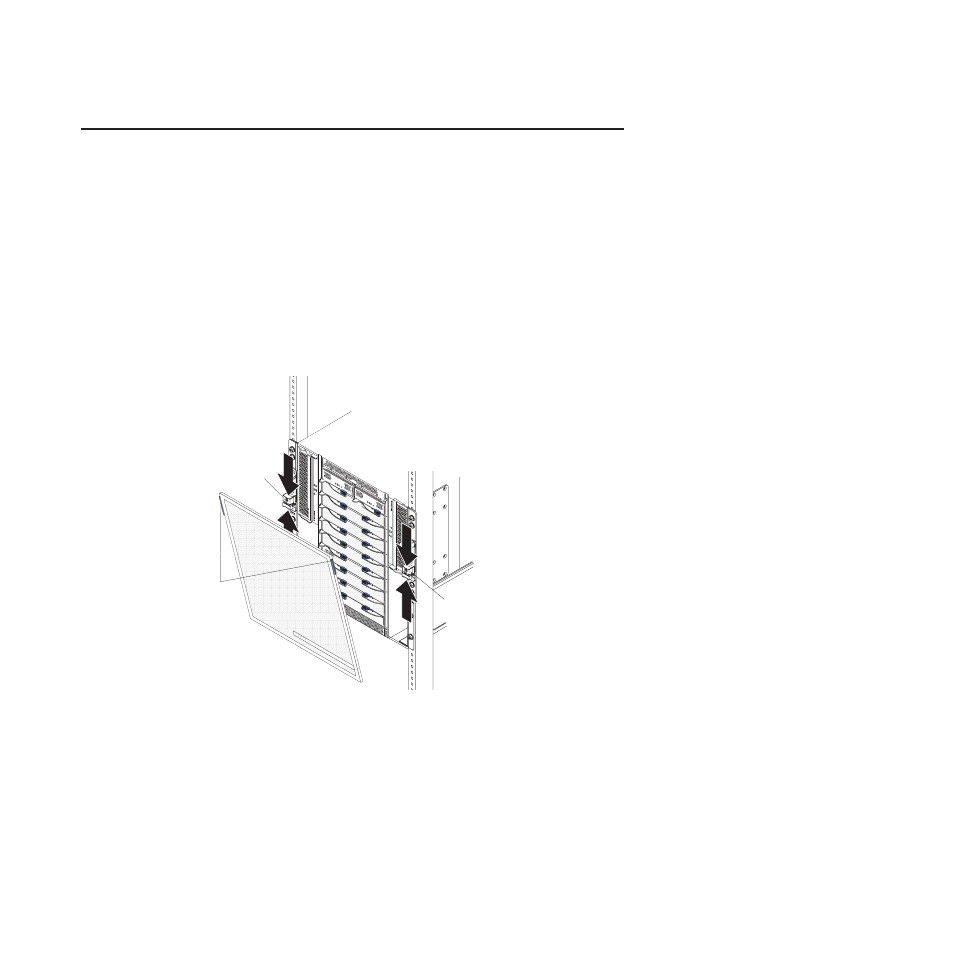
CM
M
1
CM
M
2
ESD
Bezel
touch
points
Bezel lock
retention latch
Bezel lock
retention latch
Removing
the
bezel
assembly
Complete
the
following
steps
if
you
are
removing
the
bezel
assembly
from
the
front
of
the
BladeCenter
T
unit:
1.
Squeeze
the
upper
and
lower
halves
of
the
bezel
lock
retention
latches
together
to
open
the
bezel
locks
on
each
side
as
shown
in
the
illustration;
then,
forcefully
pull
forward
on
the
blue
touch
points
at
the
top
sides
of
the
bezel.
2.
Lift
the
bezel
assembly
up
and
out
of
the
BladeCenter
T
unit.
Carefully
set
the
bezel
assembly
aside
in
a
safe
location.
Chapter
4.
Setting
up
the
BladeCenter
T
hardware
43