Adding a word to the t9 database, Entering characters by tapping the keypad – Sanyo Scp 8100 User Manual
Page 48
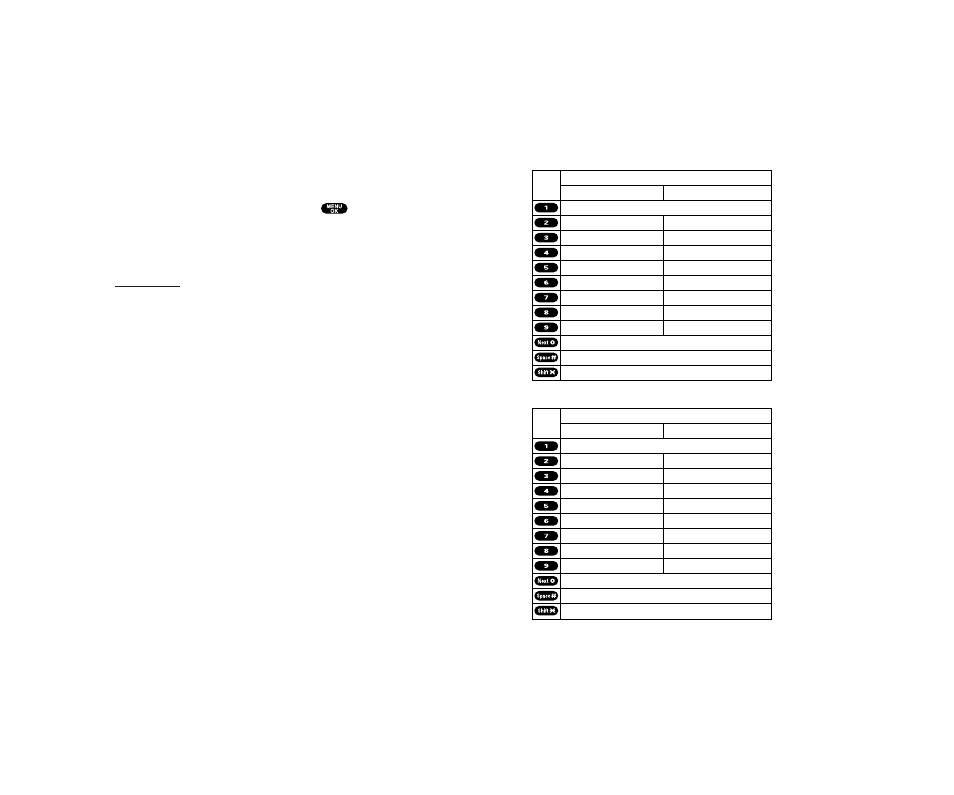
Entering Characters by Tapping the Keypad
To enter characters by tapping the keypad, select the Alphabet
mode (see “Selecting a Character Input Mode” on page 79).
Press the corresponding key until the desired character appears.
By default, the first letter of a word is capitalized and following
letters are lowercase.
Characters scroll in the following order:
In Spanish mode, characters scroll in the following order.
See page 51 for changing Spanish entering mode.
After a character is entered, the cursor automatically advances to
the next space after two seconds or when you enter a character
not on the same key.
Spanish Sequence
Upper Case
Key
. , @ 1 ¿ ? ¡ !
*
# /
A Á B C 2
D E É F 3
G H I Í 4
J K L 5
M N Ñ O Ó 6
P Q R S 7
T U Ъ Ь V 8
W X Y Z 9
a á b c 2
d e é f 3
g h i í 4
j k l 5
m n ñ o ó 6
p q r s 7
t u ъ ь v 8
w x y z 9
0
Space
Unshifted One-character- shifted Caps Lock
Lower Case
English Sequence
Upper Case
Key
. , @ 1 ? !
*
# /
A B C 2
D E F 3
G H I 4
J K L 5
M N O 6
P Q R S 7
T U V 8
W X Y Z 9
a b c 2
d e f 3
g h i 4
j k l 5
m n o 6
p q r s 7
t u v 8
w x y z 9
0
Space
Unshifted One-character- shifted Caps Lock
Lower Case
Section 2: Understanding Your PCS Phone
2G: Using the Internal Phone Book
81
Adding a Word to the T9 Database
If a word you want to enter does not display as an option when
you are using T9 Text Input, you can add it to the database.
To add a word to the T9 Text Input database:
1. Select the Alphabet input mode. (See “Selecting a Character
Input Mode” on page 79.)
2. Enter the word using multi-tap text entry. (See “Entering
Characters by Tapping the Keypad” on page 81.) Then press
right softkey, highlight T9 Word and press
. The word will
appear as an option the next time you scroll through options
during T9 Text Input.
For more information about T9 Text Input, visit the Tegic Web
site
Section 2: Understanding Your PCS Phone
80
2G: Using the Internal Phone Book