Mounting to shop floor notice – Grizzly G0694 User Manual
Page 17
Model G0694 (Mfg. Since 10/09)
-15-
Mounting to Shop
floor
NOTICE
To ensure long life from you lathe and good
turning results, make sure the bedways
are level side-to-side and front-to-back.
Re-check the bedways two weeks after the
initial placement of the machine, then annu-
ally thereafter.
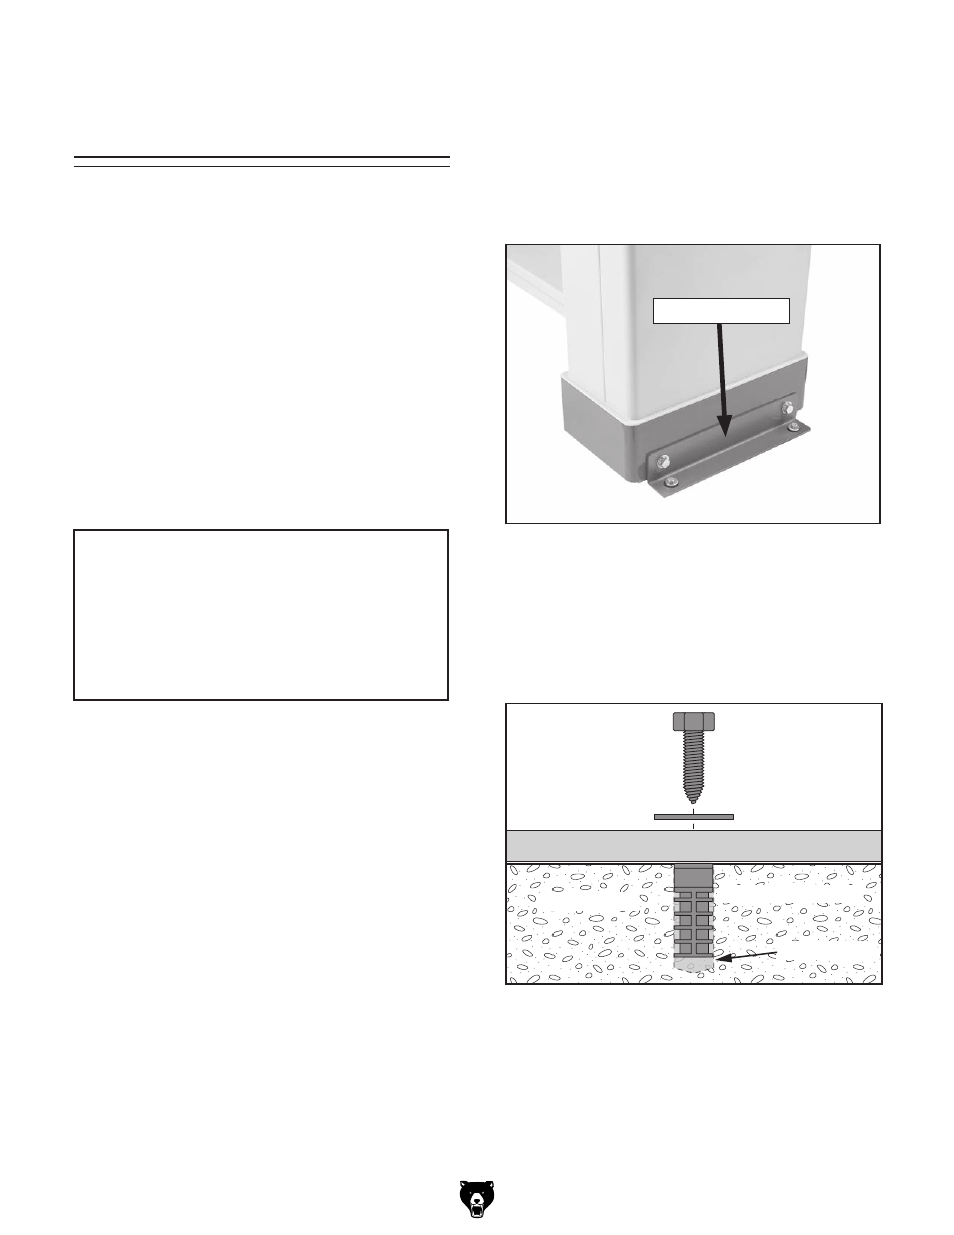
figure 7. right side mounting flange.
Mounting Flange
Use a precision level to make sure the bedways
are level side-to-side and front-to-back. if neces-
sary, place metal shims under the cabinets and
mounting flanges.
the mounting flanges on either side of the lathe
will accept
3
⁄
8
" mounting hardware (see
figure 7).
securing the machine to the floor prevents it from
tipping or shifting and reduces operational vibra-
tion. on the other hand, securing the machine to
the floor reduces future mobility.
if your machine will be installed in an industrial or
workplace setting, or if it is permanently connect-
ed (hardwired) to the power supply, local codes
may require that it be fastened to the floor.
if not required by any local codes, securing the
machine to the floor is an optional step. if you
choose not to secure the machine to the floor,
we recommend placing it on machine mounts,
because they give you an easy way to level the
machine and feature vibration-absorbing pads.
figure 8. typical fasteners for mounting to
concrete floors.
Machine Base
Concrete
Lag Screw
Lag Shield Anchor
Flat Washer
Drilled Hole
Bolting to concrete floors
Lag shield anchors with lag screws (see below)
are a popular way to anchor machinery to a con-
crete floor. however, always be sure the approved
methodology when local codes apply.