Pressure roller adjustment – Grizzly G0716 User Manual
Page 38
-36-
Model G0716 (Mfg. Since 2/11)
pressure Roller
Adjustment
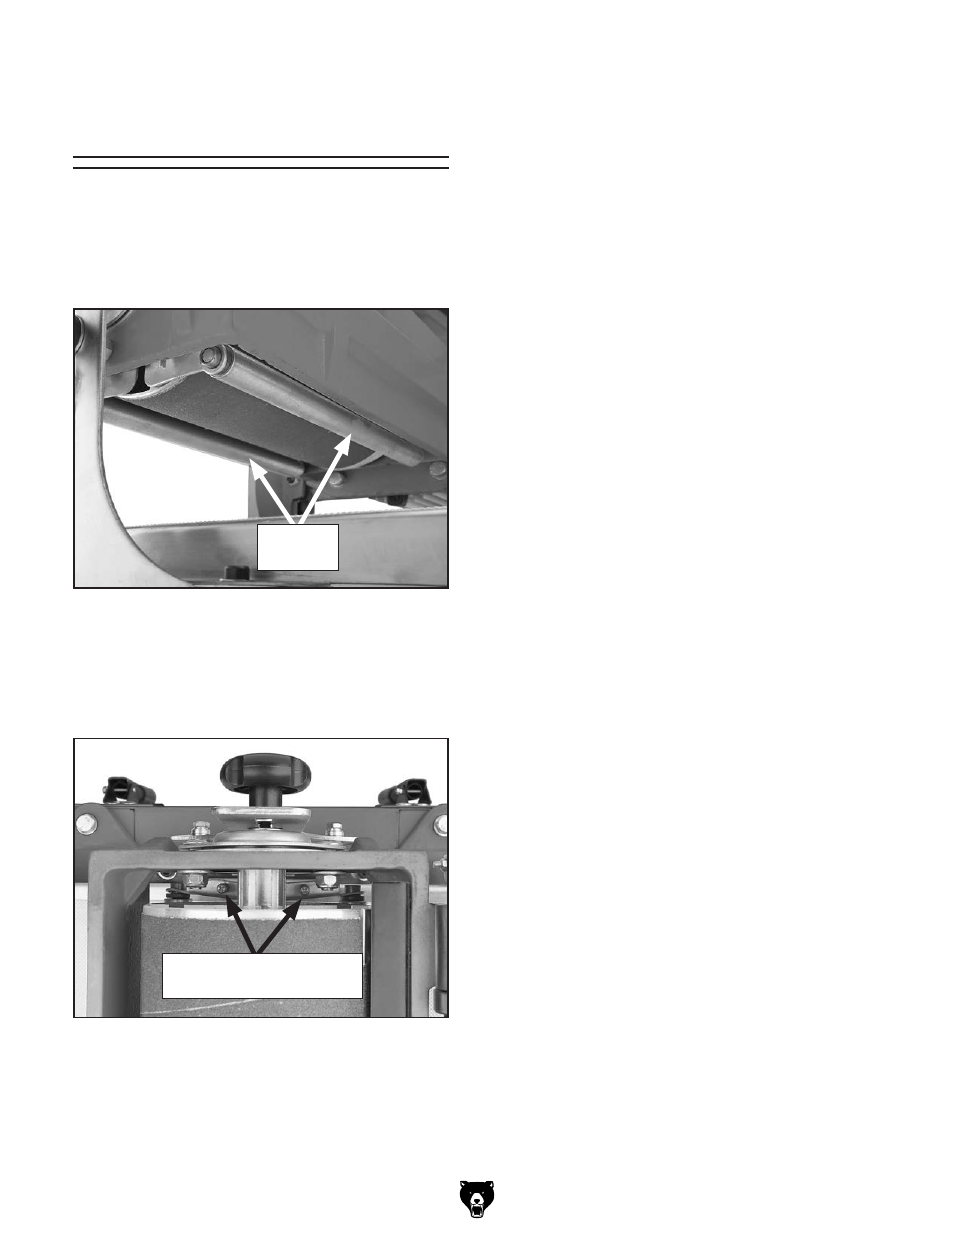
the height of the pressure rollers (see
figure 36)
is set slightly below the bottom of the sanding
drum to keep the workpiece firmly against the
conveyor belt as it passes through the sander,
preventing workpiece kickback.
figure 36. location of the pressure rollers.
pressure
rollers
proper pressure on the workpiece helps avoid
kickback and keeps the workpiece from slipping.
however, as pressure increases on the workpiece
from the rear pressure roller, snipe also increases.
in this case, decrease the pressure on the rear
roller.
if you choose to increase or decrease the pres-
sure that these rollers exert on the workpiece,
perform the following procedure.
tool Needed
Qty
hex Wrench 5mm .............................................. 1
phillips screwdriver #2 ...................................... 1
to adjust the pressure rollers:
1. disCoNNECt saNdEr FroM poWEr!
2. remove the cap screw that secures the dust
collection hood, then lift the hood up to gain
access to the pressure roller adjustment
screws.
3. to increase the pressure exerted by the roll-
ers, tighten all four screws in small, equal
amounts, then test the pressure of the rollers
by pressing up on them.
Conversely, loosen the adjustment screws to
lessen the pressure.
4. test your adjustments by sanding a scrap
workpiece.
— if the workpiece tends to kickback, reduce
the pressure by rotating the screws coun-
terclockwise one turn, then perform the test
again.
— if the workpiece slips on the conveyor
belt, increase the pressure by rotating the
screws clockwise one turn, then perform
the test again.
the pressure these rollers exert on the workpiece
as it passes underneath the sanding head is con-
trolled by compression springs and adjustment
screws (see
figure 37).
figure 37. location of the pressure roller
adjustment screws.
pressure adjustment
screws (one side shown)