Installing/removing tailstock center – Grizzly Variable Speed Wood G0632 User Manual
Page 28
-26-
Model G0632 (Mfg. 4/12+)
Installing/Removing
Tailstock Center
The included live center installs into the tailstock
quill with an MT#2 tapered fit.
To install the center into the tailstock quill:
1. Loosen the quill lock handle and rotate the
tailstock handwheel until the quill extends out
about 1" (see
Figure 27).
2. Make sure the mating surfaces of the center
and quill are free of debris and oily substanc-
es before inserting the center.
3. Insert the tapered end of the center into the
tailstock quill as shown in
Figure 27.
4. Make sure the center is securely installed by
attempting to pull it out by hand—a properly
installed center will not pull out by hand.
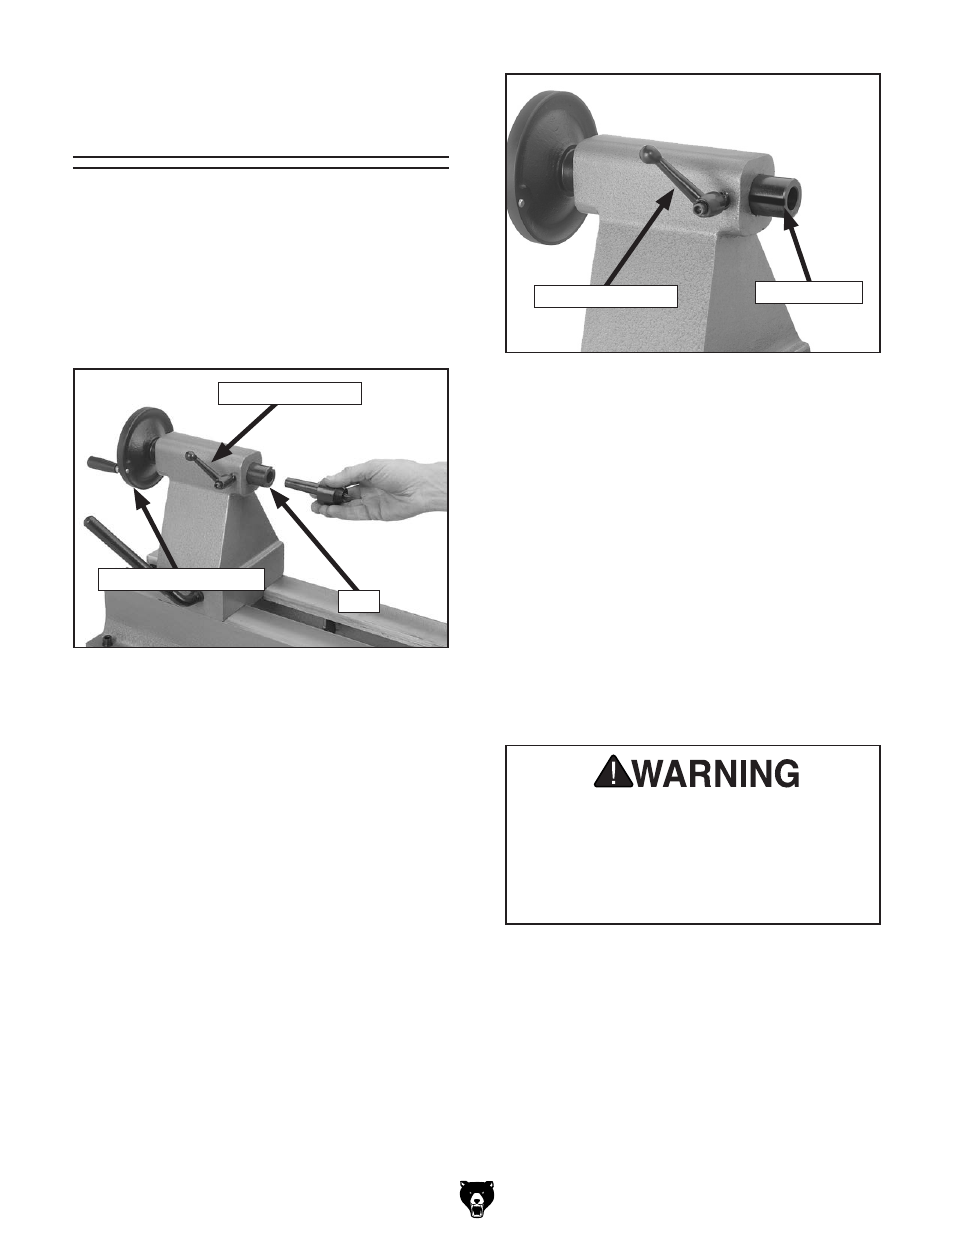
5. Make sure the center of the quill lock handle
is aligned with the quill keyway (see
Figure
28) to ensure that the tailstock center and
quill will not freely rotate under load.
Figure 28. Quill lock handle aligned with quill
keyway.
Quill Keyway
Quill Lock Handle
Tailstock Center
6. Secure the quill in place by re-tightening the
quill lock handle.
To remove the center from the tailstock quill:
1. Loosen the quill lock handle.
2. Hold a clean rag under the spindle or wear a
glove to catch the center when you remove
it.
3. Rotate the tailstock handwheel counterclock-
wise—the tailstock quill will retract back into
the quill causing the center to be forced out
of the quill.
The tailstock quill must always be locked in
place during lathe operation. Before tighten-
ing the quill lock handle, it must be properly
aligned with the quill keyway. Otherwise,
the workpiece can be thrown from the lathe
causing serious personal injury or death.
Figure 27. Installing center into tailstock quill.
Quill
Quill Lock Handle
Tailstock Handwheel