46 finalizing the installation, Lp (propane) ng (natural gas) rate screws, For qualified installers only) – FireplaceXtrordinair Revolution 36CF User Manual
Page 46
46
Finalizing the Installation
(for qualified installers only)
© Travis Industries
4090102
100-01212_000
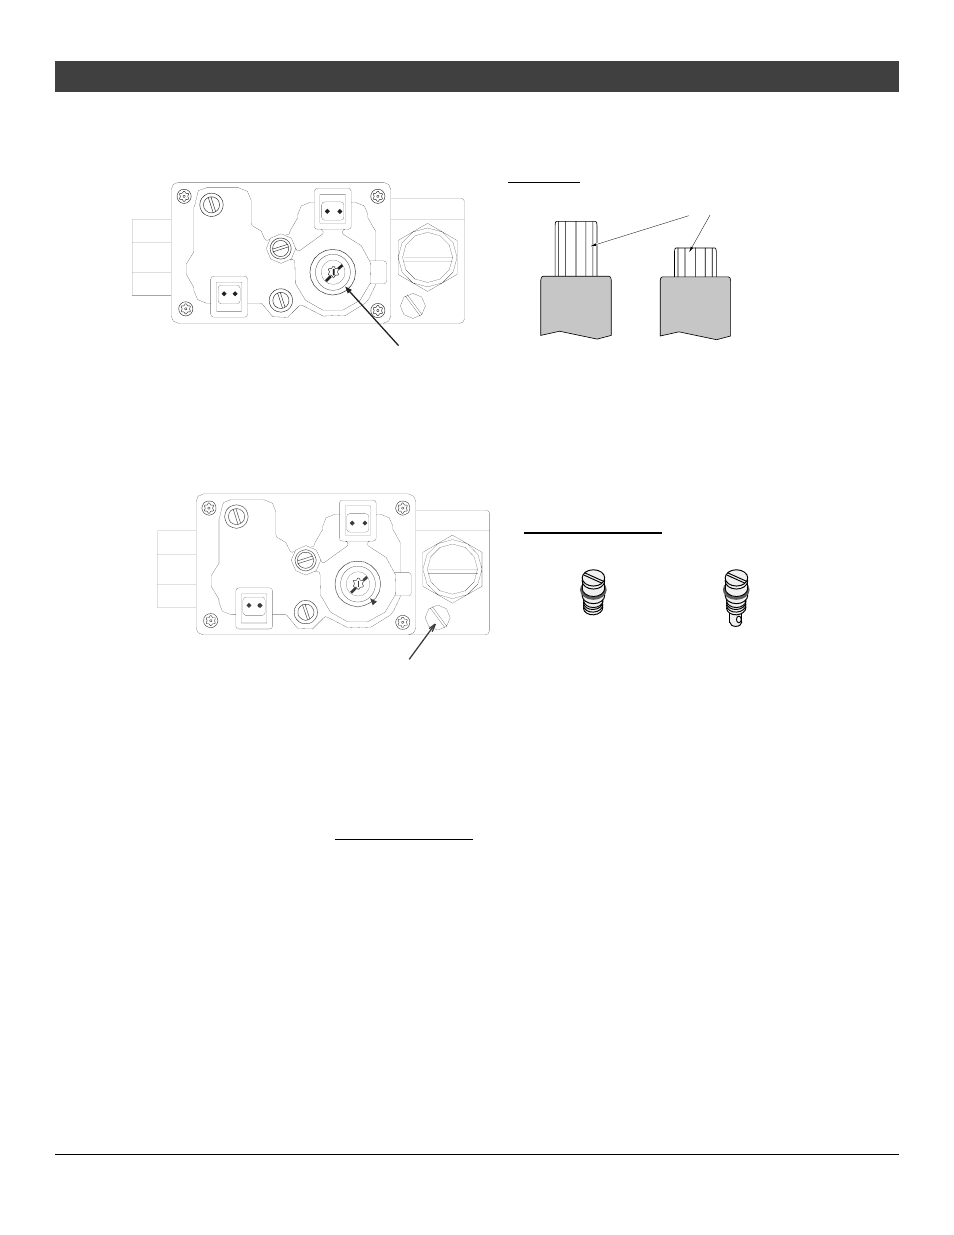
11 The gas control valve has a propane conversion shaft that alters the outlet pressure. Remove
the rubber cap over the propane conversion shaft and twist the small knob so the line points to
“LP” (see Figure 27).
Pilot Adj.
Inlet
Outlet
NATURAL TO PROPANE
CONVERSION SHAFT
(UNDER RUBBER CAP)
LP
NAT
NAT
LP
Main
Pilot
Side View
NG
(Natural Gas)
LP
(Propane)
Conversion Shaft
(Note how it is in a lower
position when switched to LP)
Figure 27
12 Remove the NG rate screw and replace it with the LP rate screw included in the owner’s pack
(see Figure 28). Take care to not damage the rubber o-ring on the rate screw when installing.
Pilot Adj.
Inlet
Outlet
RATE SCREW (BRASS)
LP
NAT
NA T
L
P
Main
Pilot
LP
(Propane)
NG
(Natural Gas)
Rate Screws
Figure 28
13 Return the fireplace to the correct configuration (replace firebox and valve cover components).
14 The fireplace receiver module will need to be configured for LP. This is done by pressing and
holding the “Learn” switch FOR 20 SECONDS (see “Battery Pack / Learn Switch Installation” on
page 15). The receiver will give off a short beep (less than 1 second) when configured for LP.
The receiver will give off a long beep (3 seconds) when configured for NG. By pressing the
switch for 20 seconds, you toggle between the two settings.
15 Make the gas line connection, bleed the gas line (if applicable), start the heater and thoroughly
leak-test all gas connections and the gas control valve (see Gas Line Requirements on page 18
for details). Check the pilot and adjust if necessary.