Finalizing the installation – FireplaceXtrordinair Revolution 36CF User Manual
Page 45
Finalizing the Installation
(for qualified installers only)
45
© Travis Industries
4090102
100-01212_000
7
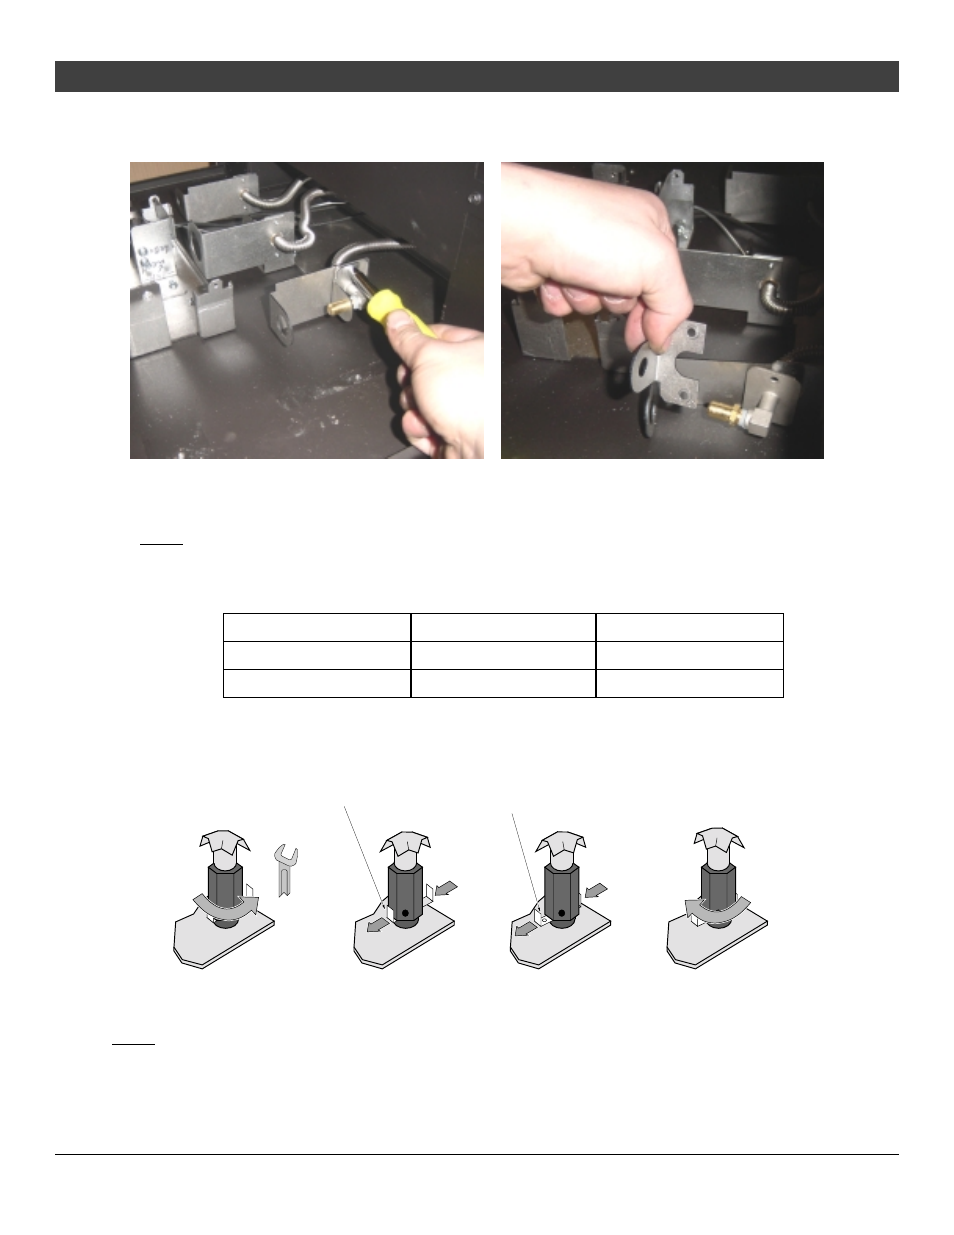
The manifolds that secure the three orifices are visible at this point. Detach the air shutter
stopper on the mixing tube brackets to gain full access to the orifices (2 screws hold them in
place).
8
Remove the NG orifices and replace with the LP orifices. See the table below for correct
orifice selection (each orifice is stamped for identification).
NOTE: The LP orifice kit only includes two #56 orifices (these install on the side burners). For
the center burner, remove one of the side burner orifices (# 52 - shipped on the fireplace for NG
configuration) and place it on the center manifold.
ORIFICE TABLE
Center Burner
Side Burner (2)
NG
#32
#52
LP
#52
#56
9
Switch the pilot hood to the “LP” size following the directions below.
7/16" Wrench
Un-screw the pilot
hood 1/4 turn.
Slide this silver tab out.
When in the LP position a hole
will appear near one of the tabs.
Tighten the pilot hood
until it is fully secure.
Figure 26
NOTE: The sliding portion of the pilot orifice may be positioned differently. Instead of pulling it
towards you, you may push it away. Either way – when the hole appears near the tab, the orifice is
in the LP position.
10 Remove the cover over the gas control valve.