FUJITSU IMAGE FI-5530C2 User Manual
Page 116
100
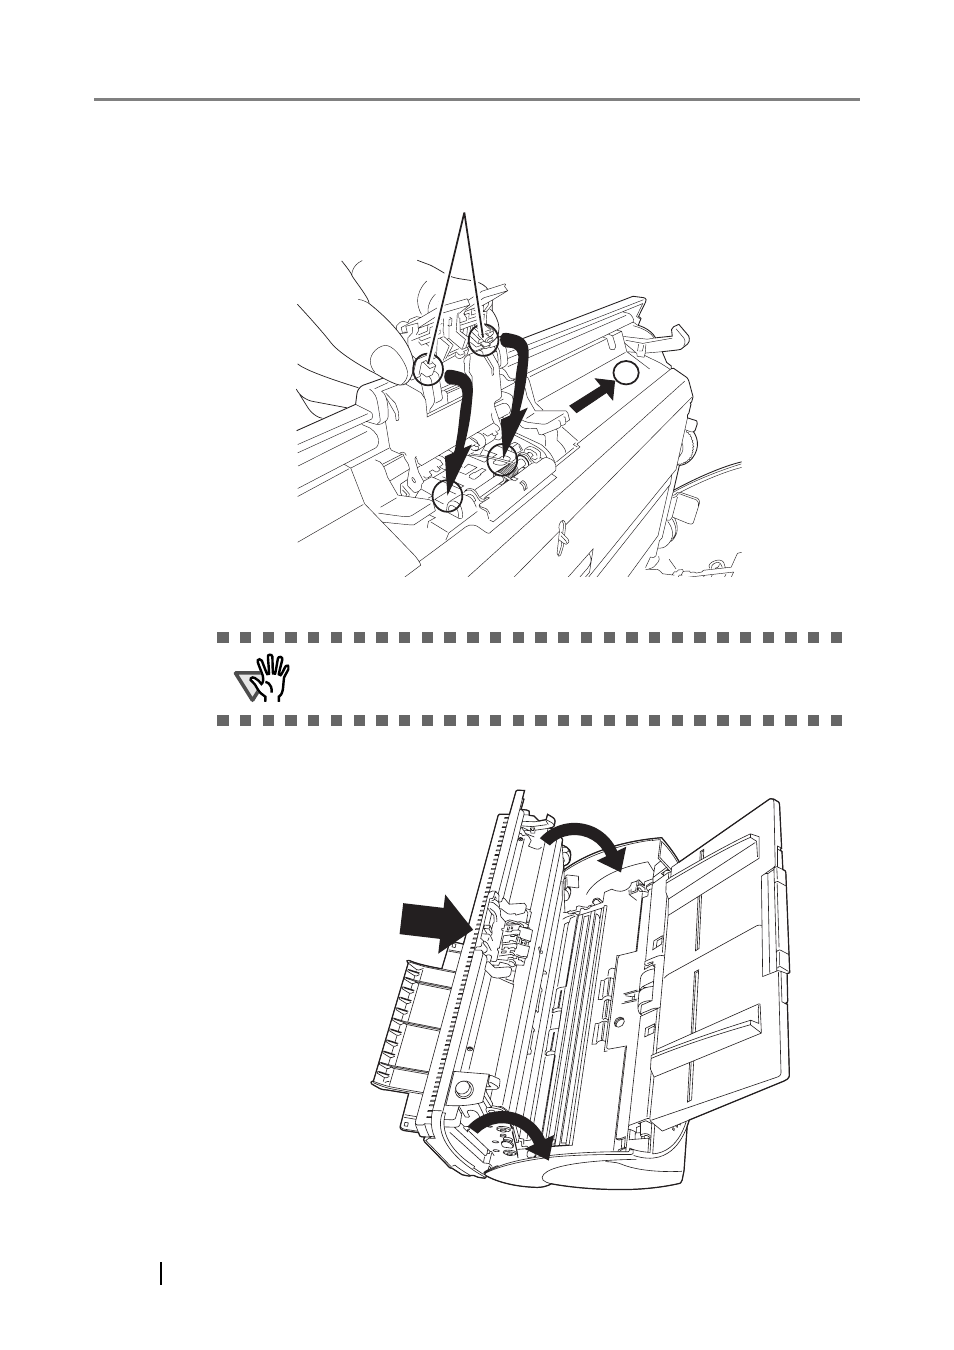
4. Attach a new Pad ASSY.
Insert the claws of the Pad ASSY into the holes on the ADF.
While pressing down the Pad ASSY, slide it to the direction "A" and install it.
5. Push the ADF at its center to close it, and lock the ADF.
ATTENTION
Make sure that the Pad ASSY is firmly attached. If the Pad ASSY is not
correctly attached, document jams or other feeding errors may occur.
A
Claws
Push the center of the ADF
See also other documents in the category FUJITSU Scanners:
- fi-5015C (26 pages)
- M3093GX\DG (7 pages)
- M3099EX (100 pages)
- S500M (24 pages)
- M3096GX (53 pages)
- M3093GX (50 pages)
- fi-4750L (95 pages)
- Image Scanner fi-5650C (161 pages)
- C150-E194-01EN (38 pages)
- fi-4120C2 (130 pages)
- fi-4010CU (2 pages)
- SCANSNAP P2WW-2301-01ENZ0 (90 pages)
- fi-5110C (137 pages)
- fi-4530C (132 pages)
- fi-4110CU (40 pages)
- FI-6140 (20 pages)
- fi-5120C (28 pages)
- M3091DC (51 pages)
- fi-5110EOX (135 pages)
- SCANPARTNER 620C (26 pages)
- fi-4750C (94 pages)
- fi-5220C (28 pages)
- fi-5530C (28 pages)
- SCANSNAP P2WW-2300-01ENZ0 (81 pages)
- SCANSNAP NETWORK SCANNER N1800 (23 pages)
- Network Scanner fi-6010N (21 pages)
- fi-4640S (61 pages)
- SCANSNAP S300M (38 pages)
- M3093DE (51 pages)
- fi-5750C (40 pages)
- Image Scanner fi-6230 (222 pages)
- fi-6230 (211 pages)
- C150-E187-01EN (94 pages)
- Mobile Color Scanner (65 pages)
- SCANPARTNER 600C (95 pages)
- C150-E140-03EN (63 pages)
- fi-4220C2 (141 pages)
- CardMinder P2WW-2640-01ENZ0 (40 pages)
- M3097DG (70 pages)
- SCANSNAP! FI-4110EOX2 (97 pages)
- fi-60F (55 pages)
- ScanSnap Upgrade P2WW-1860-01EN Scanner (55 pages)
- fi-4340C (114 pages)
- fi-4120C (180 pages)