Installing the ar1202 and ar1204 router, Table top installation, Nstalling – Foundry Networks AR1202 User Manual
Page 23: Ar1202, Ar1204 r, Outer, Able, Nstallation
Installation
June 2004
© 2004 Foundry Networks, Inc.
3 - 5
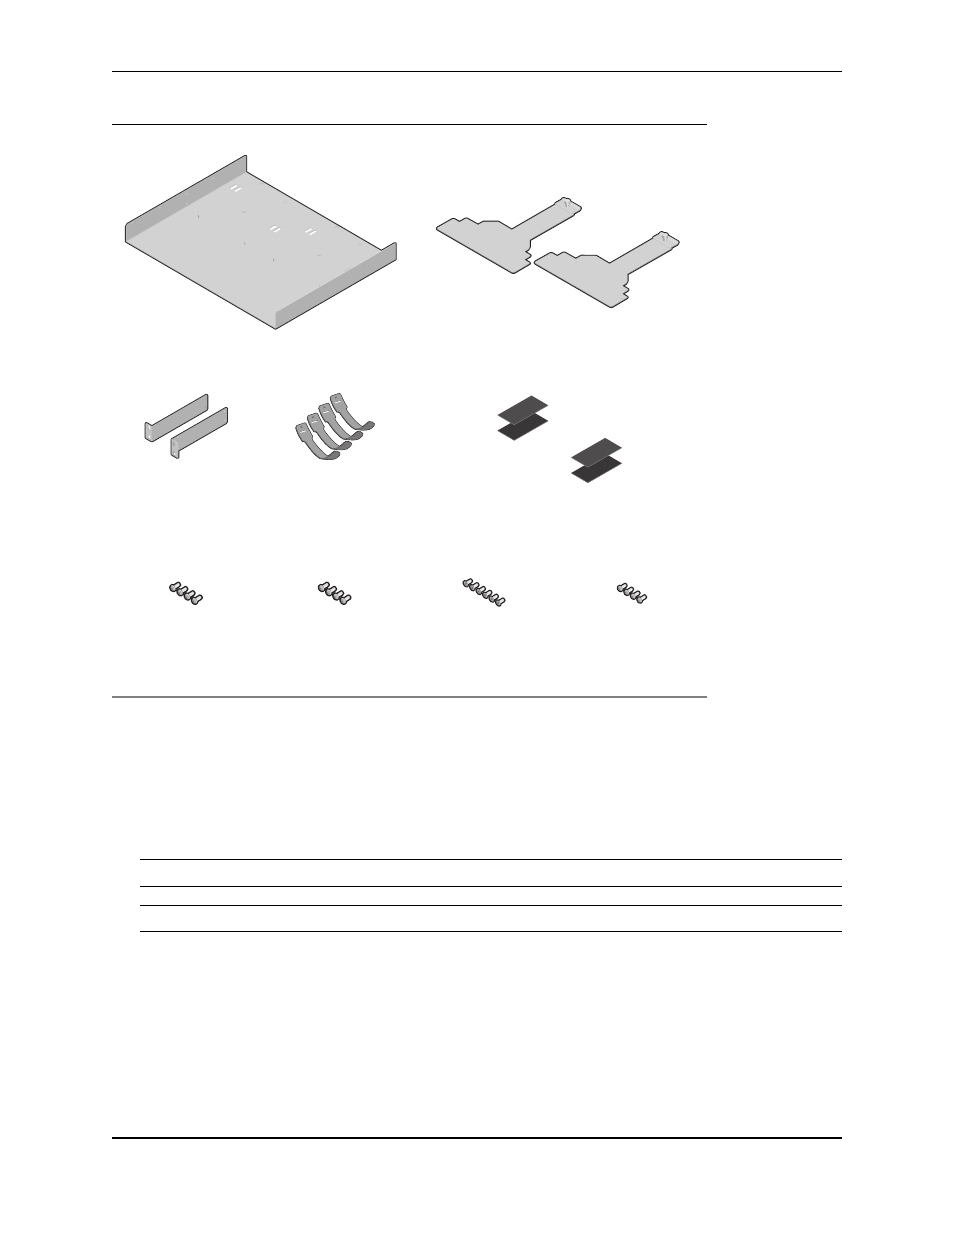
Figure 3.7
Rack-Mount Components
Installing the AR1202 and AR1204 Router
The AR1202 and AR1204 router can be installed on a table top, in a Telco equipment rack (using the optional
rack-mounting tray), or on a vertical surface (using the optional wall-mounting assembly). The router ships with a
Console cable. You will need to obtain additional cables for your specific application. Refer to Figure 3.2 on
page 3-2 and Figure 3.3 on page 3-2.
CAUTION:
Do not block the cooling vents on the top of the unit.
NOTE: For problem-free operation, the router should be located in an area with adequate ventilation.
Table Top Installation
To install the AR1202 and AR1204 for operation on a table top, follow this procedure. Refer to Figure 3.8 on
page 3-6.
Rack Tray
(2) Rack Carriage Assemblies
2) Mounting Brackets
(4) Velcro Tie Wraps
(2 sets) Velcro Mounting Pads
4) 10-24 x .5 Phillips
Pan Head Screws for
Equipment Rack
(4) 10-24 x .5 Phillips
Pan Head Screws for
Equipment Rack
(6) 6-32 x .25 Phillips
Flat Head Mounting
Bracket Screws
4) 4-40 x .25 Phillips
Pan Head Rack Carriage
Screws