Quintum Technologies Tenor AX User Manual
Page 39
3-4
P/N 480-0062-00-10
Chapter 3: Installation/Basic Troubleshooting
Attach the unit to the wall as follows:
1. Determine the wall area to mount the unit. With chalk or a soft pencil, mark the install area according to
NOTE:
Ensure the unit is level.
Figure 2-1 Wall Mounting Dimensions
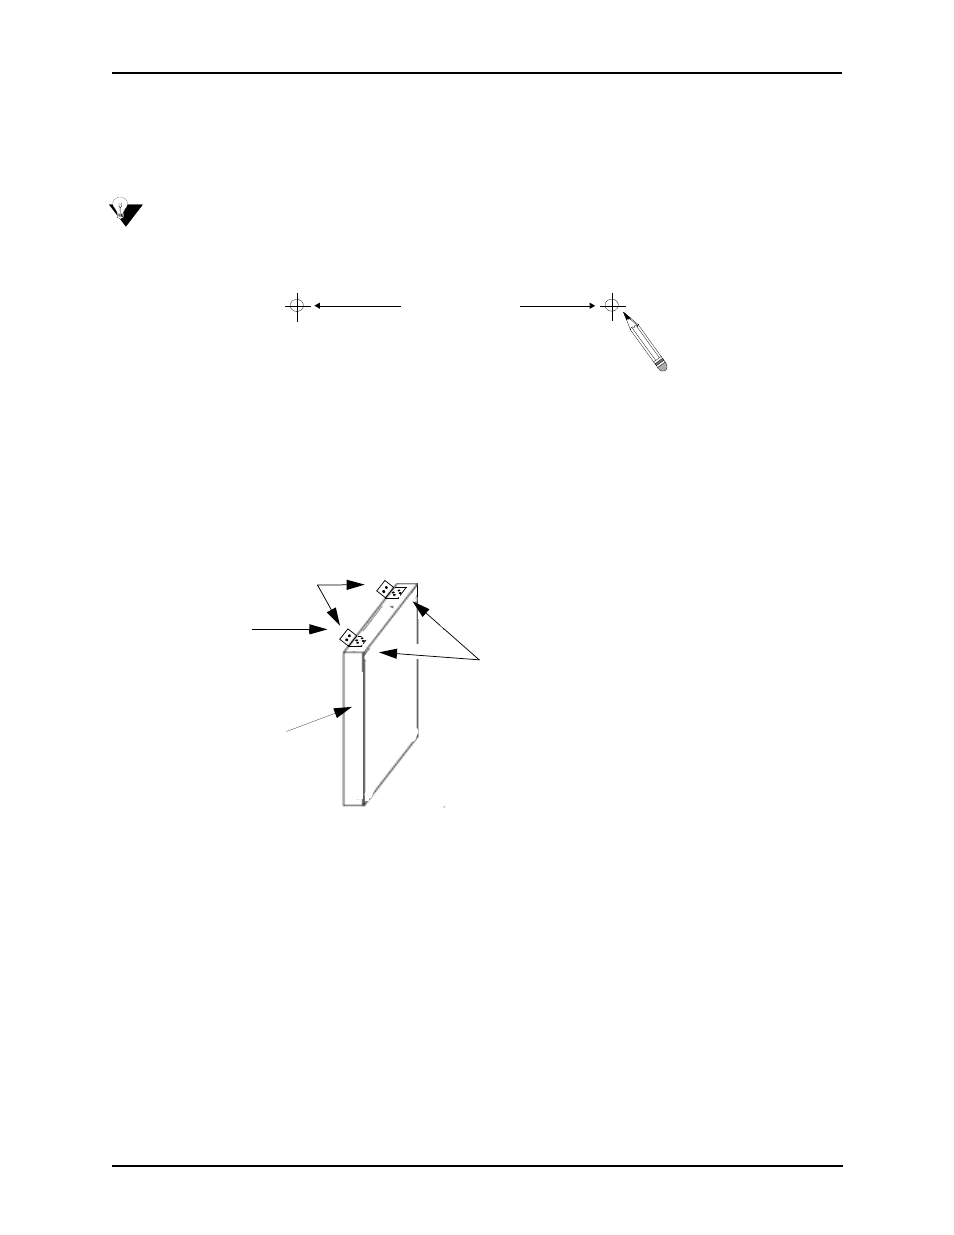
2. Position and attach one mounting bracket to the unit using a screw existing in the system and one screw
included with the package. See Figure 2-2.
3. Position and attach the other mounting bracket using a screw existing in the system and the remaining
screw in the package. See Figure 2-2.
Figure 2-2 Wall Mount Installation
4. Mount the unit to the wall using the four remaining screws included with the system.
5. Ensure the unit is firmly mounted against the wall.
7 3/4” (19.9cm)
3/16”
Mounting
Brackets
Note: Ensure unit is level.
Attach each bracket to the
unit using 1 screw already installed
and 1 screw included
in the unit (unscrew and re-insert)
with the package.
Unit Front
The fan needs to be pointed up (when viewed from
Note:
Fan
the front of the unit, the fan is on the left)