Installing, Support, Rails – IBM Partner Pavilion DS4100 User Manual
Page 56: Figure
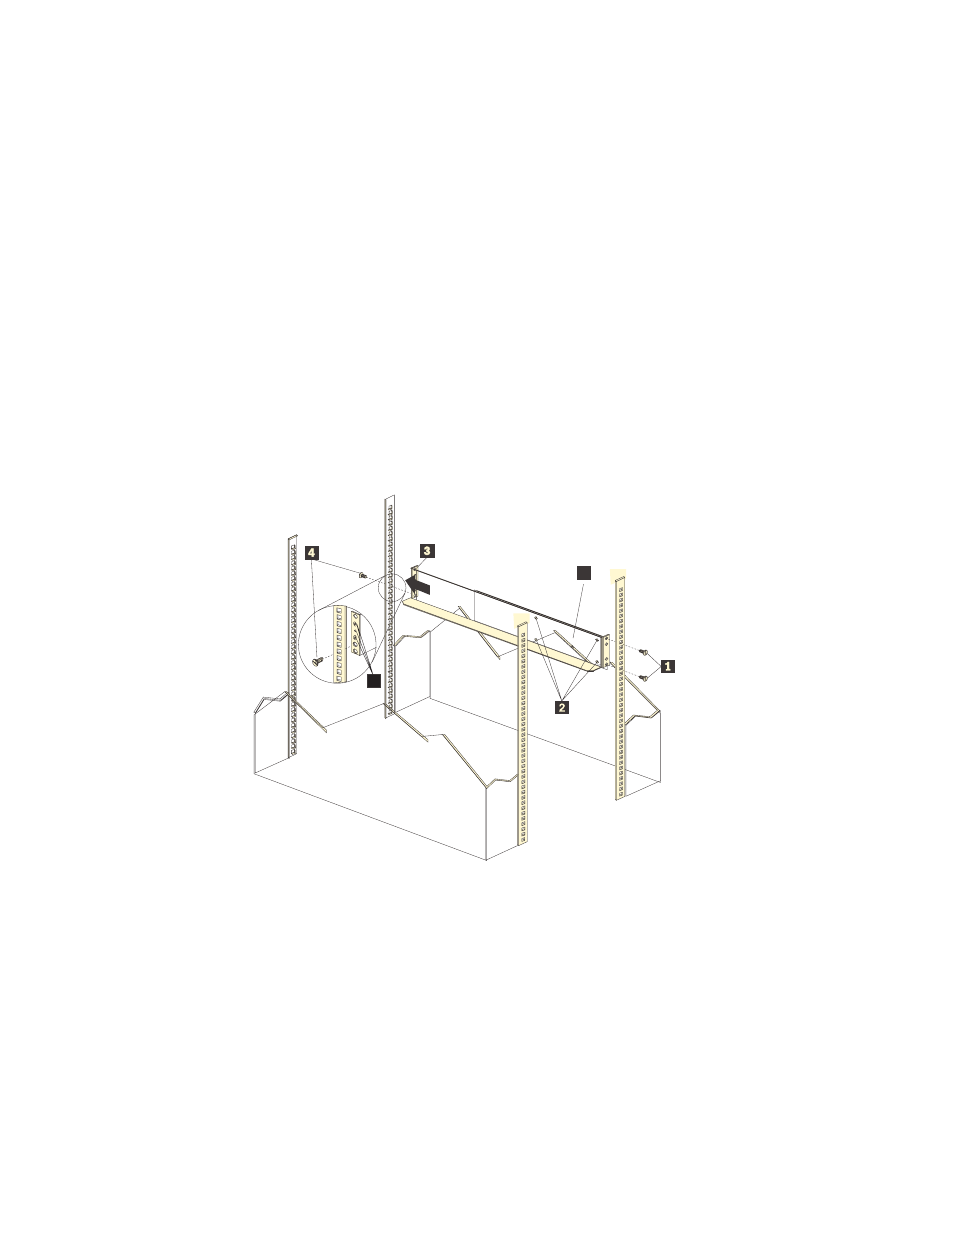
5.
Starting
with
the
left
rail,
remove
and
save
the
6/32
in.
screw
(
5 ).
Loosen
the
four
rail
adjustment
screws
(
2 ).
Note:
The
support
rails
are
not
marked
as
Left
or
Right.
However,
each
rail
can
be
correctly
mounted
on
only
one
side
of
the
rack
cabinet.
The
rails
should
be
mounted
with
the
alignment
pins
at
the
front
of
the
rack
cabinet.
shows
the
installation
of
the
left
support
rail.
6.
Hold
the
front
of
the
rail
against
the
inside
of
the
right
rack-mounting
flange
and
loosely
tighten
the
lower
M6
screw
(
4 ).
See
for
the
location
for
this
screw.
7.
Extend
the
rear
of
the
support
rail
until
it
makes
contact
with
the
rear
rack
rail.
8.
From
the
rear
of
the
rack,
thread
and
tighten
two
M6
screws
(
1 )
(see
for
the
location
for
these
screws).
From
the
front
of
the
rack
cabinet,
finish
tightening
the
front
M6
screw
(
4 ).
When
you
are
the
finished,
the
rail
should
be
attached
to
the
cabinet
using
one
M6
screw
in
the
front
(inserted
at
the
second-to-lowest
hole)
and
two
M6
screws
at
the
back.
9.
Repeat
step
5
through
step
8
for
the
right
rail.
10.
Tighten
the
rail
adjustment
screws
2
on
both
rails.
11.
Continue
with
Rear of Rack
5
5
6
f10ug050
Figure
12.
Installing
the
support
rails
24
IBM
TotalStorage
DS4100
Storage
Server:
Installation,
User’s,
and
Maintenance
Guide