Applications of buss record, Record by mixing the input sound and play sound, Connecting the sound source – Fostex VF-16 User Manual
Page 70: Preparations to record, How to adjust the rec buss master level, Auto punch, Optical, Press the [input sel] key (orange: flashing), Press the [buss-rec trk] key (red: flashing), Press the [ch status/ch sel] key of ch7 and ch8
70
Sound sources
ACCESS
PHANTOM
CH STATUS/CH SEL
1
2
3
4
5
6
7
8
TRACK
9
10
11
12
13
14
15
16
TRACK
A
B
C
D
E
F
G
H
INPUT
ORANGE
CH STATUS
INPUT
RED
REC
GREEN
PLAY
MUTE
EQ/COMP
RECALL
STORE
EFF1/EFF2
HI-G/F/Q
AUX1/AUX2
MID-G/F/Q
PAN
LO-G
FADER
CH VIEW
PRE/POST
PRE/POST
COMP
MUTE
MUTE
EFF1
EFF2
DIRECT RCL
MAP
SCENE
CH PARAM EDIT
EFF EDIT
OFF
CH STATUS/CH SEL
+6
-10
-20
-40
-
∞
-30
0
+6
-10
-20
-40
-
∞
-30
0
+6
-10
-20
-40
-
∞
-30
0
+6
-10
-20
-40
-
∞
-30
0
+6
-10
-20
-40
-
∞
-30
0
+6
-10
-20
-40
-
∞
-30
0
+6
-10
-20
-40
-
∞
-30
0
+6
-10
-20
-40
-
∞
-30
0
+6
-10
-20
-40
-
∞
-30
0
MASTER
+6
-10
-20
-40
-
∞
-30
0
+6
-10
-20
-40
-
∞
-30
0
+6
-10
-20
-40
-
∞
-30
0
+6
-10
-20
-40
-
∞
-30
0
+6
-10
-20
-40
-
∞
-30
0
+6
-10
-20
-40
-
∞
-30
0
+6
-10
-20
-40
-
∞
-30
0
+6
-10
-20
-40
-
∞
-30
0
DISP SEL
REC TRK
END
MARK
DIRECT
BUSS
AUTO RTN
AUTO PUNCH
REC ASSIGN
REC TRK
SOURCE
CH STATUS
AUTO PUNCH
START
SCENE SEQ.
RECORD
P.EDIT
VARI
PITCH
ALIGN SEL
SETUP
SCRUB
A RTN
A PLAY
PGM SEL
OUT
OUT
LOCATE
LOC MEM
IN
IN
4
1
6
7
3
5
2
UNDO/
REDO
HOLD/
EDIT
STORE
PLAY
STOP
F FWD
REWIND
NEXT
PREV
CLIPBOARD PLAY
L O C AT E A B S 0
LOCATE REC END
FADER
ADJUST
SHIFT
LEVEL
ADJUST
EXIT/NO
ENTER/YES
EJECT
JOG
SHUTTLE
2/10/B
6/14/F
7/15/G
8/16/H
L
R
5/13/E
4/12/D
3/11/C
1/9/A
MON OUT
PHONES
UNBAL
INSERT
BAL
UNBAL
0
10
PHONES
0
10
MON OUT
LINE
MIC
PEAK
LINE
MIC
PEAK
LINE
MIC
PEAK
LINE
MIC
PEAK
LINE
MIC
PEAK
LINE
MIC
PEAK
8/16/H
LINE
MIC
PEAK
TRIM
INPUT
7/15/G
LINE
MIC
PEAK
6/14/F
5/13/E
1/9/A
4/12/D
3/11/C
2/10/B
INSERT
BAL
CLEAR
OPTICAL
DIGITAL
MULTITRACKER
TIME BASE
CLIPBOARD
INPUT A ~ D
Track 1
Track 2
Track 3
Track 4
Track 7
Track 8
Applications of BUSS RECORD
BUSS RECORD makes it possible to record all the source channel signals sent to REC BUSS L/R on either 2 tracks
or 1 track. The source channel is selectable with the “INPUT” channel and “TRACK” channel, therefore, it is pos-
sible to record the input signals along with signals that are already recorded.
Record by mixing the input sound and play sound
Here, we will mix the play sounds of tracks 1-4 with the signals input through [INPUT] A-D to record on tracks
7 and 8.
Connecting the sound source
1. Connect the sound sources to record to [INPUT] A to D.
Preparations to record
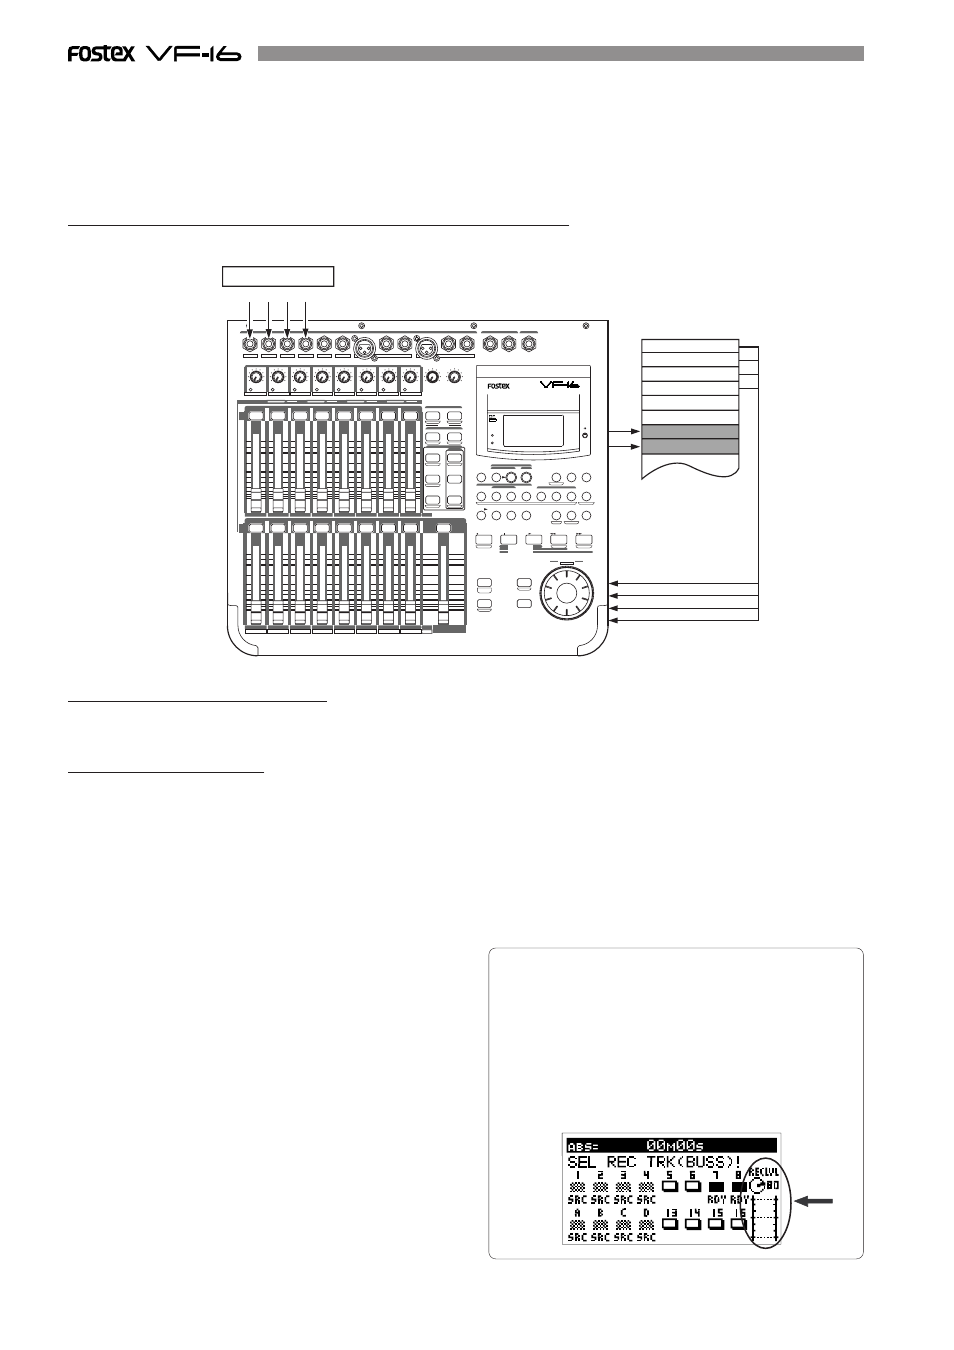
1. Press the [INPUT SEL] key (ORANGE: Flashing).
The display to select “INPUT” - “TRACK” appears.
2. Press the [CH STATUS/CH SEL] key of ch9-ch12 so it
flashes ORANGE (ch9-ch12 -> “INPUT”).
3. Press the [BUSS-SOURCE] key (GREEN: Flashing).
The display to select the source channel appears.
4. Press the [CH STATUS/CH SEL] key of ch1-ch4 and the
[CH STATUS/CH SEL] key of ch9-ch12.
Ch1-4 and ch9-12 are set to the source channel.
5. Press the [BUSS-REC TRK] key (RED: Flashing).
The display to select the REC track appears.
6. Press the [CH STATUS/CH SEL] key of ch7 and ch8.
Ch7 and ch8 are set as the REC track. The signals from
ch1-4 and ch9-12 can not be recorded to tracks 7 and 8.
7. Press the [EXIT/NO] key to return to the Normal Display.
8. Set the ch1-4, ch 7&8, and ch9-12 fader and master fader
to "0".
9. Press the [RECORD] key to go to the input monitor (RED:
Flashing).
10. Set the ch7/8 fader and PAN that is used to monitor the
REC track.
Set the ch7 PAN to the LEFT (L) and ch8 PAN to the RIGHT
(R). The position of the recorded signal can be checked.
11. Adjust the faders, PAN, equalizer and effect of each
source channel (ch1-4 and ch9-12).
The sound is recorded on track 7 by setting the source
channel PAN to the LEFT. The sound is recorded on track
8 by setting the source channel PAN to the RIGHT.
The sound is recorded on both tracks by setting the source
channel PAN to the CENTER.
When the preparations to record have been completed,
start recording according to the basic "BUSS RECORD"
instructions described earlier.
How to adjust the REC BUSS Master Level
To adjust the REC BUSS Master Level, press the [BUSS-REC
TRK] key then use the [JOG] dial while the following dis-
play is shown. The default setting of the REC BUSS Mas-
ter Level is set to "80". However, this can be modified to
a voluntary REC BUSS Master Level with the [JOG] dial.
After adjusting the level, press the [EXIT/NO] key.
The Normal Display appears. The master level during re-
cording appears on the level meter shown on the display
below.