Fitting the fixed head - built-in, Fitting the fixed head – HP COMBI 2180206H User Manual
Page 25
Combi HP thermostatic mixer shower
FITTInG THE FIxEd HEAd - BuIlT-In
FITTING THE FIXED HEAD
(Built in option only)
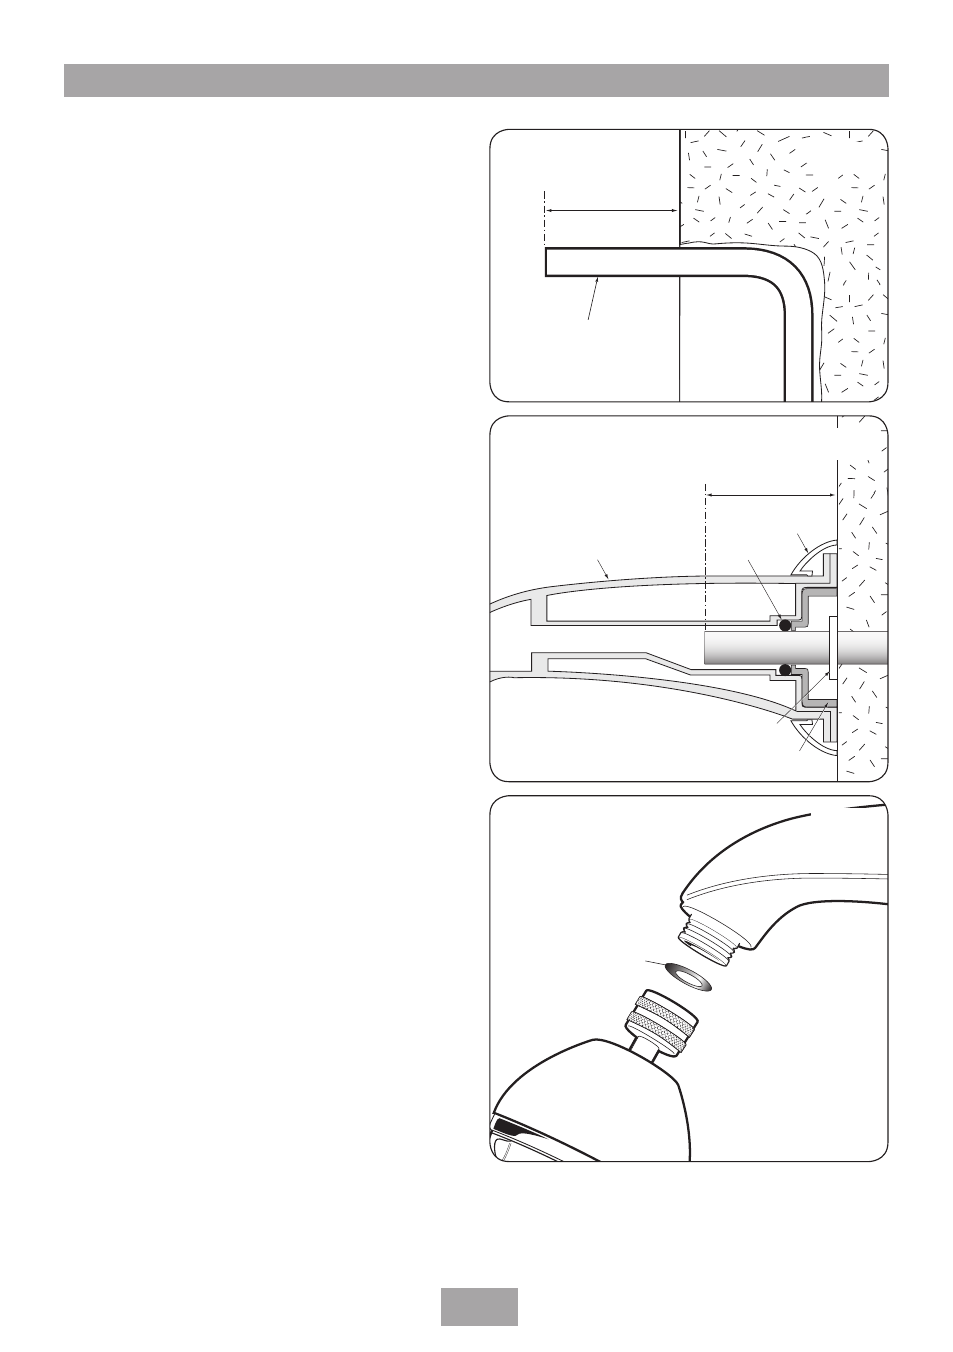
The outlet pipe should protrude from the
surface of the wall between 50 mm and 65 mm
(fig.).
Mark four fixing hole positions by using the fixed
arm as a template. drill and plug the wall using
the plugs supplied. care must be taken not to
drill into the buried pipework.
Remove burrs on the pipework to prevent
damage to the ‘O’ ring.
Slide the special lock washer over the pipe and
push it tight to the wall.
Note: Make sure the lock washer is placed on
the pipe correctly with the inscription ‘FROnT’
facing away from the wall. This washer holds the
pipe in position.
Slide the bushing over the pipe and push it tight
against the wall.
Slide the ‘O’ ring onto the pipe up against the
bushing.
Push the fixed arm assembly onto the pipe tight
to the wall. An automatic watertight seal is thus
created.
Secure to the wall with the four fixing screws
supplied. Push-fit the trim into place (fig.).
Finally, screw on the adjustable showerhead
making sure the sealing washer is in place
(fig.7). Screw on tight to make sure of a
watertight connection.
Turn on the water supplies.
T00284
50 mm – 65 mm
Outlet pipe
Fig.
T00285
50 mm – 65 mm
Trim
Fixed arm
'O' ring
Bushing
Special lock washer
Fig.
T00286
Washer
Fig.7