Flushing procedure – HP COMBI 2180206H User Manual
Page 22
0
Combi HP thermostatic mixer shower
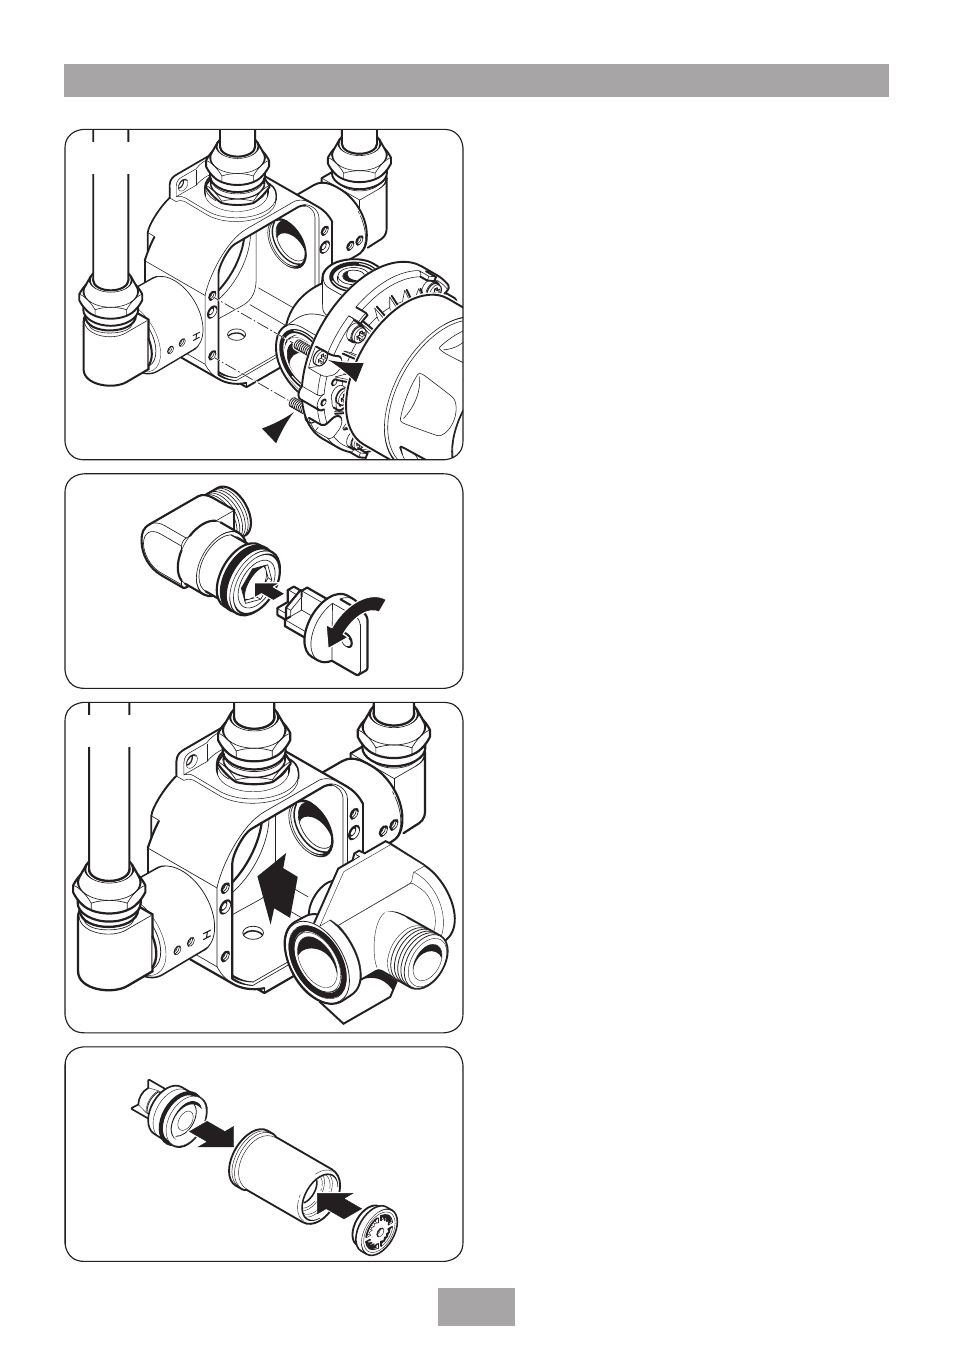
Removal and/or fitting of check valves
for maintenance
ImportaNt: It is preferable to flush the
pipework before installing the valve. Where
this is not possible, the procedure using a
flushing cartridge should be followed.
a. Isolate the supplies.
b. Remove the trim ring by twisting anti-
clockwise.
c. Remove the valve cover.
d. Remove the four screws holding the valve
cartridge, and carefully remove the cartridge
assembly from housing (fig.0).
e. Insert the plastic tool provided into the inner
sleeve located inside the elbow and twist
anti-clockwise (fig.). Take care not to
damage the check valve.
Note: The sleeve may stick, in which case
it must be carefully hooked out using a
suitable tool such as an allen key.
f. Push the flushing cartridge into the housing
(fig.). Attach a hose to the flushing
cartridge outlet and make sure it is directed
to waste. Flush the pipes clean.
g. wash out the sleeve and check valve. Take
care not to damage them.
h. Replace the check valve into the sleeve,
making sure it is in the correct way (fig.).
i. Refit sleeve into the elbow. carefully replace
the valve cartridge and refit the cover.
j. Reinstate supplies and test the valve
operation.
Note: It may be necessary to service the check
valves at regular intervals to prevent cross flow
of water.
Note: Flushing cartridges and replacement
check valve tools are available from Triton
customer Service.
Flush the pipework to clear system of debris
and check for leaks.
FluSHInG PROcEduRE
FLUSHING PROCEDURE
T00270
Fig.
T00269
Fig.0
T00272
Fig.
T00271
Fig.