HP VXI E1432A User Manual
Page 163
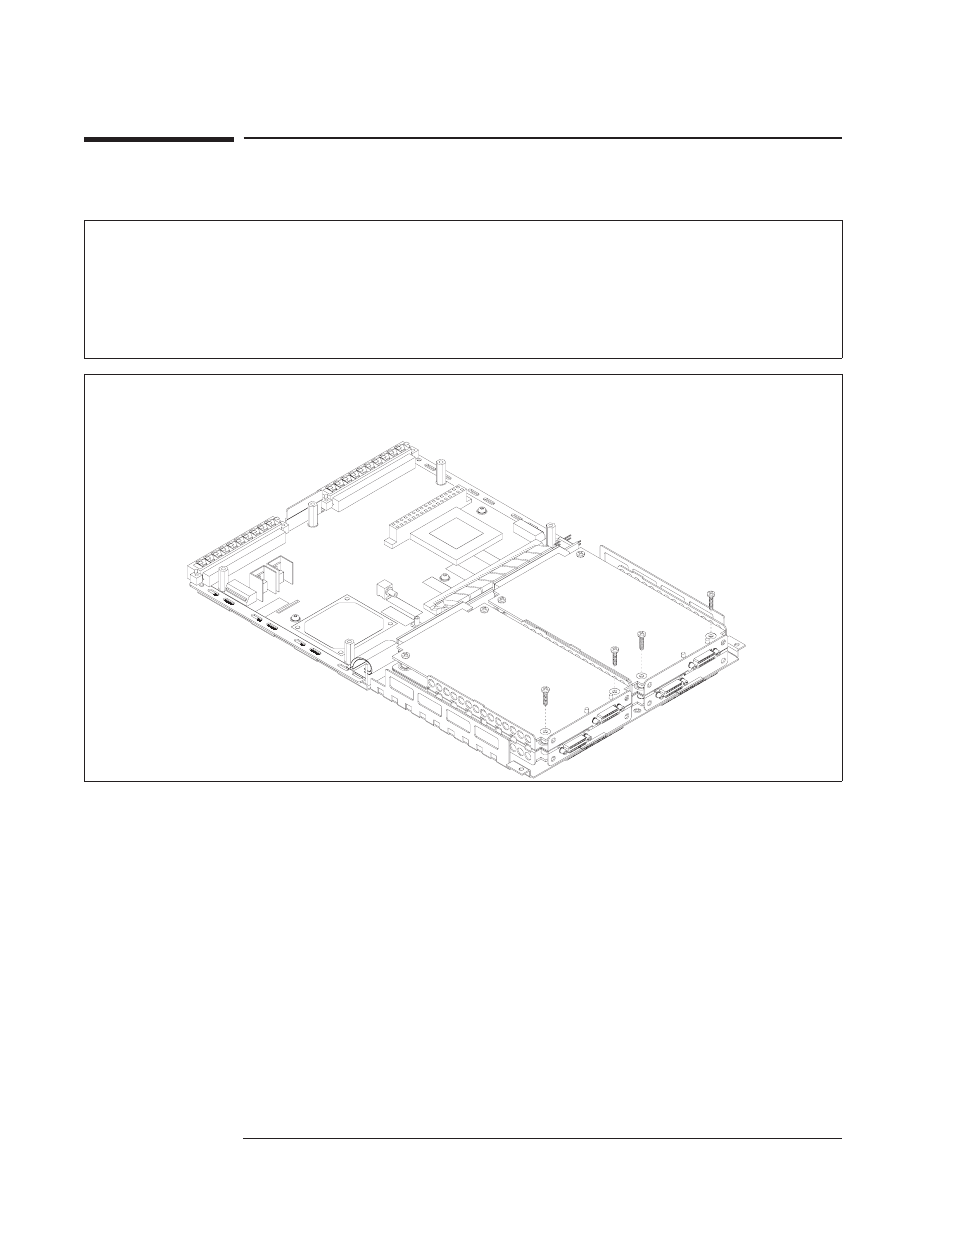
To remove the input assemblies
1
Remove top cover, see “To remove the top cover.” Remove the front panel, see steps 1 and 2
in “To remove the front panel.” Note that the following steps are showing illustrations of an
HP E1432A with a standard configuration (four input assemblies). If your HP E1432A has option
1DD (one input assembly) or option 1DE (two input assemblies), the following steps will be the
same except the length and quantity of screws.
2
Using a T-10 torx driver, remove the four screws that attach the assemblies to the bottom cover.
HP E1432A User's Guide
Replacing Assemblies
10-18
Artisan Technology Group - Quality Instrumentation ... Guaranteed | (888) 88-SOURCE | www.artisantg.com
See also other documents in the category HP Notebooks:
- EliteBook 8440p (169 pages)
- XZ100 (104 pages)
- ZT1100 (58 pages)
- 110 (104 pages)
- ze2000 (213 pages)
- OmniBook 2000 Notebook PC (70 pages)
- XE3 (116 pages)
- 1103 (101 pages)
- ze4200 (126 pages)
- TC1 100 (17 pages)
- 15 (101 pages)
- XB4000 (43 pages)
- ze2300 (239 pages)
- Laptop Docking Station (70 pages)
- V6115TU (22 pages)
- 210 (67 pages)
- zt3000 (186 pages)
- XB3000 (79 pages)
- xe310 (12 pages)
- COMPAQ TC4400 (219 pages)
- 367055-002 (26 pages)
- Compaq Tablet PC TC1 100 (23 pages)
- 463777-001 (42 pages)
- zx5000 (272 pages)
- VC133 (38 pages)
- USB Media Docking Station VY847AA#ABA (1 page)
- ze4100 (5 pages)
- 2000 (118 pages)
- ZE4900 (182 pages)
- V4200 (273 pages)
- Compaq Tablet PC TC1100HP (22 pages)
- EliteBook 6930p Notebook PC (35 pages)
- Chromebook 11 G2 (23 pages)
- EliteBook Folio 9470M-Notebook-PC (33 pages)
- EliteBook 2570p Notebook PC (107 pages)
- EliteBook 2570p Notebook PC (106 pages)
- ProBook 6470b Notebook-PC (113 pages)
- ProBook 6470b Notebook-PC (126 pages)
- EliteBook 2540p Notebook PC (23 pages)
- EliteBook 2540p Notebook PC (175 pages)
- EliteBook 2540p Notebook PC (173 pages)
- EliteBook 2540p Notebook PC (177 pages)
- ProBook 6460B Notebook-PC (45 pages)
- mt41 Mobile Thin Client (90 pages)