Using the track log feature, Creating a track log – Holux GM-120 User Manual
Page 34
27
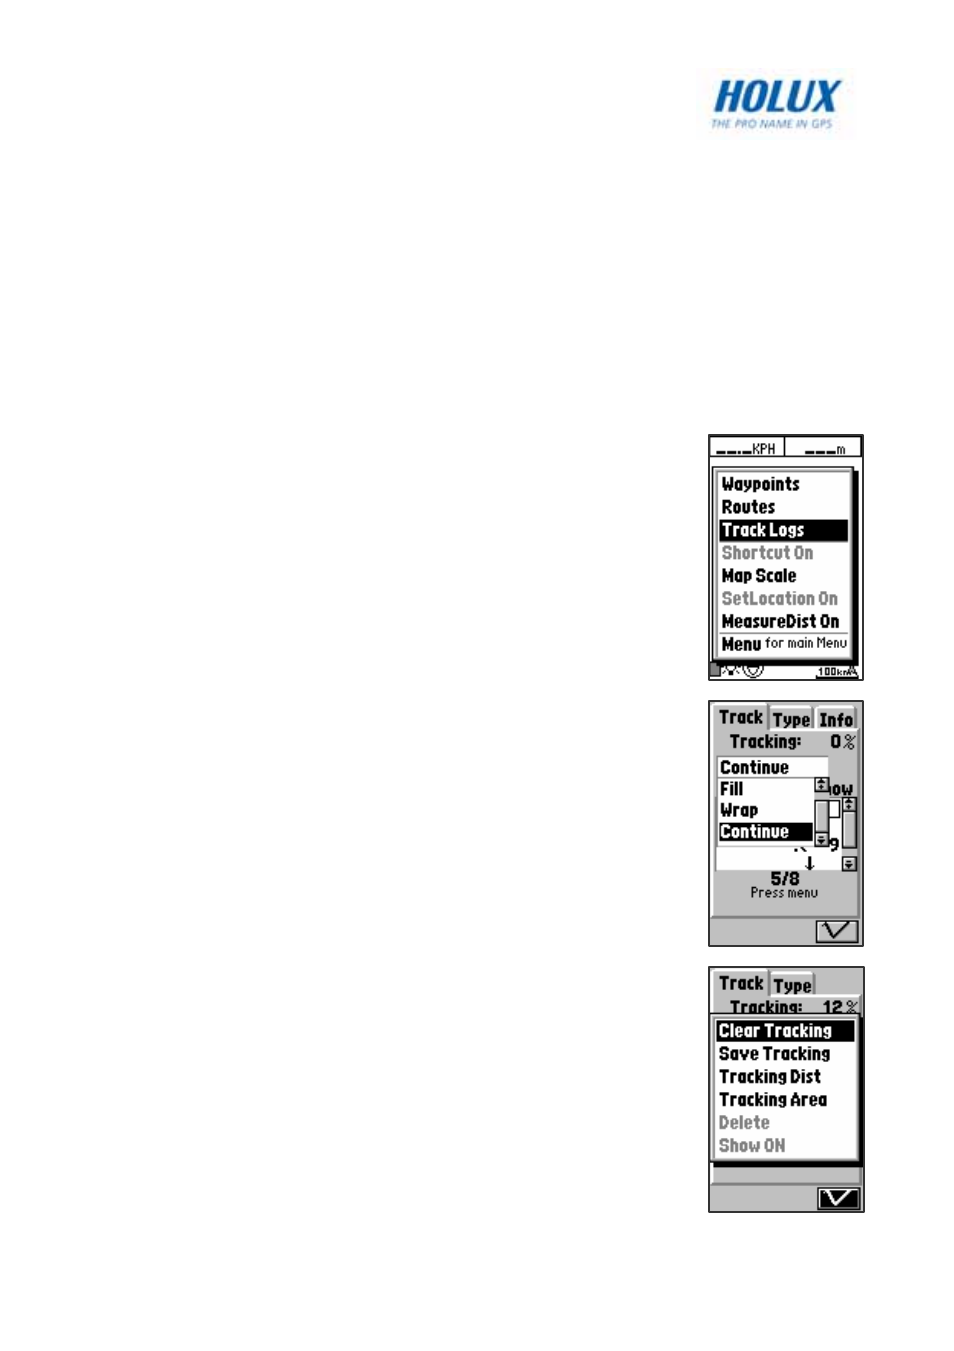
Using the Track Log Feature
In the track log menu, you can configure track log settings, change track
log type, and view the track log information.
Creating a Track Log
The GM-120 also features a track log function that records information
about your trip to help you track your journey in the future.
To create a track log:
1. In Professional mode, press the Menu button to
display the menu options.
2. Highlight
the
Track Logs option and press OK.
3. Under
the
Track tab use the navigation keys to
highlight the Tracking field and press OK to
display the drop down menus.
4. Select from the following options:
• Select
Off to disable tracking.
• Select
Fill to save track logs with no more
than 2500 track points.
• Select
Wrap to create track logs in a cyclical
manner. After a track log with 2500 track
points is saved, new track points are saved by
overwriting the old track points starting from 0.
• Select
Continue to create a single continuous
track log of all track points. You can save up
to 8 continuous track logs.
5. Press
the
Menu button to view the track log menu
and select from the following options:
• Select
Clear Tracking to clear all current
tracking points.
• Select
Save Tracking to save the current
track log to the system’s internal flash memory.
Up to 8 track logs can be saved.