Using the routes feature, Creating a route – Holux GM-120 User Manual
Page 32
25
Using the Routes Feature
Read this section to learn how to create a route manually
using the previously created waypoints.
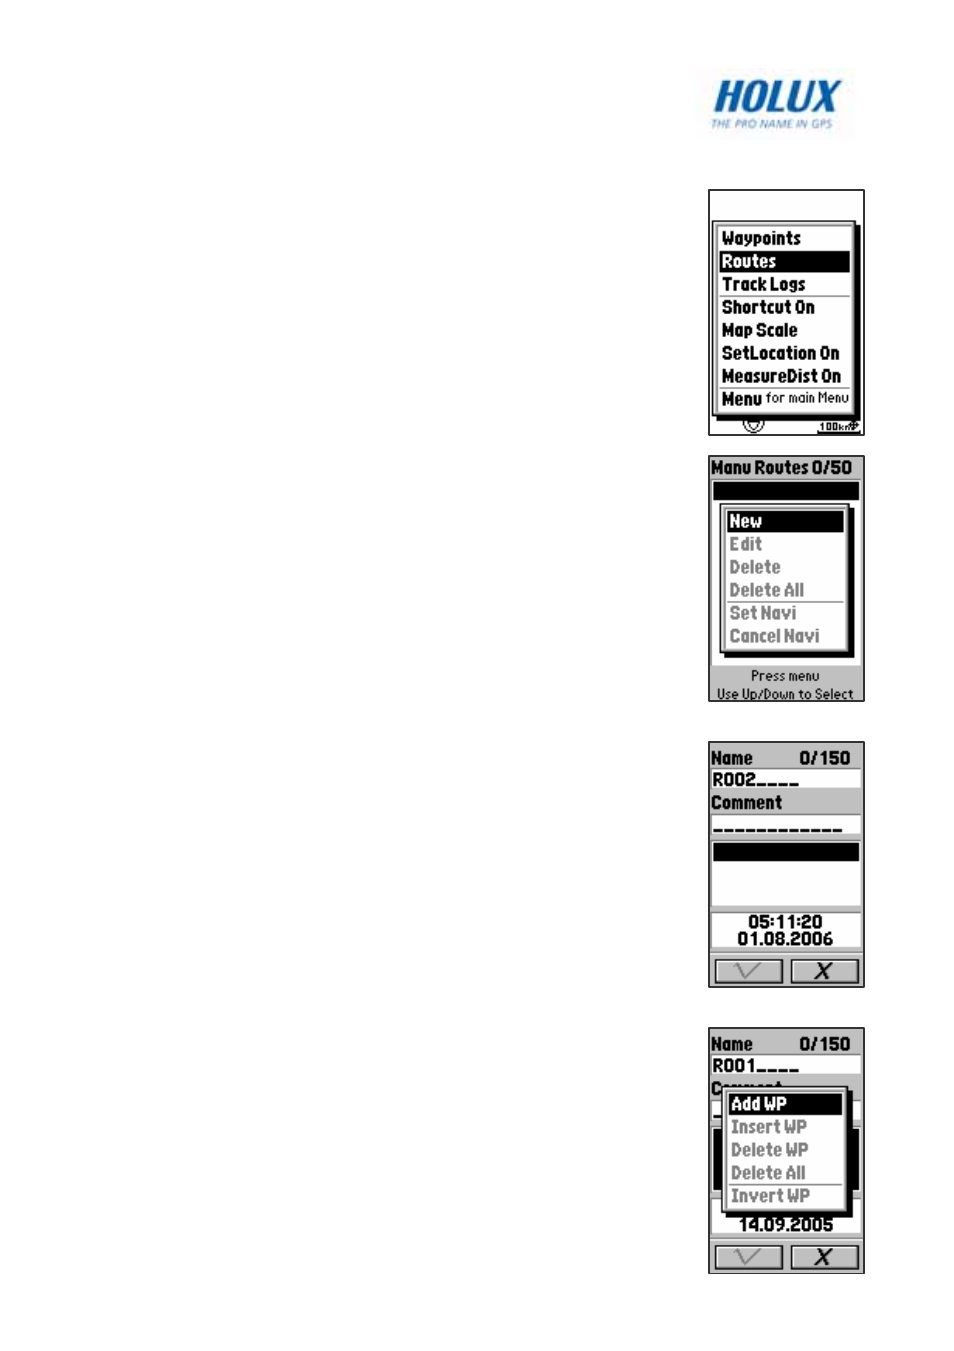
Creating a Route
To create a route using the waypoints previously created:
1. In Professional mode, press the Menu button to
display the menu options.
2. Use the navigation keys to select the Routes
option and press OK.
3. A list of routes will be displayed on screen. Press
the Menu button and use the navigation keys to
select New.
4. A new route is created and its information is
displayed on screen. Use the navigation keys to
highlight each field to input information such as
name, comment, and so on.
5. Use the up/down navigation keys to highlight the
waypoints field. Press the Menu button to select
from the following options to create a route:
• Select
Add WP to add existing waypoints to
the route.
• Select
Insert WP to insert a waypoint starting
at the selected location on the route.
6. You can set the priority of the waypoints on the
route by selecting the waypoint and pressing the
OK button. The order of the waypoints on the
route is displayed on the right column of the
respective waypoint.
7. Press
the
Page button to highlight the waypoints
field.
8. Use the down navigation key to highlight the √
option and press OK to save changes.