Epson PictureMate User Manual
Page 76
75
4. Move the lever right to the
Lock
position. If it does not lock in place, the
cartridge is crooked; you need to push in whichever side is sticking out too far.
(See step 3.)
Caution: If the cartridge is not inserted correctly, ink may leak out.
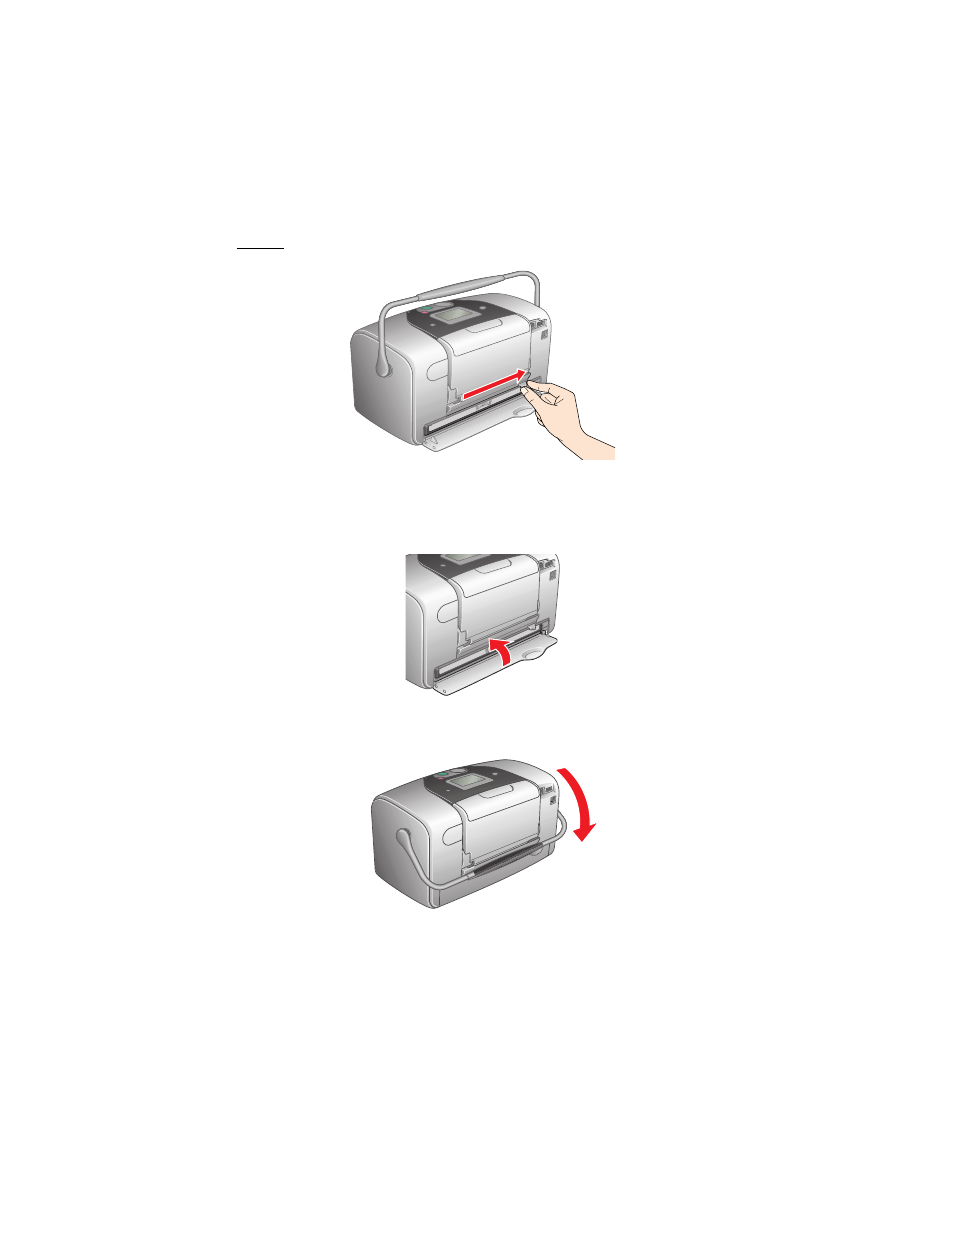
5. Close the cartridge door. Make sure it is completely closed.
6. Move the handle over to the back.
7. Reconnect the power cord. If you’re using a computer or external drive, reconnect
the USB cable to PictureMate.
8. Turn PictureMate back on.
See also other documents in the category Epson Photo Printers:
- R300 (6 pages)
- C120 (2 pages)
- R380 (72 pages)
- STYLUS PHOTO R800 (6 pages)
- PictureMate 239 (3 pages)
- Ultra Hi-Definition Photo Printer R260 (82 pages)
- STYLUS DX6000 (36 pages)
- PictureMate 238 (1 page)
- PictureMate 500 (90 pages)
- Stylus Color 800 (20 pages)
- All in One Stylus CX7800 (12 pages)
- SUBLIJET IQ R800 (53 pages)
- Sylus Pro 10600 (16 pages)
- CPD-18557R1 (1 page)
- PictureMate 222 (1 page)
- T087720 (4 pages)
- PictureMate CZ 283 (2 pages)
- Stylus Photo R300 Series (124 pages)
- 1400 (6 pages)
- Stylus Photo EX 220-240 V (12 pages)
- Stylus Photo 750 (11 pages)
- STYLUS PHOTO 900 (2 pages)
- Photo PX700W (3 pages)
- 221 (2 pages)
- Stylus Pro 9800 (8 pages)
- Stylus Photo R220 (10 pages)
- CPD-19345R0 (119 pages)
- PIS T079620 (4 pages)
- PictureMate (6 pages)
- 790 (26 pages)
- LQ-680Pro (16 pages)
- STYLUS PHOTO 915 (4 pages)
- RX650 (2 pages)
- STYLUS R2880 (64 pages)
- PowerLite 1260 (2 pages)
- Stylus NX200 (2 pages)
- HP 7960 (1 page)
- R Series (6 pages)
- R340 (40 pages)
- Stylus CX3100 (57 pages)
- 870 (8 pages)
- STYLUS R1900 (56 pages)
- STYLUS R3000 (5 pages)
- Photo 925 (152 pages)