Control, Performing live with a plug-in synthesizer, Connecting to your computer – Roland FANTOM-7 76-Note Workstation Keyboard User Manual
Page 22: Usb driver settings, Controlling an external midi device (ext midi out), Using usb audio, Controlling an analog synthesizer (cv/gate out), Controlling an external midi device, Ext midi out), Controlling an analog synthesizer
22
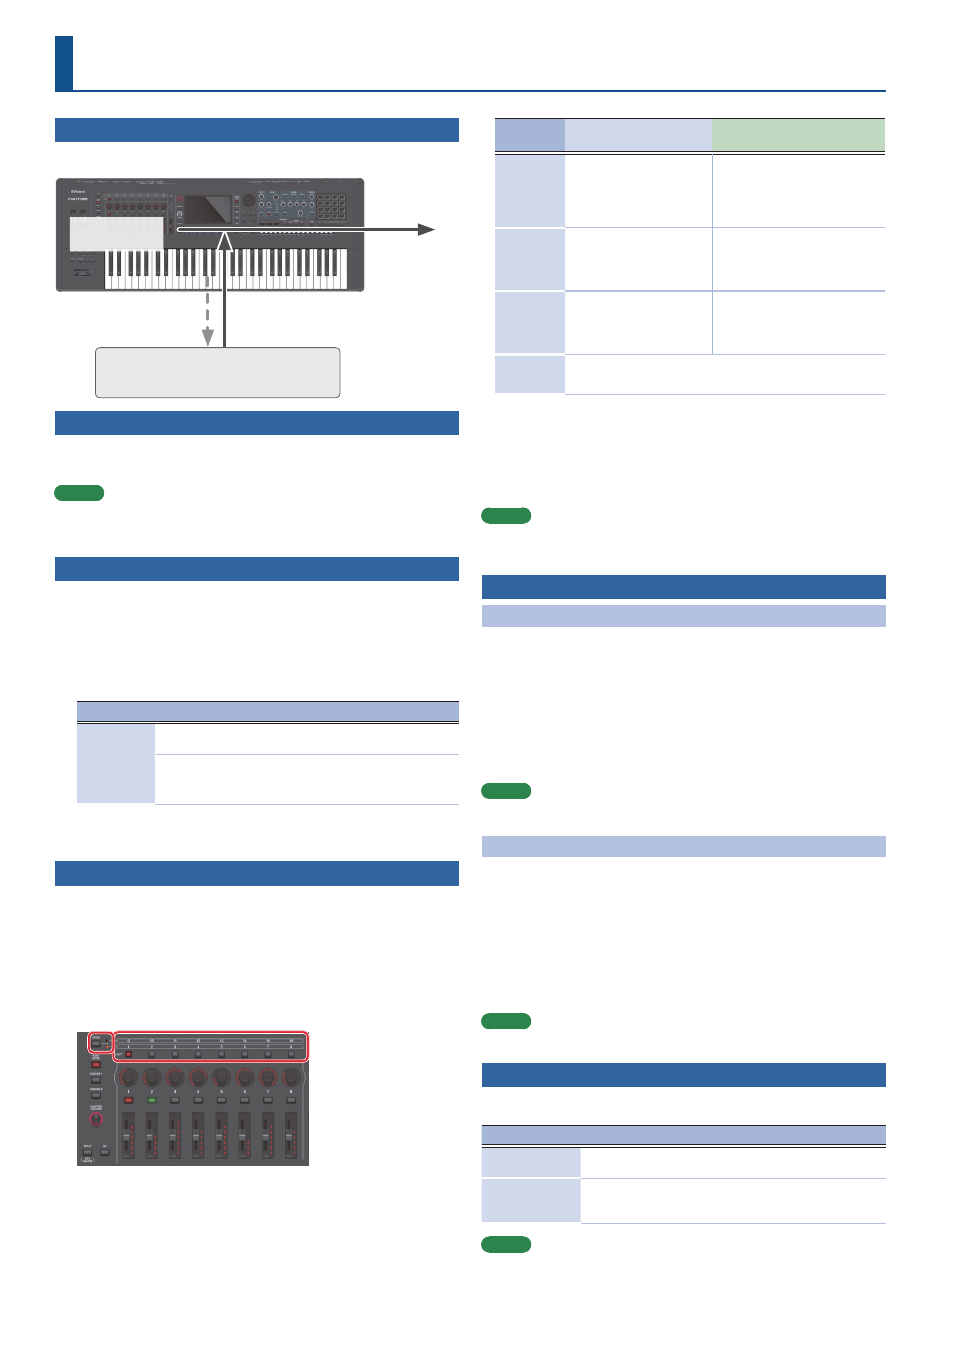
Performing Live with a Plug-in Synthesizer
Here’s how you can use the FANTOM to play a plug-in synthesizer that’s installed on
your computer.
Performance data for external
zones
(USB MIDI)
Audio from the
computer (USB audio)
Performance using
Internal zones
Plug-in synthesizer
installed on the computer
Output
Connecting to Your Computer
The USB driver is software that transfers data between your computer software and
this unit.
You must install the USB driver in order to use this unit connected to your computer.
MEMO
For details on downloading and installing the USB driver, refer to the
Roland website.
http://www.roland.com/support/
USB Driver Settings
Here’s how to specify the USB driver that’s used when connecting to your
computer.
1.
Press the [MENU] button.
2.
Touch
3.
Touch
4.
Set the “USB Driver” parameter to “VENDER.”
Parameter
Value
Explanation
USB Driver
VENDER
Choose this if you want to use a USB driver
downloaded from the Roland website.
GENERIC
Choose this if you want to use the standard USB
driver that was included with your computer.
*
Only MIDI is available.
5.
Press the [WRITE] button to save the SYSTEM settings.
6.
Turn this unit’s power off, and then on again.
Controlling an External MIDI Device (EXT MIDI OUT)
This unit’s knob operations and keyboard performance can be transmitted as MIDI
messages from the MIDI OUT connector and from USB MIDI OUT.
Keyboard data can be output from the CV/GATE OUT jacks as CV/GATE signals.
By setting a specific zone to “EXT,” you can use that zone for controlling an external
MIDI device.
1.
Press the ZONE SELECT button of the zone that you want to
use for MIDI output.
To select zones 9–16, use the [ZONE 1-8/9-16] button to switch groups, and then
press a ZONE SELECT [1]–[8] button.
2.
Press the ZONE INT/EXT button of the selected zone to make
it light green.
If it's not green, hold down the [SHIFT] button and press the corresponding ZONE
INT/EXT button to make it light green (EXT setting).
If it is lit green (EXT setting), MIDI messages are output.
If the ZONE INT/EXT buttons of multiple zones are lit, these settings in
conjunction with the zones specified by the ZONE SELECT button (current zone)
determine whether MIDI is output to an external sound module (p. 12).
Button
status
When the applicable zone is
the current zone
When the applicable zone is
not
the current zone
Unlit
(COMMON)
The internal sound engine and
the external sound module both
produce sound when you play the
keyboard.
Neither the internal sound engine nor
the external sound module produce
sound when you play the keyboard. You
can use the internal sequencer or MIDI
data from an external device to play the
internal sound engine.
Lit red
(INT)
The internal sound engine
produces sound when you play
the keyboard.
Only if the ZONE INT/EXT button of
another current zone is on (lit red or
green), the internal sound engine
produces sound when you play the
keyboard.
Lit green
(EXT)
The external sound module
produces sound when you play
the keyboard.
Only if the ZONE INT/EXT button of
another current zone is on (lit red or
green), the external sound module
produces sound when you play the
keyboard.
Lit orange
(MUTE)
The sound engine is muted. The internal sound engine does not produce
sound. If the immediately previous state was lit green, the external sound
module produces sound.
3.
As desired, press the [PAN/LEVEL] button, the [ASSIGN 1]
button, or the [ASSIGN 2] button.
4.
When you operate control knobs [1]–[8] and sliders [1]–[8],
MIDI messages are output according to the buttons you
pressed in step 3.
MEMO
5
You can make detailed settings in ZONE EDIT (p. 14).
5
The settings you make can be saved as scene settings. “Saving a Scene”
Using USB Audio
Adjusting the USB Audio Input
Here’s how to make settings for audio that’s input from a USB-connected computer.
1.
Press the [USB AUDIO SELECT] button.
The USB AUDIO menu appears.
2.
Use the cursor to select “USB Audio Input Switch,” and use the
[VALUE] dial to turn the setting “ON.”
Audio input from the connected device turns on.
3.
Use the cursor to select “USB Audio Input Volume,” and use
the [VALUE] dial to adjust the input level.
MEMO
If “USB Audio In/Out Select” is set to IN, you can also use the [USB AUDIO]
slider to adjust the value.
Adjusting the USB Audio Output
Here’s how to output the FANTOM’s audio to a USB-connected computer.
1.
Press the [USB AUDIO SELECT] button.
The USB AUDIO menu appears.
2.
Use the cursor to select “USB Audio Output Switch,” and use
the [VALUE] dial to turn the setting “ON.”
Audio output to the connected device turns on.
3.
Use the cursor to select “USB Audio Output Volume,” and use
the [VALUE] dial to adjust the output level.
MEMO
If “USB Audio In/Out Select” is set to OUT, you can also use the [USB AUDIO]
slider to adjust the value.
Controlling an Analog Synthesizer (CV/GATE OUT)
You can connect an analog synthesizer equipped with CV/GATE input jacks, and
control its note on/off or pitch.
Jack
Explanation
GATE OUT 1 jack
GATE OUT 2 jack
These jacks output note on/off.
Outputs +5 V.
CV OUT 1 jack
CV OUT 2 jack
These jacks output pitch. If you’ve made transpose or octave
shift settings, this voltage changes accordingly.
These jacks support OCT/V (it does not support Hz/V).
MEMO
GATE OUT2 can be changed to CV OUT. For details, refer to “Reference
Manual” (PDF).
Control