Canon PowerShot G3 X User Manual
Page 137
137
Setting Menu
Accessories
Appendix
Index
Before Use
Basic Guide
Advanced Guide
Camera Basics
Auto Mode /
Hybrid Auto Mode
Other Shooting Modes
P Mode
Tv, Av, M, C1, and C2 Mode
Playback Mode
Wi-Fi Functions
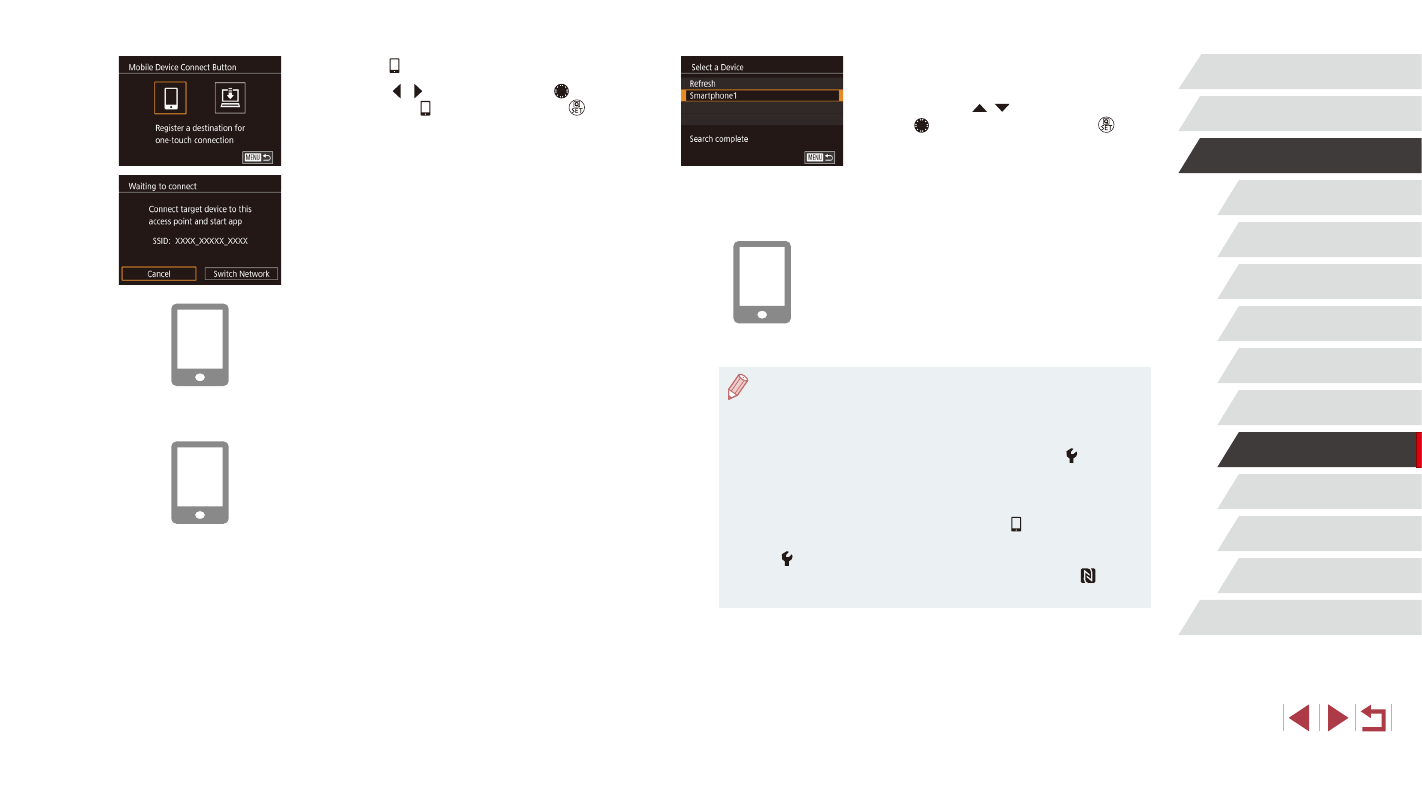
6
Choose the smartphone to connect to.
z
Choose the smartphone (either by
pressing the [ ][ ] buttons or by turning
the [ ] dial), and then press the [ ]
button.
z
After a connection is established with
the smartphone, the smartphone name
is displayed on the camera. (This screen
will close in about one minute.)
7
Import images.
z
Use the smartphone to import images
from the camera to the smartphone.
z
Use the smartphone to end the
connection; the camera will automatically
turn off.
●
Connections require that a memory card be in the camera.
●
You can also change the camera nickname on the screen in
step 2 (= 136).
●
For better security, you can display a password on the screen
in step 3 by accessing MENU (= 31) and choosing [ 4] tab
► [Wi-Fi Settings] ► [Password] ► [On]. In this case, in the
password field on the smartphone in step 4, enter the password
displayed on the camera.
●
One smartphone can be registered to the [ ] button. To assign
a different one, first clear the current one in MENU (= 31) ►
[ 4] tab ► [Mobile Device Connect Button].
●
Not all NFC-compatible smartphones have an N-Mark ( ). For
details, refer to the smartphone user manual.
3
Choose [ ].
z
Press the [ ][ ] buttons or turn the [ ]
dial to choose [ ], and then press the [ ]
button.
z
The camera’s SSID is displayed.
4
Connect the smartphone to the
network.
z
In the smartphone’s Wi-Fi setting menu,
choose the SSID (network name)
displayed on the camera to establish a
connection.
5
Start Camera Connect.
z
Start Camera Connect on the
smartphone.
z
After the camera recognizes the
smartphone, a device selection screen is
displayed.