ProSoft Technology MVI69-ADM User Manual
Page 98

Programming the Module
MVI-ADM ♦ 'C' Programmable
Developer's Guide
'C' Programmable Application Development Module
Page 98 of 342
ProSoft Technology, Inc.
February 20, 2013
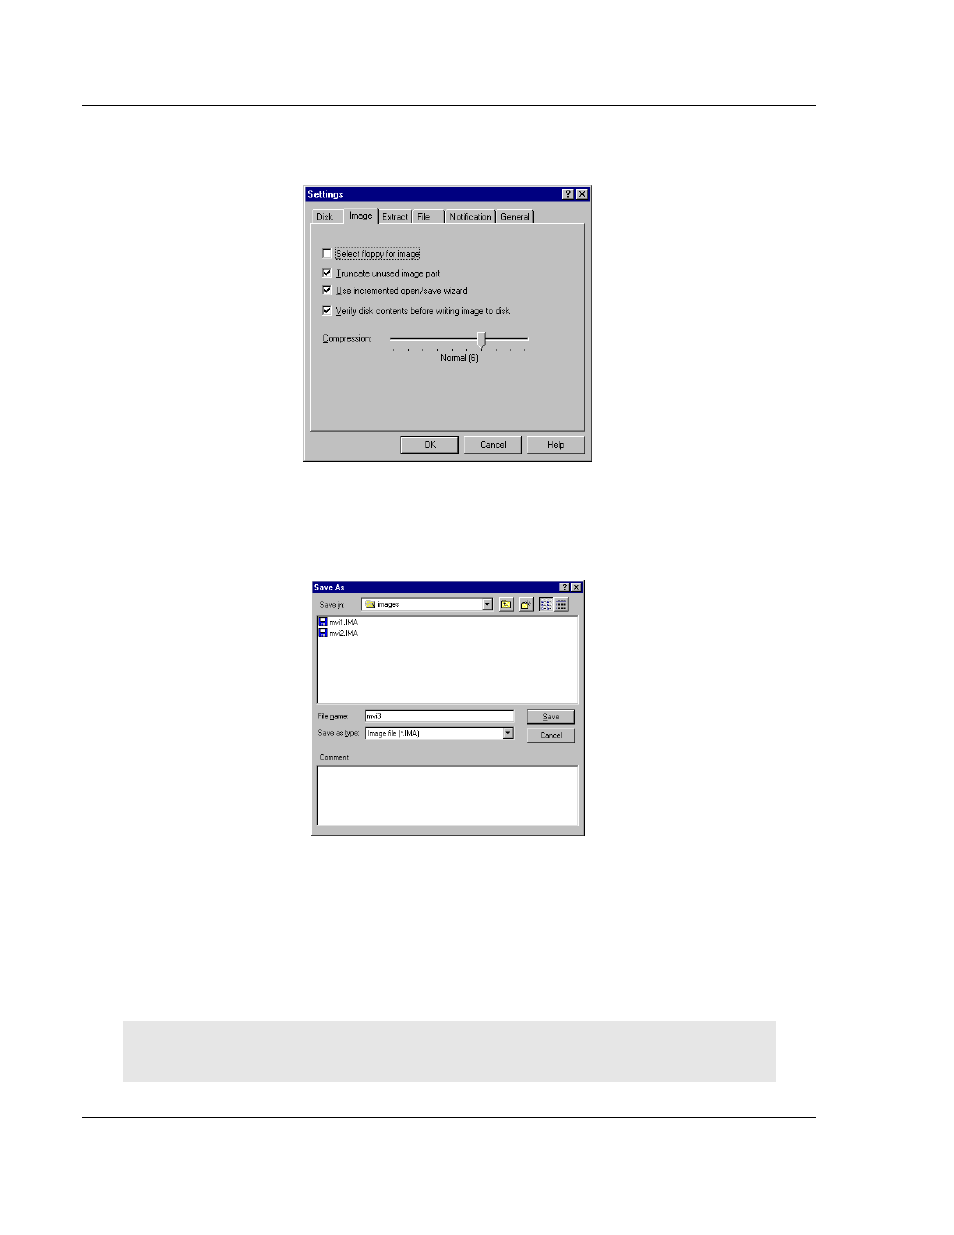
4 Click on Options, Settings and make sure the Truncate unused image part
option is selected, as shown in the following figure. Click on OK.
5 Click on File, Save As, and choose a directory and filename for the disk
image file. The image must be saved as an uncompressed disk image, so be
sure to select Save as type: Image file (*.IMA) as shown in the following
figure.
6 Check the disk image file size to be sure it does not exceed the maximum
size of the MVI-ADM
module’s ROM disk (896K bytes, 384K bytes for
MVI94). If it is too large, use WINIMAGE to remove some files from the
image, then de-fragment the image and try again (Note: To de-fragment an
image, click on Image, Defrag current image.
7 The disk image is now ready to be downloaded to the MVI-ADM module.
For more information on using WINIMAGE, refer to the documentation included
with it.
Note: WINIMAGE is a shareware utility. If you find this program useful, please register it with the
author.
