Multi-Contact MA251 User Manual
Page 7
Advanced Contact Technology
www.multi-contact.com
7 / 12
21
22
19
20
17
18
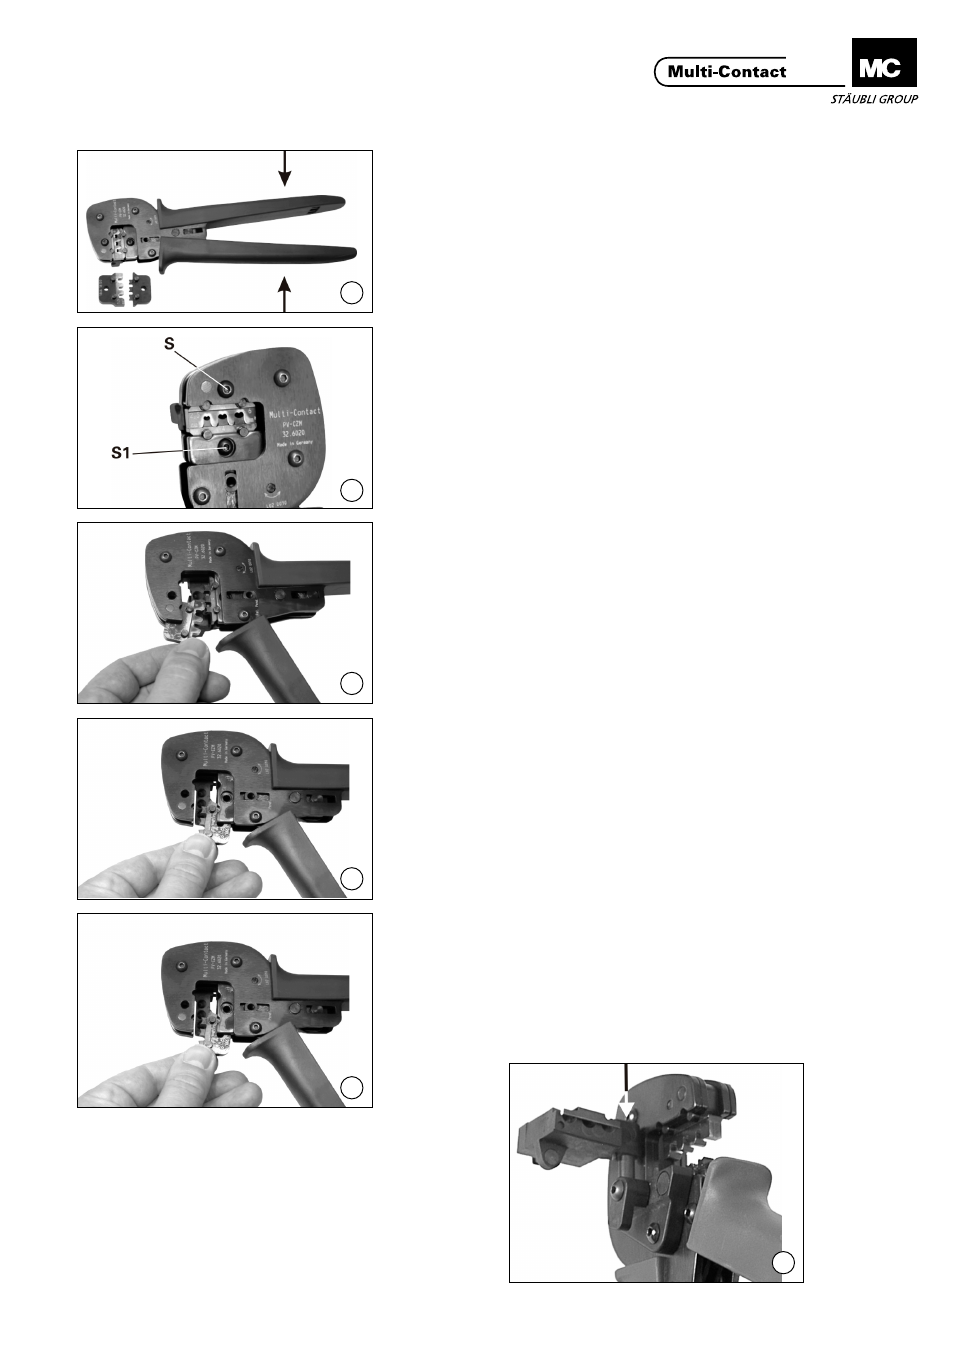
Cambio de la matríz de engarce
Exchanging the crimping
inserts
Desmontaje de la matríz de eng-
arce
Removing the crimping insert
(ill. 17)
Cierre la tenaza de engarce.
(ill. 17)
Close the crimping tool
(ill. 18)
Desatornille los tornillos el largo (S) y
el corto (S1) y abra la tenaza de engar-
ce (apriete a fondo y suelte).
(ill. 18)
Unscrew both the long S and the
short S1 screw. Open the crimping
tool (press completely together and
release).
(ill. 19)
Extraiga la matríz de engarce superior.
(ill. 19)
Remove the upper crimping insert.
(ill. 20)
Extraiga la matríz de engarce inferior.
(ill. 20)
Remove the lower crimping insert.
Montaje de la matríz de engarce
Fitting the crimping insert
(ill. 21)
Abra la tenaza de engarce (apriete a
fondo y suelte).
Introduzca ambas matrices de en-
garce. Las señales marcadas deben
quedar a la vista en la misma cara que
las marcas de la tenaza.
Cierre la tenaza de engarce.
Atornille a fondo ambas matrices de
engarce.
(ill. 21)
Open the crimping tool (press com-
pletely together and release). Insert
both crimping inserts. The markings
must be on the same side as the
marking on the crimping tool.
Close crimping tool and screw both
crimping inserts tight.
(ill. 22)
Insertar el posicionador dentro de la
guía.
(ill. 22)
Insert locator into the guide pin.