Multi-Contact MA223 User Manual
Page 4
Advanced Contact Technology
4 / 8
www.multi-contact.com
7
6
L
Q
8
9
2,5mm
2
4mm
2
6mm
2
Preparación del cable
Cable preparation
(ill. 6 / Tab. 1)
Pelar el cable.
Longitud de acuerdo con la Tab. 1
Atención:
Tenga cuidado de no cortar nin-
gún hilo.
(ill. 6 / Tab. 1)
Strip cable insulation.
Length according Tab. 1
Attention:
Take care not to cut individual
strands.
Nota:
para obtener instrucciones sobre
cómo utilizar los alicates pela cables
PV-AZM... y cómo cambiar las hojas
de corte, consulte MA267
www.multi-contact.com
Note:
for directions on the operation of
stripping pliers PV-AZM... and chang-
ing blade sets, see operating instruc-
tion MA267 at www.multi-contact.com
Conexiones para engarzar
Crimp connections
Para conectar los conductores a los
casquillos de engarce de los conec-
tors PV, recomendamos utilizar las
herramientas de engarce indicadas en
esta hoja de instrucciones.
For the connection of the conductors
to the crimping sleeves of the PV plug
connectors, we recommend using the
stated crimping tools.
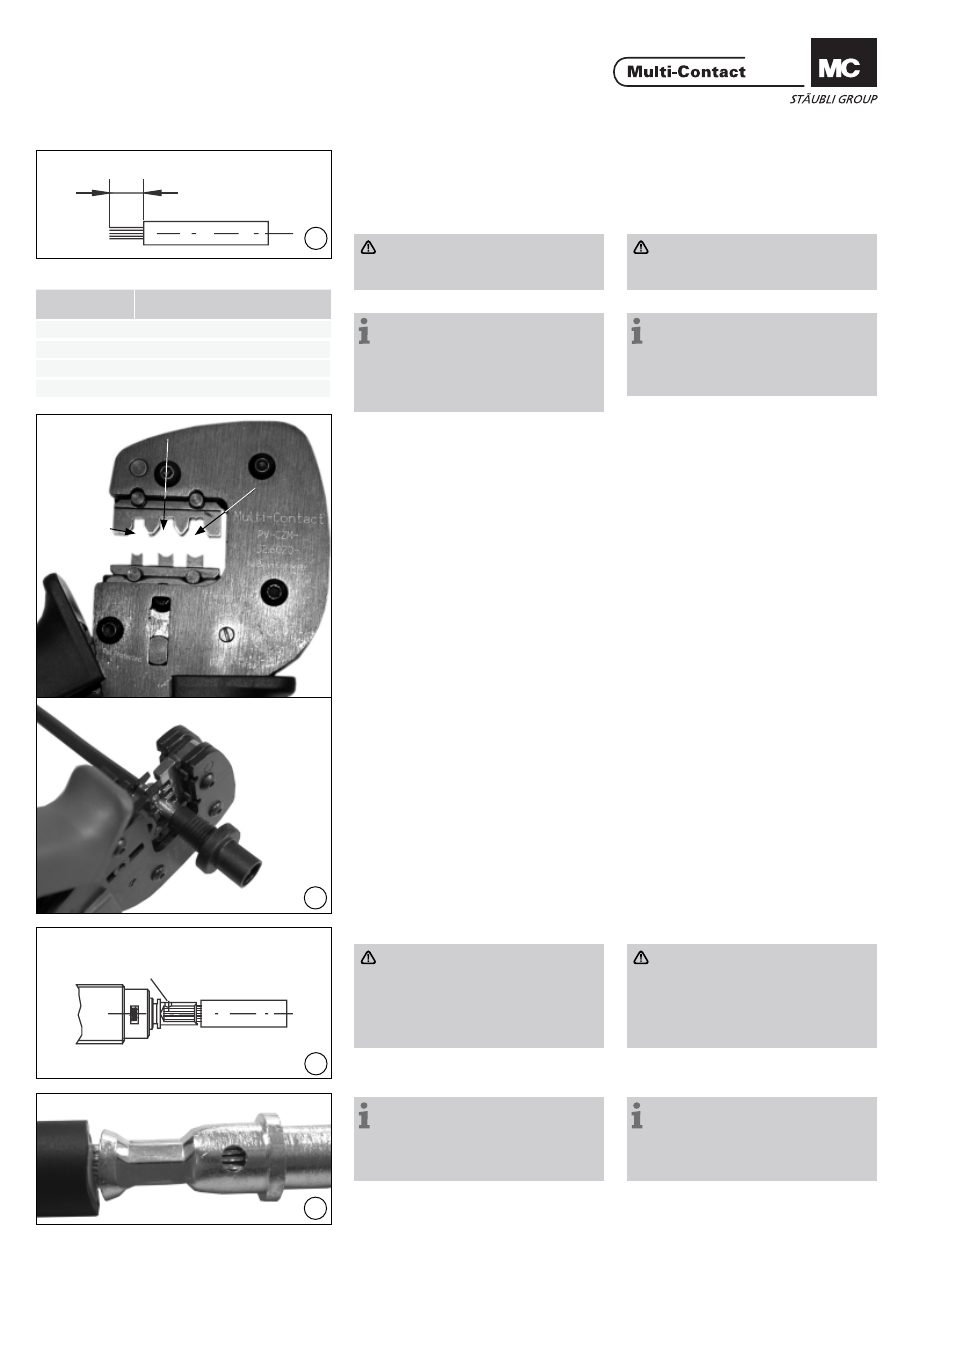
Engarce
Crimping
con alicates de engarce
PV-CZM-16100A
with crimping pliers
PV-CZM-16100A
Quitar el localizador.
Remove the locator.
(ill. 7)
Coloque la parte metálica del pin
macho o hembra en la guía para la
sección de cable correspondiente.
Inserte el cable de la izquierda.
(ill. 7)
Place the metal part of the female
or male coupler in the guide for the
appropriate cross section. Insert the
cable from the left.
(ill. 8)
Atención:
Todos los conductores deben ser
introducidos deben ser introdu-
cidos en el orifi cio Q dejando
una distancia máxima visible de
1mm.
Cierre completamente la herramienta
de engarce.
(ill. 8)
Attention:
All strands of the wires must be
correctly inserted into the bore
hole and visible in sight hole Q.
The max. distance of 1mm must
not be exceeded.
Completely close the crimping tool.
Nota:
para el cambio del posicionador y
las correspondientes matrices, por
favor, diríjase al manual MA251,
www.multi-contact.com
Note:
for the replacement of the loca-
tor and the corresponding crimping
inserts, please see MA251 at
www.multi-contact.com
(ill. 9)
Verifi que la crimpadora en forma
visual.
(ill. 9)
Visually check the crimp.
Tab. 1
Tipo
Type
Longitud L (mm)
Length L (mm)
PV-BP3/4
6 – 7,5
PV-SP3/4
6 – 7,5
PV-BP3/6
8,5 – 9,5
PV-SP3/6
8,5 – 9,5