Multi-Contact MA213-02 User Manual
Page 4
Advanced Contact Technology
4 / 8
www.multi-contact.com
7
8
9
10
11
12
13
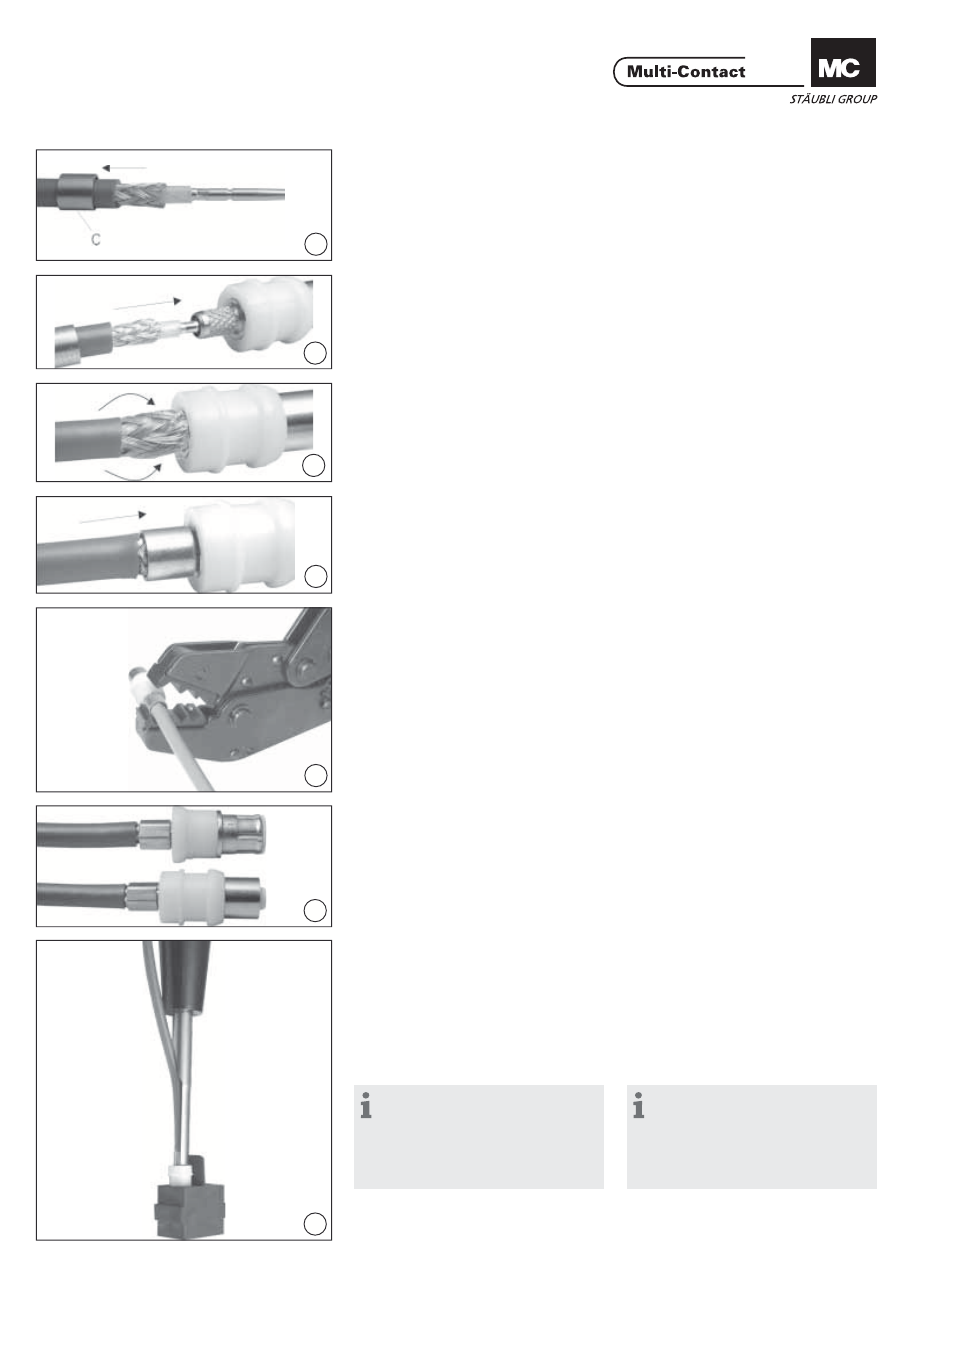
(ill. 7)
Deslizar el casquillo C sobre la funda
del cable.
(ill. 7)
Slip crimp sleeve C onto the cable.
(ill. 8)
Introducir el conductor en el aloja-
miento de engarce presionando hasta
que el contacto quede montado en el
aislador interno.
(ill. 8)
Insert the cable into the crimp housing
until the contact engages in the inner
insulator.
(ill. 9)
Introducir el blindaje en el casquillo
aislante.
(ill. 9)
Push the shield wires over the crimp
housing.
(ill. 10)
Deslizar el casquillo de engarce sobre
el blindaje...
(ill. 10)
Slip the crimp sleeve over the shield.
(ill. 11)
...y proceder al engarce con la tenaza
en la posición deseada (58 o 59).
(ill. 11)
Crimp the crimp sleeve in the re-
quired position 58 or 59.
(ill. 12)
El procedimiento de montaje es idénti-
co para hembras y machos.
(ill. 12)
The assembly steps for sockets and
pins are similar.
(ill. 13)
Insertar los contactos en el porta-con-
tactos con ayuda de la herramienta de
montaje ME-WZ5 hasta que aquellos
queden bien sujetos. El montaje de los
conectores coaxiales resultará más fá-
cil humedeciendo los porta-contactos
con alcohol industrial.
(ill. 13)
Insert the contacts in the contact car-
rier by means of the inserting tool
ME-WZ5 until they engage. The inser-
tion of the coaxial connectors can be
facilitated by previously wetting the
contact carriers with industrial alcohol.
Nota:
Para no estropear los porta-
contactos es necesario poner las
herramientas de montaje en posición
paralela al eje de cada uno de los
contactos.
Note:
To avoid damage to the contact
carriers, the inserting tools must
be guided parallel to the axis and
the pressure should be distributed
circular.