Installing optional and supplied accessories, Removing and attaching the projector lens unit, Removing – Epson Z8250NL User Manual
Page 188: P.188
Installing Optional and Supplied Accessories
188
Installing Optional and Supplied Accessories
Prepare #2 plus-driver in advance.
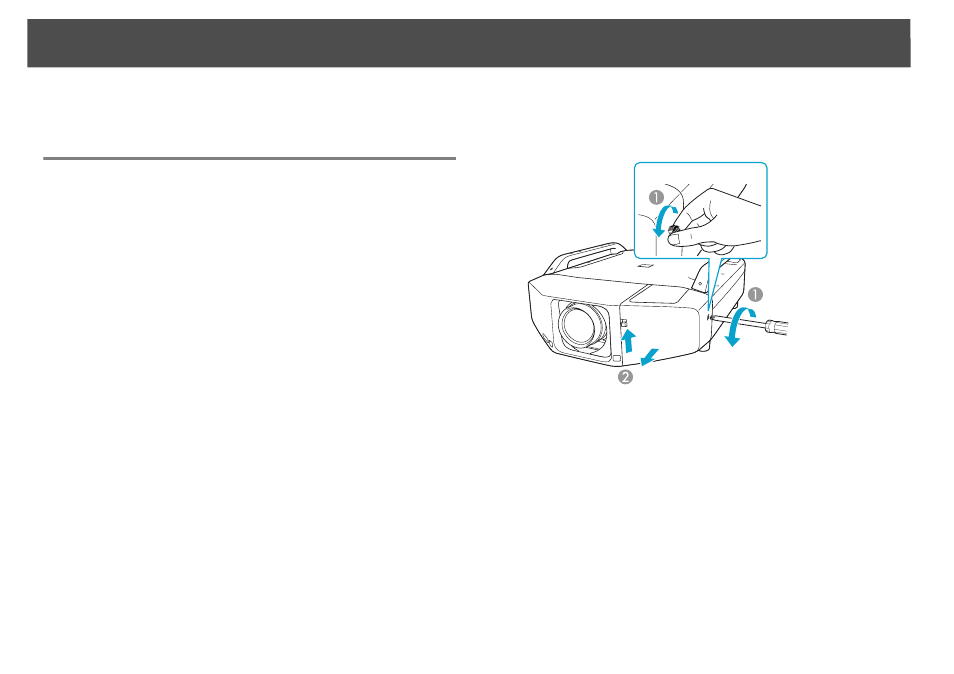
Removing and Attaching the Projector Lens Unit
Removing
Caution
• Only remove the lens unit when necessary. If dust or dirt enter the projector,
projection quality deteriorates and it could cause a malfunction.
• Try not to touch the lens with your hand or fingers.
If fingerprints or oils are left on the surface of the lens, projection quality
deteriorates.
• Before replacing the lens unit, use the lens shift function to horizontally and
vertically center the lens. s
Procedure
A
Remove the interface cover.
A
Loosen the screw. (Thumb screw available on PowerLite Pro
Z8255NL/Z8455WUNL only.)
B
While pulling up the interface cover open switch, pull the
interface cover straight out.