Chapter 2 • hardware installation – Extron Electronics Matrix 200 User Manual
Page 19
Extron • Matrix 200 • User’s Manual
Chapter 2 • Hardware Installation
Red
Black
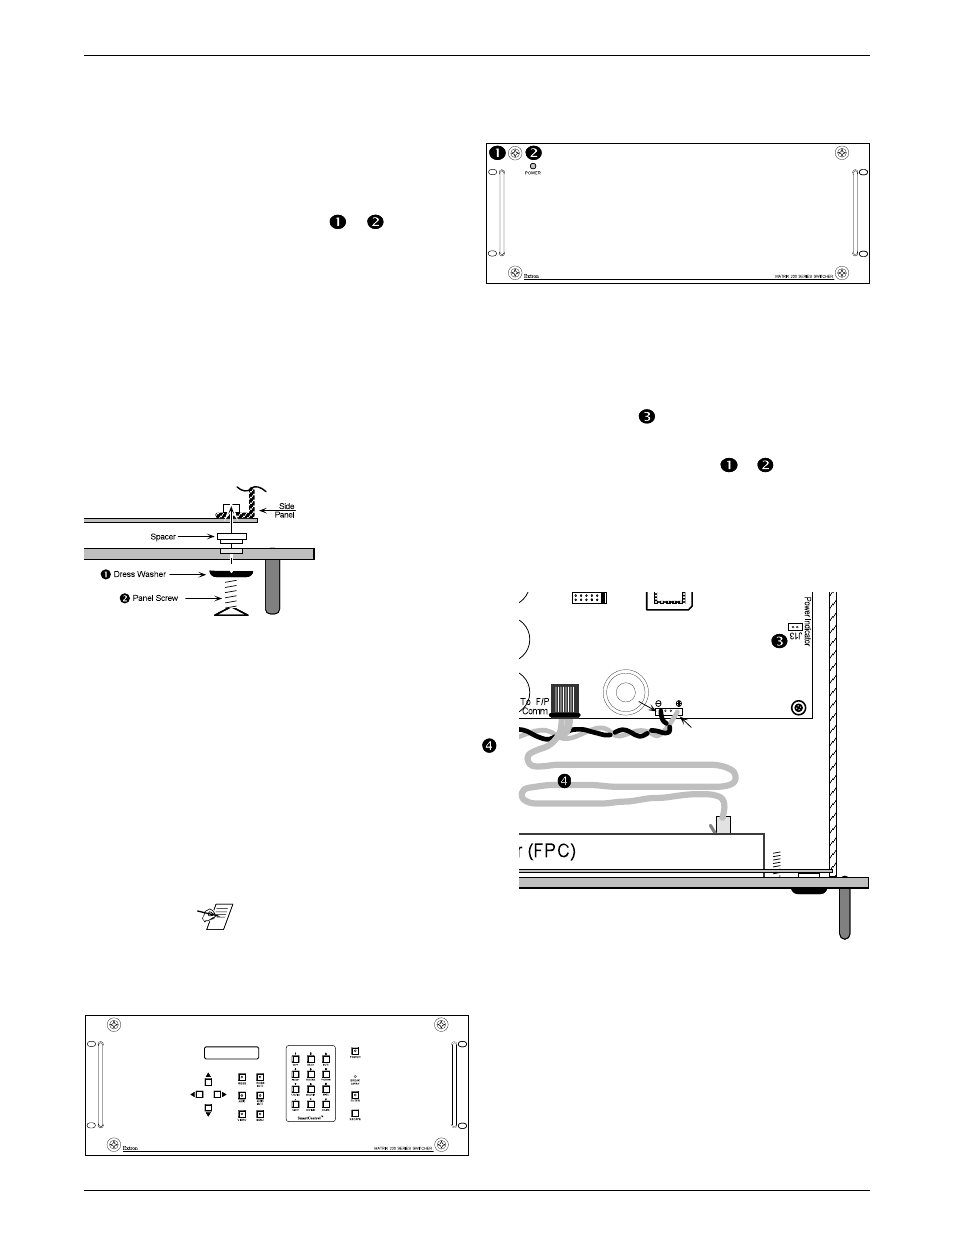
Installing a Front Panel Controller
Remove the cover (see “Removing the Matrix 200 Cover” on page 2-2) and then
do the following:
1. Remove the four
No.10 screws and
dress washers (items
&
) from the
Blank Front Panel.
Caution:
Take care to remove the four spacers from the rear of the panel. See picture
below, left.
2. Disconnect the Power Indicator cable from J13 on the right side of the main
controller board and remove the panel. See
in the picture below right.
3. Position the FPC on the front of the Matrix 200, with a spacer behind each
screw. Install the four screws and dress washers (items
&
). This may
be made easier by placing the Matrix face-up, being careful to protect the
BNC connectors from damage.
4. Connect the modular
cable from the plug on
the FPC to the RJ45
connector on the
Matrix 200 main
controller board. See
in the picture to the right
for connector location.
5. Reverse the above
procedure to put the
Matrix back together.
_______ When installing a new front
panel, it may be necessary to reposition the side panels to align the screw
holes.
The mounted Front Panel Controller.
2-3