Changing the parameters of a part – Casio PL-40R 2 User Manual
Page 15
E-47
Using the Mixer
The following is a general overview of the parts described above.
Use the following procedure to change the parameters of each
individual part.
1.
While holding down the FUNCTION button,
press the PART/(MIXER) button.
This causes “MIXER” to appear on the display.
2.
While holding down the FUNCTION button,
press the LAYER/(GROUP A/B) button to
toggle between the two groups and display the
one you want.
Group A: [A]
Group B: [B]
Select the Group A to make layer, split, or auto
accompaniment settings.
Select the Group B to make MIDI or sequencer
settings.
3.
Use the [
] and [
] buttons or the selector
dial to select the part you want.
4.
Press the ENTER/YES button to display the sub
menu.
5.
Use the [
] and [
] buttons to select
parameter whose setting you want to change.
See “Parameter List” on page A-17 for more
information about parameters.
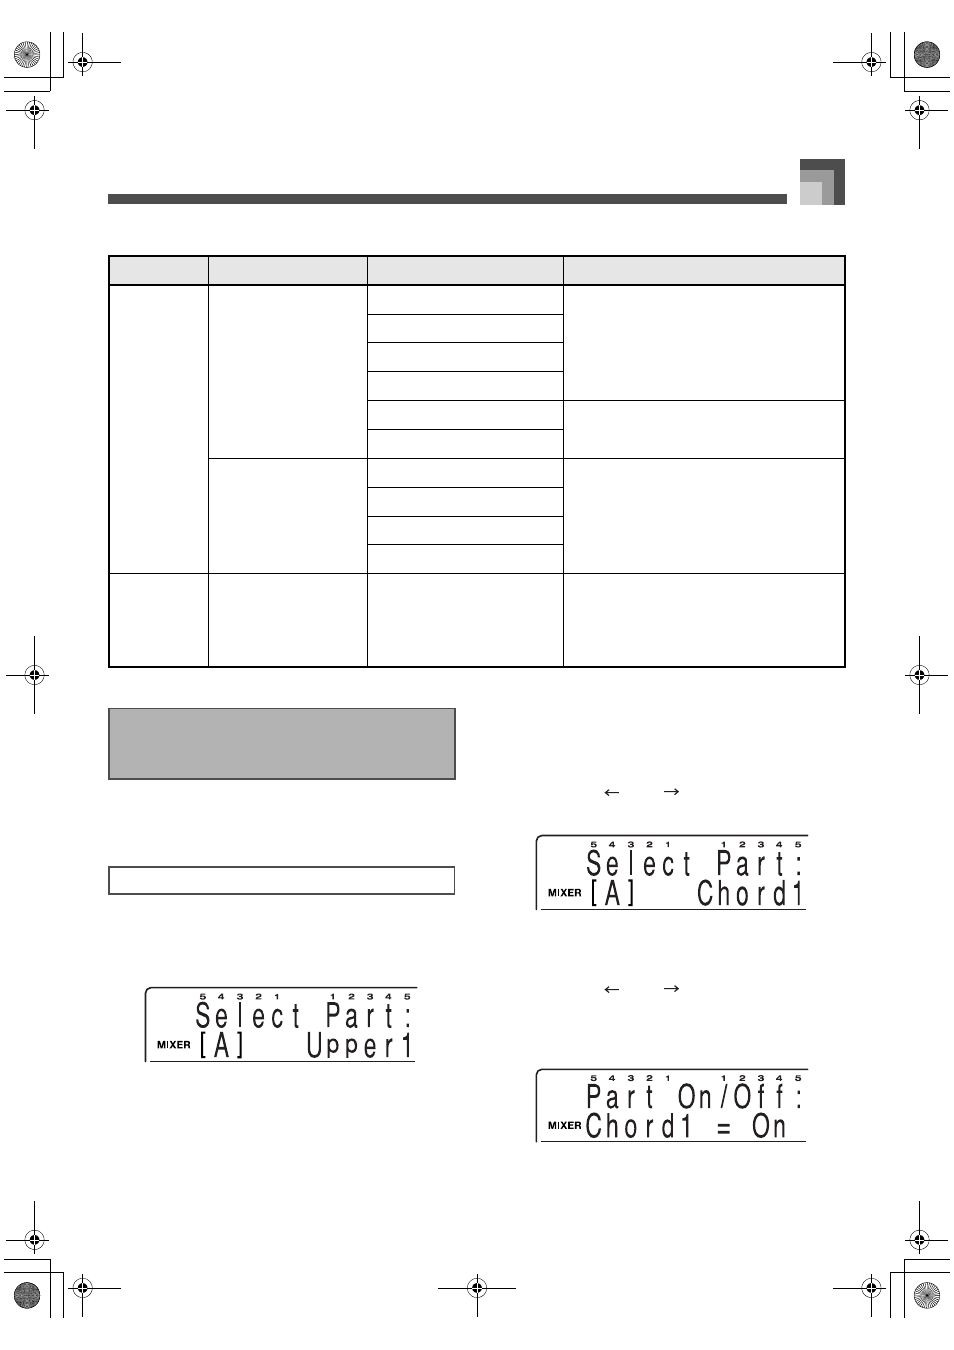
Group Name
Part Type
Part Name
Description
Group A
Internal
[A]
Melody
Upper1
These parts are used for keyboard play. See
“Upper1, Upper2, Lower1, Lower2” on page
E-19.
Upper2
Lower1
Lower2
Harmo1 (auto harmonize 1)
Harmonize notes used for auto harmonize. See
“Using Auto Harmonize” on page E-29.
Harmo2 (auto harmonize 2)
Accompaniment
Perc. (Percussion)
Auto accompaniment parts. See “Using Auto
Accompaniment” on page E-23.
Drum
Bass
Chord1 to Chord5
Group B
External
[B]
—
Pt1 to Pt16 (Part 1 to Part 16)
These parts correspond to external tracks 1 to
16 when recording or playing back with the
sequencer. They are also used when sounding
MIDI input from an external source. See
“Using MIDI” on page E-66.
Changing the Parameters of
a Part
To change part parameters
426-E-049A
PL40NE01-1.book 47 ページ 2002年7月23日 火曜日 午後6時52分