Using the attachment, Controller – Casio EX-FR10 (Camera: Ver. 1.00 and 1.01, Controller: Ver. 1.00) User Manual
Page 12
12
Quick Start Basics
You can configure the camera to suit your specific needs by attaching the hinge unit,
which enables attachment of the controller, and other included and optionally
available attachments. This way you can configure the camera to suit your specific
needs.
IMPORTANT!
• Do not apply strong pressure to the surface of the monitor screen. Doing so can
damage it.
• Never touch the lens with your fingers. Finger smudges, dirt, and other foreign
matter on the lens can interfere with proper operation of the camera. Use a blower
or other means to keep the lens and flash window free of dirt and dust, and wipe
gently with a soft, dry cloth.
You can attach the controller to the camera and use the camera as a normal camera.
.
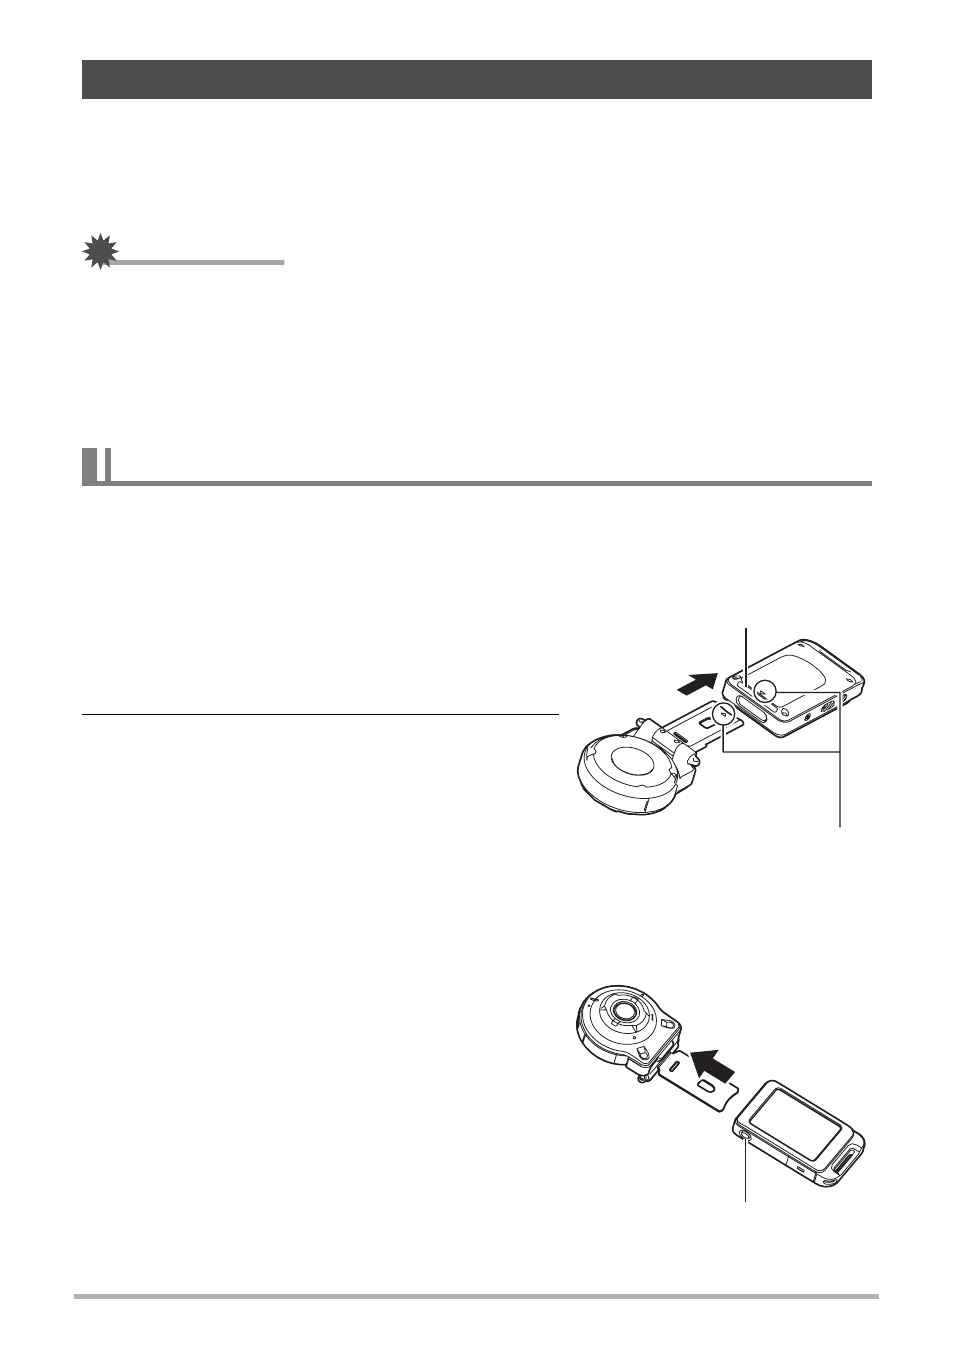
To attach the controller
1.
With the camera lens pointed in the
same direction as the controller’s
monitor screen, slide the hinge unit into
the controller’s hinge unit slot.
2.
Push the hinge unit in until you hear it
click into place.
.
To detach the controller
1.
While holding down the controller’s
[RELEASE] button, pull it out of the
camera.
Using the Attachment
Controller
Hinge unit slot
Align the 2 mark on the end of
the hinge unit with the 8 mark
next to the hinge unit slot.
[RELEASE] button