Magnum Energy MP Extension Box (MPX Series) User Manual
Page 56
3.0 Installation
© 2011 Magnum Energy, Inc.
52
3.3 Installation Checklist
After all electrical connections from the MP enclosure to the inverters, batteries, AC source, and sub-
panel have been completed, refer to the installation checklist in Section 3.13 of your MP Enclosure
Owner’s Manual (PN: 64-0028) to confi rm proper installation.
3.4 Functional Test
Once you confi rm that the system has been installed properly, you are ready to perform a functional
test. Refer to the functional test procedure in Section 3.14 of your MP Enclosure Owner’s Manual.
WARNING: During the functional test – because the front cover has been removed —
you are exposed to potential dangerous voltages and shock hazards inside the MP en-
closure that may cause damage, injury, or death. If you do not have experience working
with AC and DC voltage circuits, do not attempt this test – use an experienced electrical
installer.
CAUTION:
During the functional test, if any step cannot be verifi ed or is incorrect, stop
and recheck/correct the connections before proceeding to the next step.
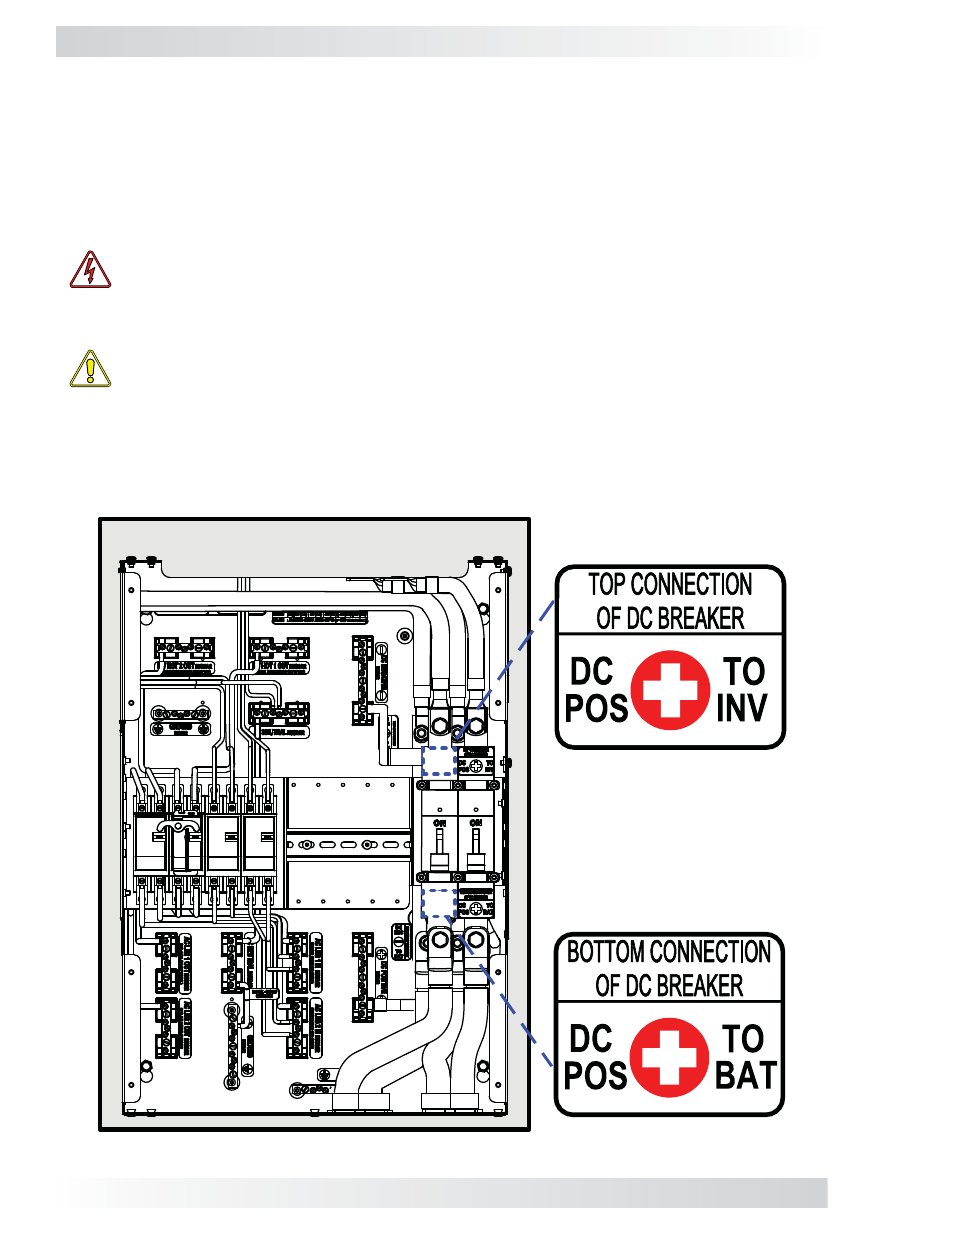
Figure 3-23, Attaching the Interior DC Labels
3.5 Attaching Labels and Covers
The MPX kit has labels for the DC breaker’s positive cable connections (see Figure 2-2). The “Top
Connection of DC Breaker” label affi xes to the top of the new DC breaker. The “Bottom Connection
of DC Breaker” label affi xes to the bottom of the new DC breaker. Refer to Figure 3-23 for proper
placement of both labels.