Yaskawa DriveWizard Plus User Manual
Page 31
31
3) Select the drive to connect to and click “OK”.
DriveWizard Plus will begin connecting to the drive. The drive is online once connection is
complete.
An error message may appear regardless if DriveWizard Plus is connected to a drive or not.
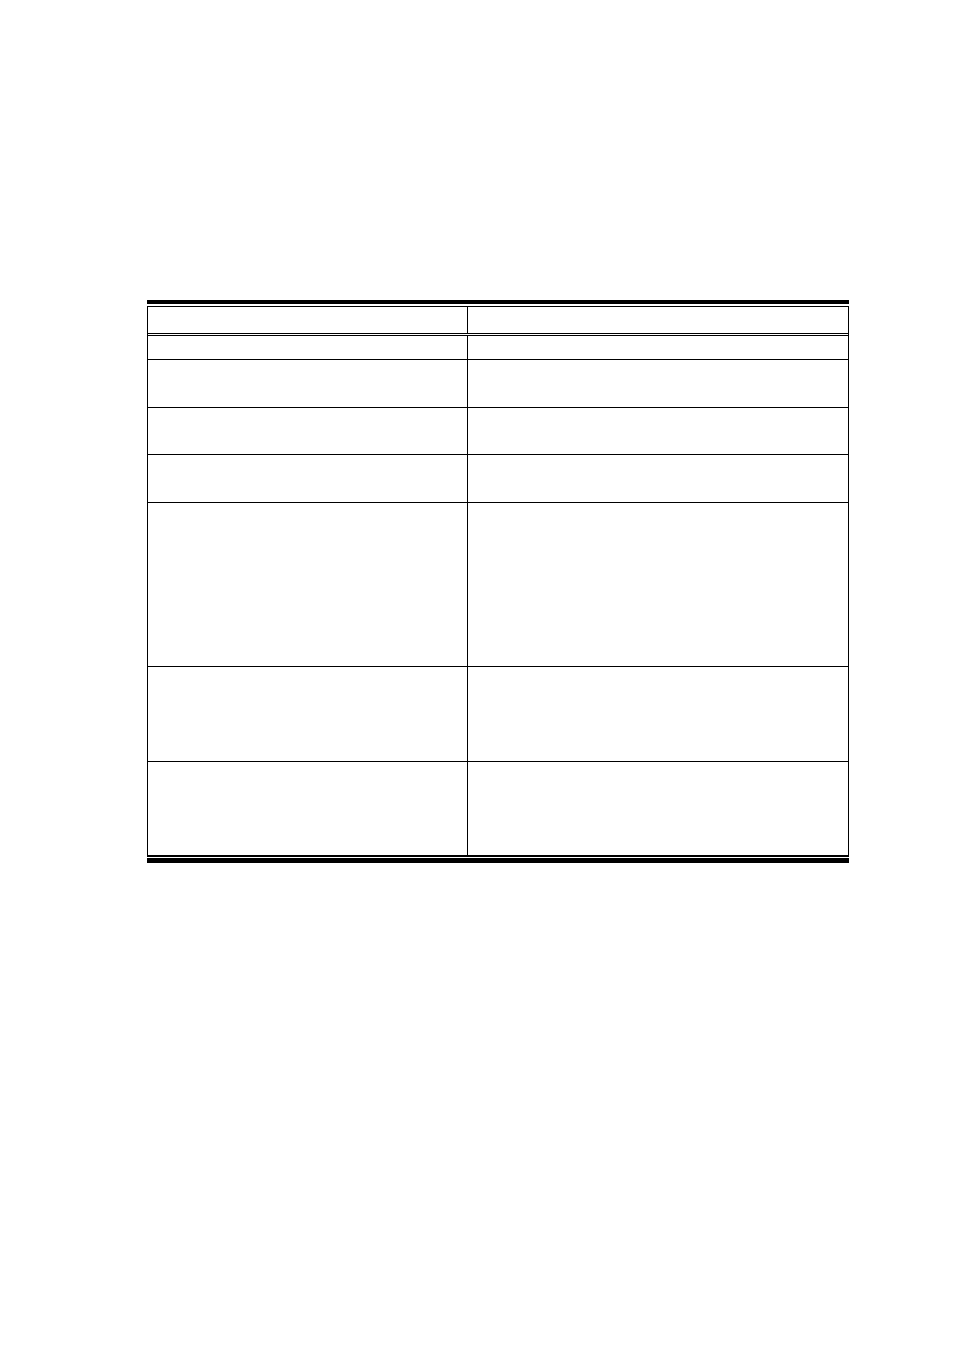
Refer to the check list in the table below if an error occurs.
Check Comments
Is the power on?
Has the correct communication port been
selected?
Is the CPU number correct?
Make sure the CPU number connected to the
controller is set correctly.
Is the number of node restarts set to 0?
The number of node restarts should be set greater
than 1.
Regardless of how the drives are
configured, is the number of drives properly
displayed?
Increase the number of node addresses.
If it is not possible to increase the number of
addresses, take the following steps:
• Delete the configuration set for the drive axes.
Note that this will clear parameter values that may
have been set for axis configuration.
•Set up the drives again for DriveWizard Plus.
Is the wiring for MECHATROLINK-II
correct?
Check the MECHATROLINK-II wiring.
• Wire the MECHATROLINK-II communication cable
correctly.
• Connect a terminator correctly.
Is there a problem receiving
MECHATROLINK-II data due to noise?
• Take steps to reduce noise.
This might include changing the MEHCATROLINK-II
communication cable or FG wiring, or using a ferrite
core for the communication cable correctly.
NOTE: If DriveWizard Plus still does not properly display the drives that are connected after
going through the check list above, then try the following:
・
Make sure the drive’s parameters for serial communications and the SVB module setting
match.
・
If any changes have been made to communication-related parameters, then power to the
drive needs to be cycled to enable those changes. Note that the LED display on the drive
needs to go out completely when shutting off the power.