12 recommissioning the inverter – SMA STP 15000TL Service Manual User Manual
Page 38
12 Recommissioning the Inverter
If you have disconnected the inverter from all voltage sources (e.g. for configuration purposes) and
want to recommission it, proceed as follows.
Requirements:
☐ The inverter must be correctly mounted.
☐ The circuit breaker must be correctly rated.
Procedure:
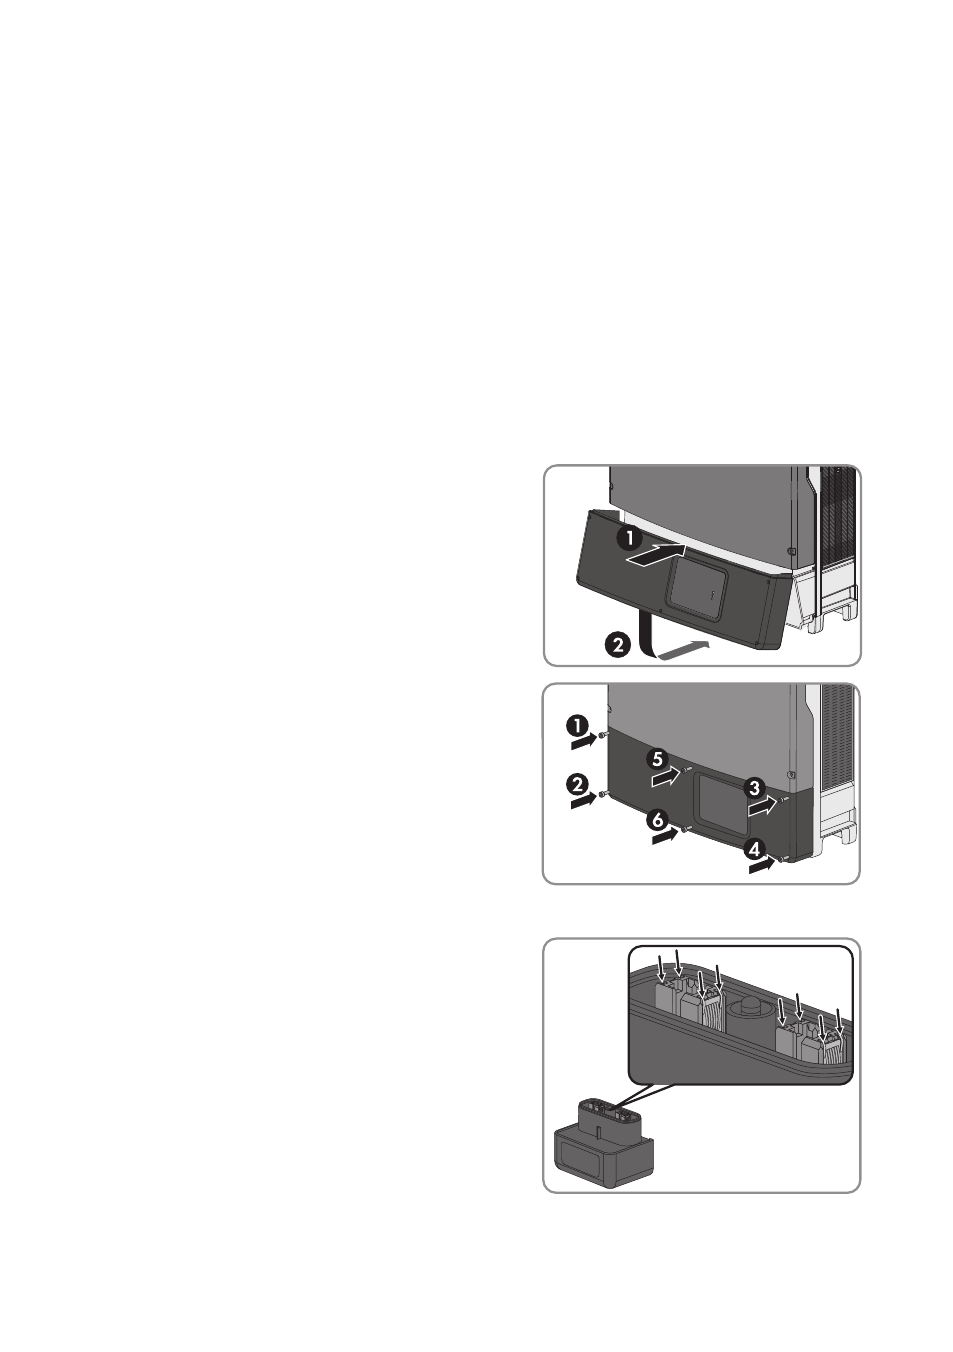
1. Connect the DC connectors to the inverter.
☑ The DC connectors snap into place.
2. Seal all unused DC inputs using the DC connectors with sealing plugs.
3. Ensure that all DC connectors are securely in place.
4. Insert the lower enclosure lid from above and
fold it down. The screws must protrude from the
lower enclosure lid.
5. Tighten all six screws with an Allen key (AF 3) in
the order 1 to 6 (torque: 2.0 Nm ± 0.3 Nm). By
tightening the screws in the prescribed order,
you avoid warping the enclosure lid, which
would keep it from sealing correctly.
Useful hint: If the screws fall out of the lower
enclosure lid, insert the long screw into the lower
middle hole and the five short screws into the
other holes.
6. If the ESS is used, check it for signs of wear:
• Check the metal mounting tabs inside the
ESS for discoloration or damage.
If the metal mounting tabs show brown
discoloration or are damaged, order a new
ESS from SMA Solar Technology AG and
have the ESS replaced.
If the metal mounting tabs show no brown
discoloration or damage, the ESS is not
worn and can still be used.
7. Securely plug in the ESS. The ESS must be aligned parallel to and flush with the enclosure.
12 Recommissioning the Inverter
SMA Solar Technology AG
Service Manual
STP15-17TL-10-SG-en-10
38