Grass Valley iTX Master Control v.2.3 User Manual
Page 18
iTX-MC User Guide
2-8
iTX-MC system configuration
Configuring the Master Control Plugin in the iTX
Desktop
The iTX Desktop’s Master Control Plugin allows you to add master control primary and/or
secondary events to a schedule. See
“iTX Master Control events” on page 1-6
for a
description of master control events.
N
OTE
A valid iTX Master Control license must be installed on the iTX system for the Master
Control plugin to be visible and operational. Also, the Master Control Plugin must be
configured on a per channel basis.
To configure the Master Control plugin:
1.
Open the iTX Desktop’s Engineering View and select the Channel Config tab.
2.
Select the channel and then the Plugins tab.
3.
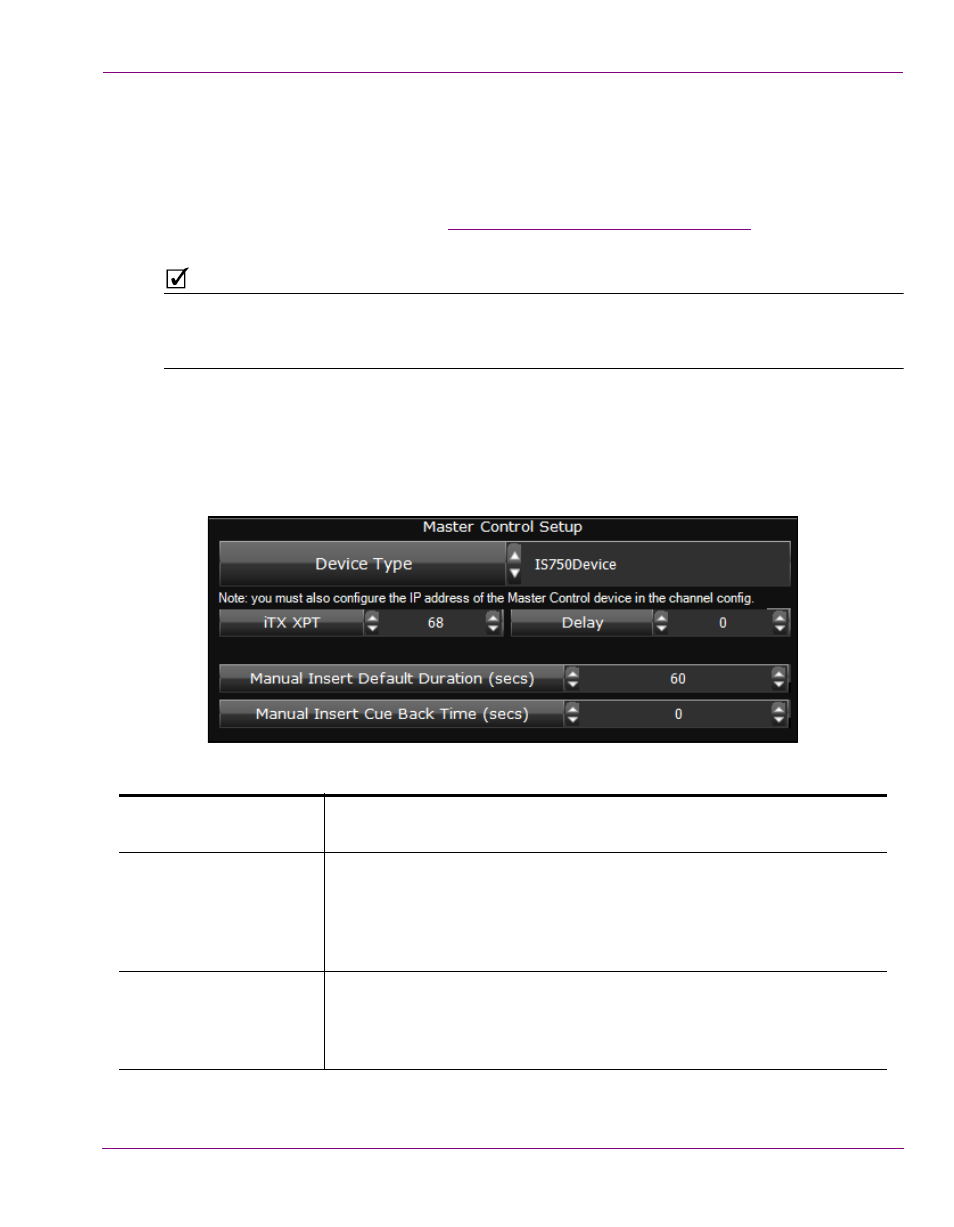
Select the Master Control tab and the following Master Control Setup settings
become available.
Figure 2-1. The Master Control Plugin’s configuration settings
Device Type
Defines the type of hardware that the Master Control plugin will connect
to for this channel. Choose IS750Device.
iTX XPT
Specifies the crosspoint on the Imagestore device that is selected when
the next item in the schedule is not a master control event. Normally, you
should specify the crosspoint that has the iTX Pandora video for that
channel. It is used only to put Pandora back in circuit when a primary
master control event ends. The default is 0.
Delay
Specify the number of frames (positive or negative) by which to delay
commands sent to the IS-750. This compensates for latency in the
system and ensures that transitions on the mixer are frame accurate. The
default is 0.