Step 4: connect to network, Step 5: access the camera live view – ACTi I93 User Manual
Page 32
Hardware Manual
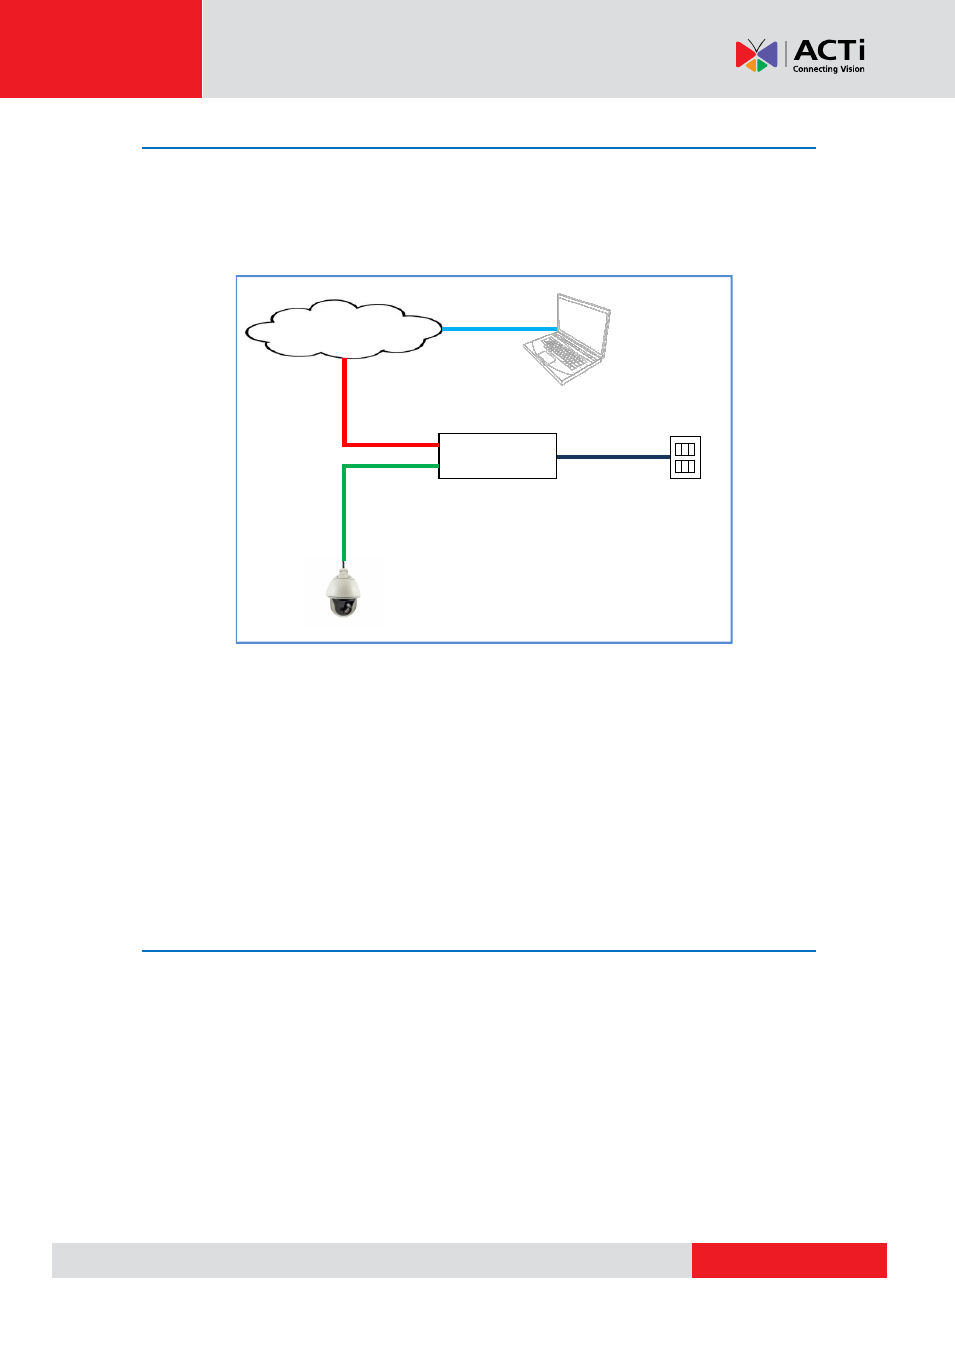
Step 4: Connect to Network
Connect the other end of the network cable to a switch or injector. Then, connect the switch or
injector to a network, PC, and a power source. See Power-over-Ethernet (PoE) connection
example below.
Network
AC Power
Source
PoE Injector
Power Cable
Ethernet Cable
Ethernet Cable
(Data + Power)
Ethernet Cable
(Data)
Camera
The Power LED of the camera will flash a few times and turn off as the camera mechanical
components initialize. Wait for the initialization to complete. Once complete, the Power LED will
light red to indicate the camera works normally.
NOTE:
Use only the supplied power adapter and power cord that came with the camera or the
optional High PoE Injector available for purchase. Using other accessories not approved by the
manufacturer may cause damage to the equipment.
Step 5: Access the Camera Live View
on page 47 for more information on how to access the Live View of
the camera.
- I94 I95 I96 I910 KCM-8211 I96 2 MP Extreme WDR Day & Night HPoE Outdoor Speed Dome PTZ IP Camera with 30x Lens I915 2MP Outdoor PTZ Network Dome Camera with Night Vision & Heater B928 5MP Outdoor PTZ Network Speed Dome Camera with Night Vision B915 3MP Outdoor PTZ Network Speed Dome Camera with Night Vision