Erasing songs, Protecting songs, Erasing songs protecting songs – Teac DP-03 User Manual
Page 37: 5 – song management
TASCAM DP-03
37
NOTE
An SD card formatted by this unit can only have one
partition, so it is not usually possible to copy to a different
partition. However, this unit can use an SD card that has
been created with multiple partitions on another TASCAM
DP series unit, and copying between partitions is possible
in this case.
7 Press the F4 (
EXEC
) button to copy the file(s) and
return to the
SONG
screen.
NOTE
To cancel song copying, press the F1 (
BACK
) button
instead of the F4 (
EXEC
) button.
8. Press the HOME button to return to the Home
Screen.
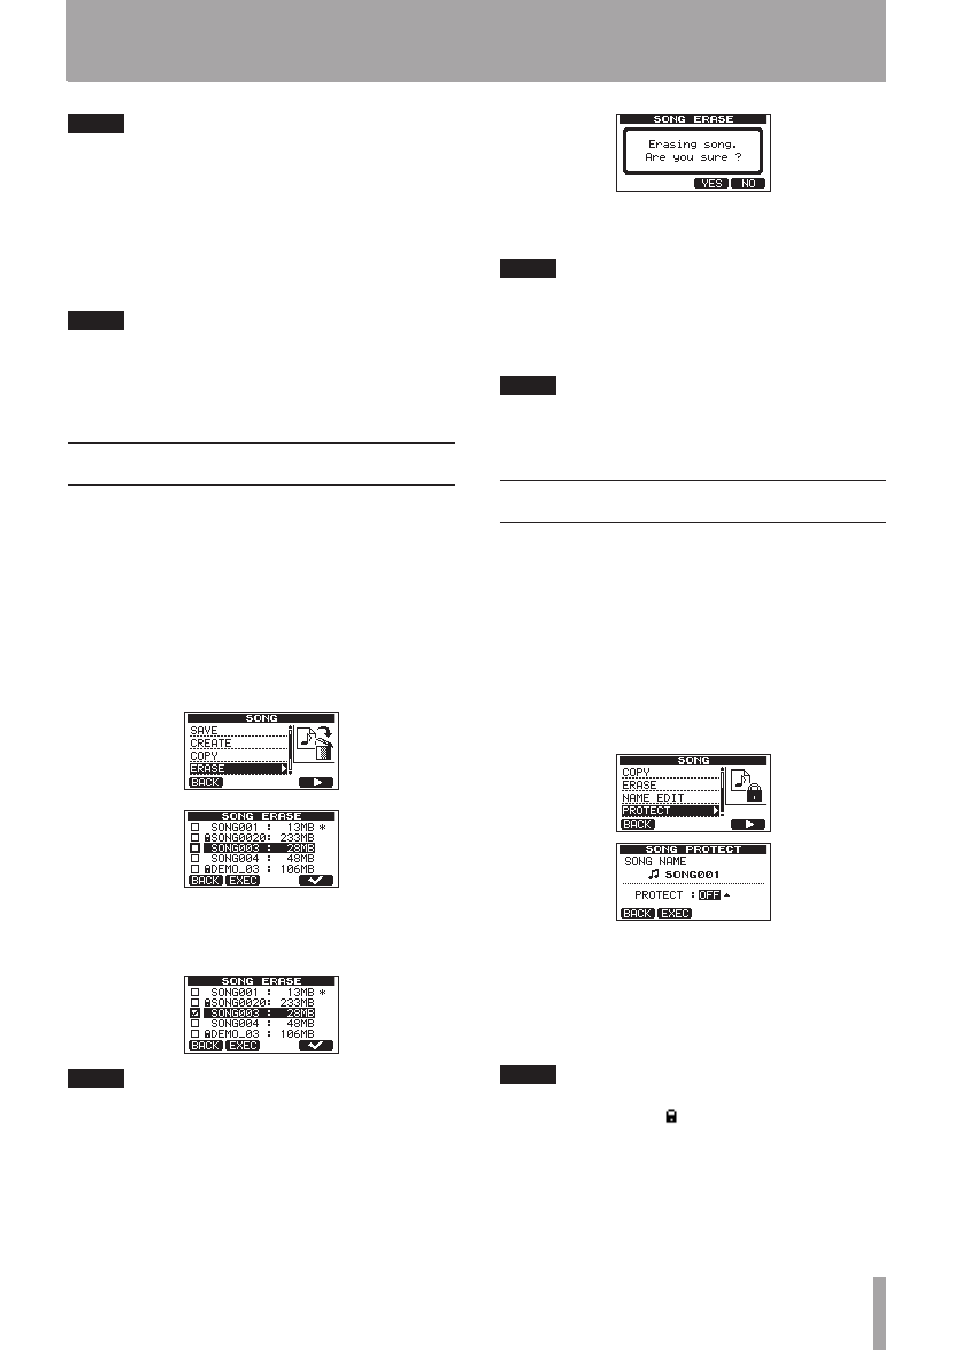
Erasing songs
You can erase a single song or multiple songs at once. You
might want to erase unneeded songs if the SD card starts
to run out of open space.
1 When the recorder is stopped, press the MENU
button to open the
MENU
screen.
2 Use the DATA wheel to select
SONG
, and press the
F4 (¥) button to open the
SONG
screen.
3 Use the DATA wheel to select
ERASE
, and press the
F4 (¥) button to open the
SONG ERASE
screen,
which shows a list of songs.
4 Use the DATA wheel to select a song that you want
to erase and press the F4 (
✔
) button.
A check appears in the checkbox next to the song.
NOTE
To remove the check from the checkbox, press the F4 (
✔
)
while the song is selected.
5 To erase multiple songs, repeat step 4.
6 After selecting all songs that you want to erase,
press the F2 (
EXEC
) button. A confirmation screen
opens.
7 Press the F3 (
YES
) button.
After the songs are erased, the
SONG
screen reopens.
NOTE
To cancel erasing a song, press the F4 (
NO
) button instead
of F3 (
YES
) button.
8 Press the HOME button to return to the Home
Screen.
NOTE
Every MTR partition must always have at least one song,
so if you erase all the songs on a partition, a new song is
created automatically.
Protecting songs
If you protect a song, editing, recording and erasing of
that song is prevented.
1 Load the song that you want to protect.
2 When the recorder is stopped, press the MENU
button to open the
MENU
screen.
3 Use the DATA wheel to select
SONG
, and press the
F4 (¥) button to open the
SONG
screen.
4 Use the DATA wheel to select
PROTECT
, and press
the F4 (¥) button to open the
SONG PROTECT
screen, where you can turn protection ON and OFF.
5 Use the DATA wheel to set
PROTECT
to
ON
, and
press the F2 (
EXEC
) button.
After
PROTECT
is turned
ON
, the
SONG
screen
reopens.
6 Press the HOME button to return to the Home
Screen.
NOTE
In the song list used to copy, erase and conduct other
•
functions, a lock icon ( ) appears next to protected
songs.
If you try to execute a prohibited operation (edit,
•
record, erase) on a protected song, a “
Song
Protected
” message appears and the operation is
prevented.
To remove protection from a song, follow the above
•
procedures but set
PROTECT
to
OFF
in step 4.
5 – Song Management