Audio recording, Live 9 lite quick start guide – Teac Live 9 Lite User Manual
Page 7
Live 9 Lite Quick Start Guide
TASCAM
7
10.
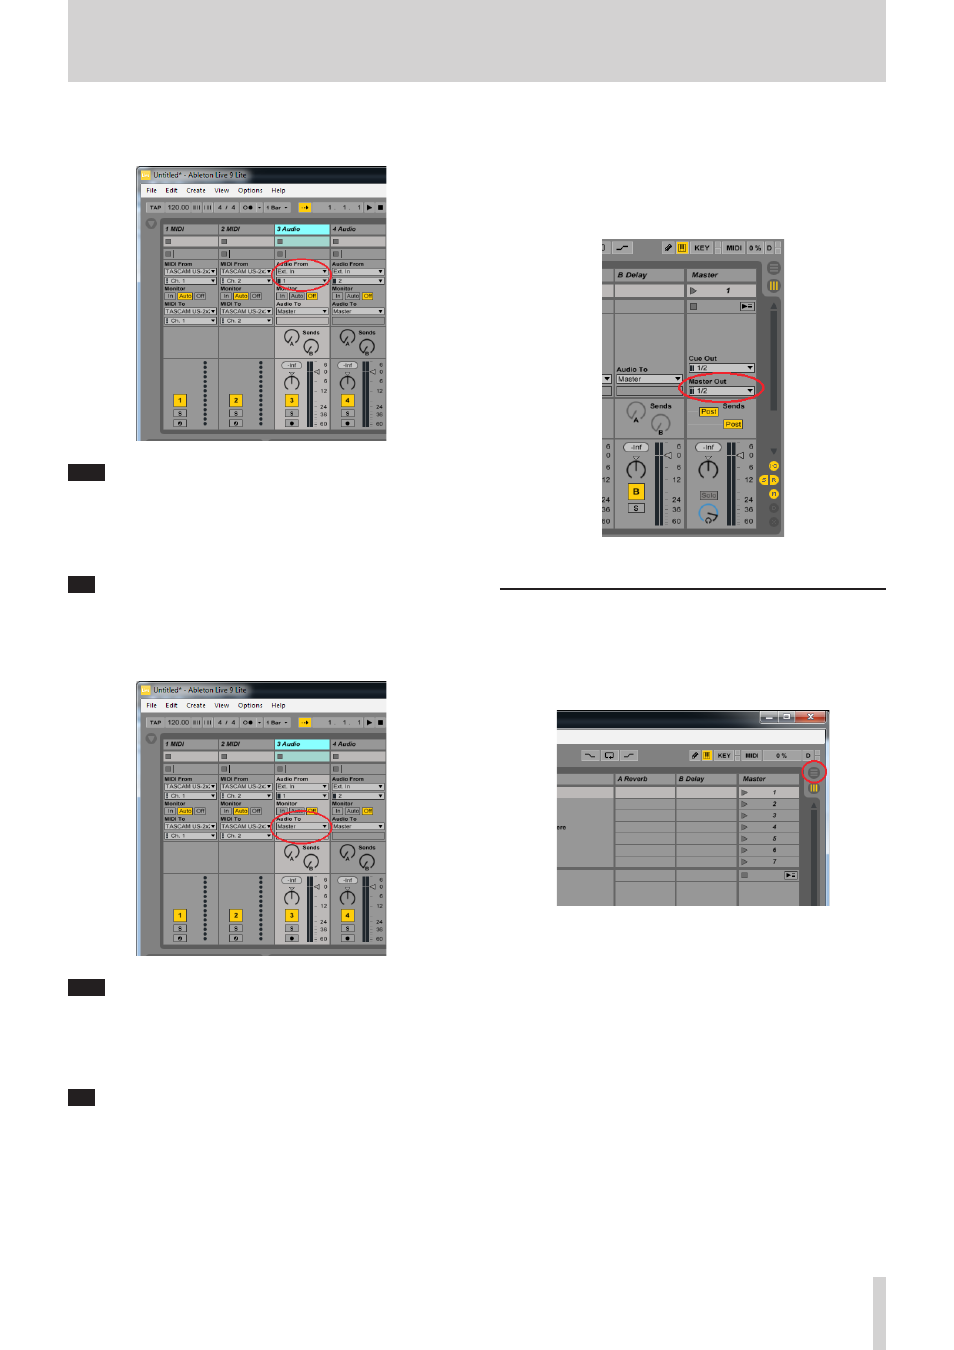
From the pull-down menu just under “Audio From” of the “3 Audio”
track, select “Ext. In”.
Note
“Ext. In” means “the input of an external device”. In this case, as the
US-2x2 has been set in 2. and 3. of this chapter, it means “the input
of the US-2x2”.
Then select “1” from the pull-down menu under it. Signals input
from the input terminal 1 of the US-2x2 will be input into the track.
Tip
If you select “2”, signals input from the input terminal 2 of the US-
2x2 will be input into the track.
11.
Next, set the audio output port. From the pull-down menu just
under “Audio To” of the “3 Audio” track, select “Master”.
Note
To listen sounds of multiple tracks in stereo, it is necessary to mix
the output sounds of the multiple tracks and then output them to
the audio interface. Select “Master” as the output port in each track
to mix output signals of the multiple tracks into a stereo sound in
the master bus.
Tip
If you select “Ext. Out” from the pull-down menu just under “Audio
To”, output signals of the track will be directly output to the US-
2x2 without going through the master bus. If the connected audio
interface has 4 or more channels of output, you can select an
output destination from the pull-down menu under it.
12.
To use another track simultaneously, follow steps 9 to 11 to
configure the track.
13.
Set the output destination of the “Master” track to send stereo
signals mixed in the master bus to the US-2x2.
On the “Master” track on the rightmost side, select “1/2” from the
pull-down menu just under “Master Out”.
14.
Now everything is ready. Let's proceed to recording.
Audio recording
1.
Switch the display of Live 9 Lite so that you can see recording
conditions.
Click the “circle with 3 horizontal lines” mark (circled in red) in the
top-right.
The screen switches from the mixer view to the timeline view.