Live 9 lite quick start guide – Teac Live 9 Lite User Manual
Page 5
Live 9 Lite Quick Start Guide
TASCAM
5
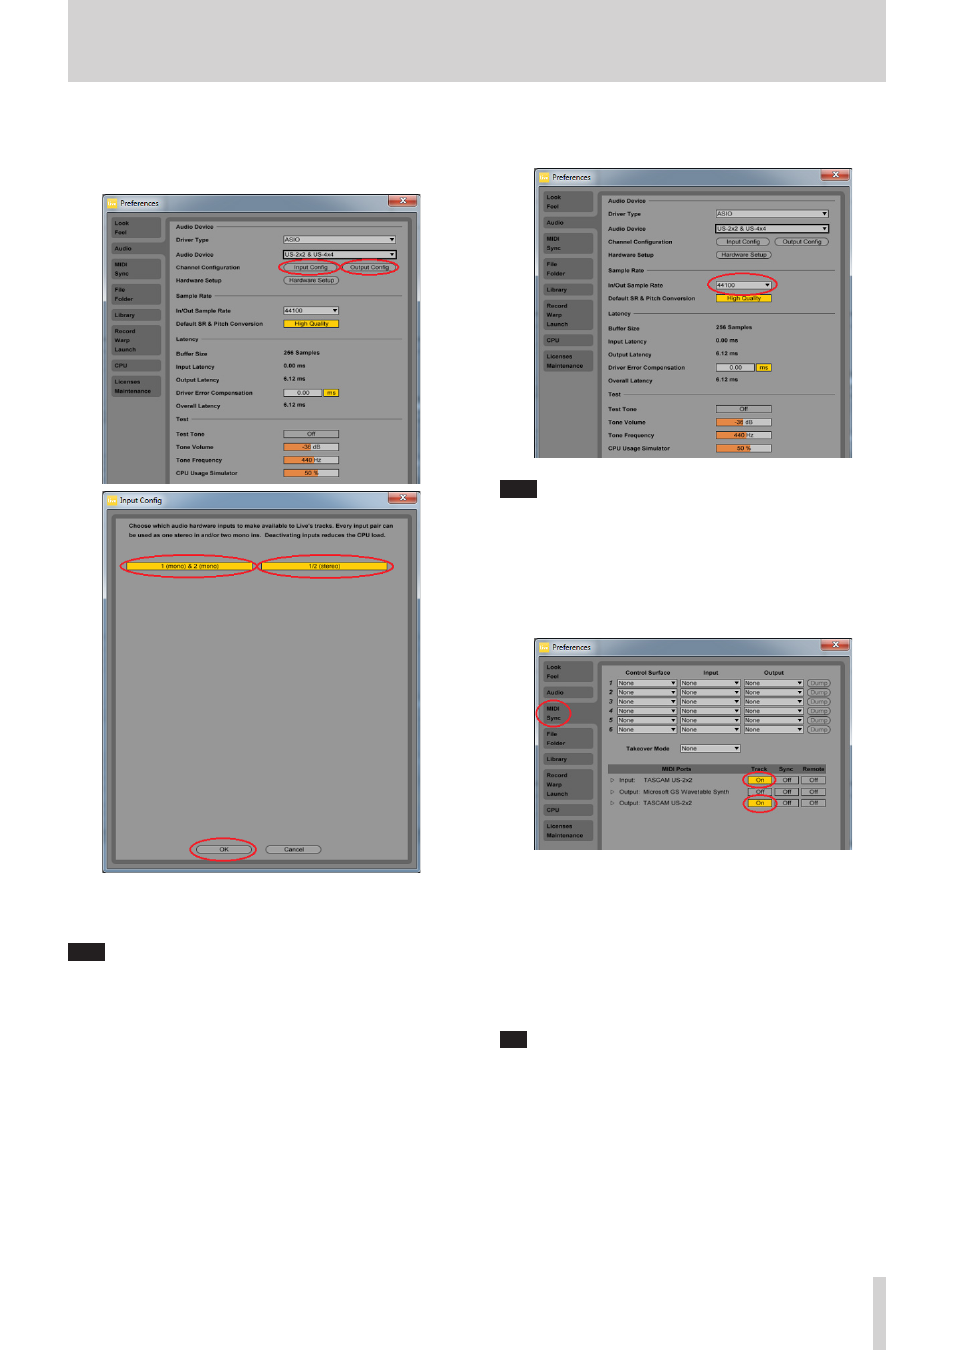
3.
Configure the input and output.
Click “Input Config”, click “1(mono) & 2(mono)” and “1/2(stereo)” on
the displayed input configuration screen so that both of them are
selected, and press the “OK” button.
Similarly, click “Output Config”, click “1(mono) & 2(mono)” and
“1/2(stereo)” on the displayed output configuration screen so that
both of them are selected, and press the “OK” button.
Note
The numbers of channels displayed on the input and output
configuration screens vary depending on your audio interface.
4.
Set a sampling rate.
Select the sampling rate to be used from the pull-down menu.
Note
Selectable sampling rates vary depending the connected audio
interface.
5.
Next, configure the MIDI input and output.
Click “MIDI/Sync” on the left side of the “Preferences” screen to
display settings of MIDI on the right side.
The input and output of your audio interface (US-2x2 in this case)
are displayed in “MIDI Ports”. Click each “Track” field to turn on.
6.
The device configuration has been completed. Close the
“Preferences” screen.
Next, create a Live Set (work project for recording) for recording
sounds.
Live 9 Lite opens a Live Set with 2 MIDI tracks and 2 audio tracks by
default, but you can create a new Live Set which is suited for the
piece of music you are going to compose. Create a new Live Set
composed of 4 audio tracks and 2 MIDI tracks here.
Tip
Use audio tracks when recording the audio input of the interface
and use MIDI tracks when using a MIDI keyboard or a MIDI sound
source connected to MIDI IN.