How to record, Live 9 lite quick start guide – Teac Live 9 Lite User Manual
Page 4
Live 9 Lite Quick Start Guide
4
TASCAM
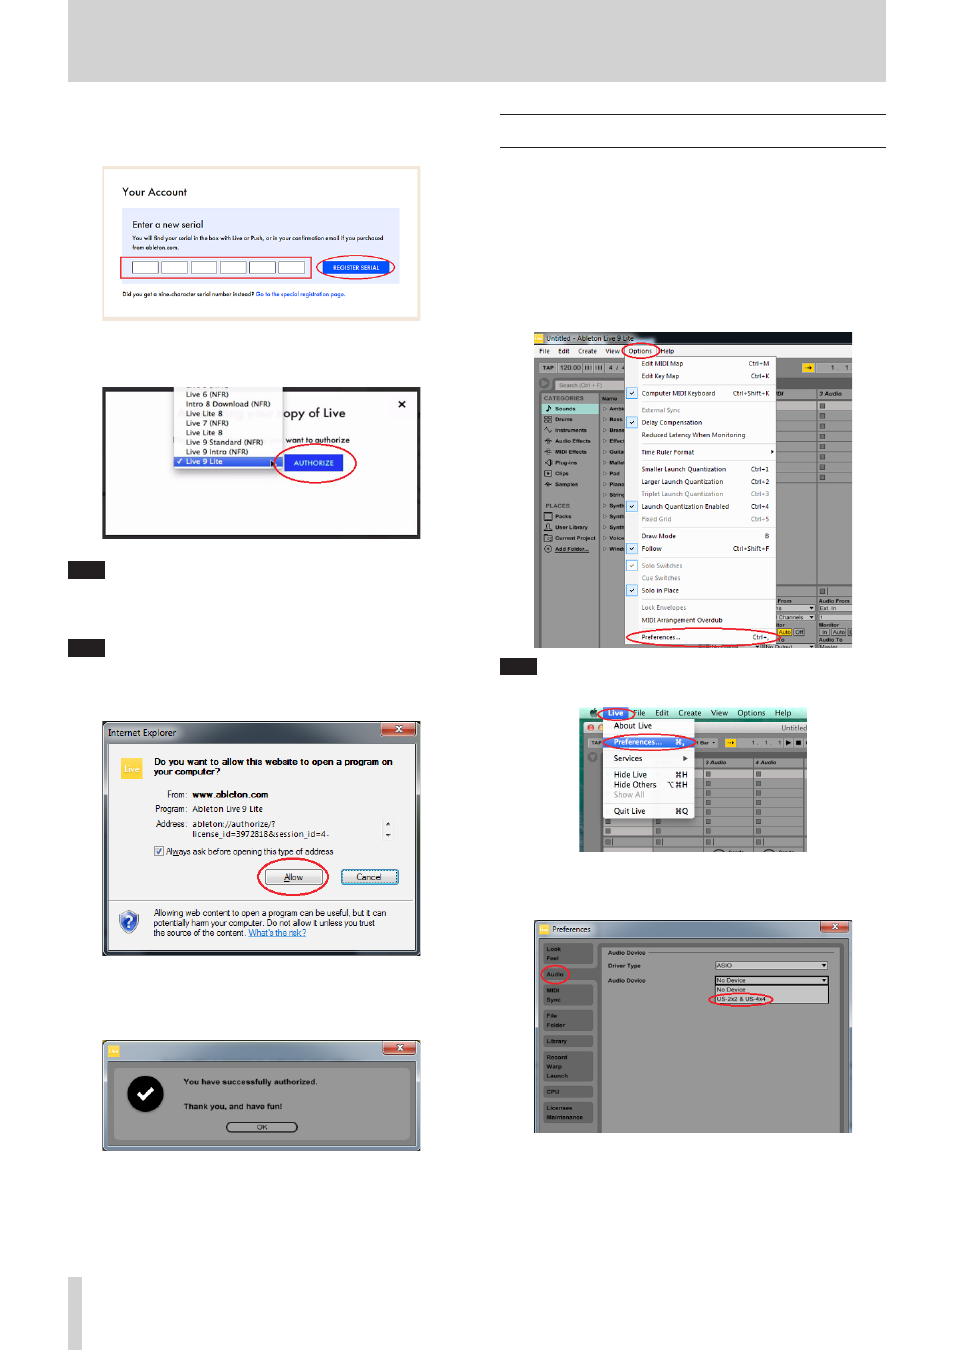
4.
Enter the serial number described on the license card included with
the TASCAM audio interface product and click “REGISTER SERIAL”.
5.
A screen for selecting a product to be authorized is displayed.
Select “Live 9 Lite” from the pull-down menu and click “AUTHORIZE”.
Note
Authorization may not be possible depending on the security
environment of your computer. In this case, stop the security
software and then try again.
Note
On Windows, if the security warning “Do you want to view only the
webpage content that was delivered securely?” is displayed, click
the “No” button and then “Allow” on the subsequent screen.
6.
When the following screen is displayed, the authorization is
completed. Click “OK” to finish the authorization.
How to record
Settings of Live 9 Lite are almost the same on Windows and Mac. The
following images are examples of screens where a US-2x2 is used on
Windows 7.
The following describes procedures until recording, however, for
detailed functions and operations, refer to the manual that is displayed
by selecting the “Read the Live Manual” of the “Help” menu.
Preparation (enabling the device)
1.
Launch Live 9 Lite. Select “Option” q “Preferences...” from the pull-
down menu.
Note
On Mac, select “Live” q “Preferences...”.
2.
Select “Audio” on the left side and then select your audio interface
(“US-2x2 & US-4x4” in this case) from the “Audio Device” pull-down
menu on the right side.