Sloan 150 ES-SM Optima ES-SM Concealed Surface Mount Flushometer User Manual
Page 6
6
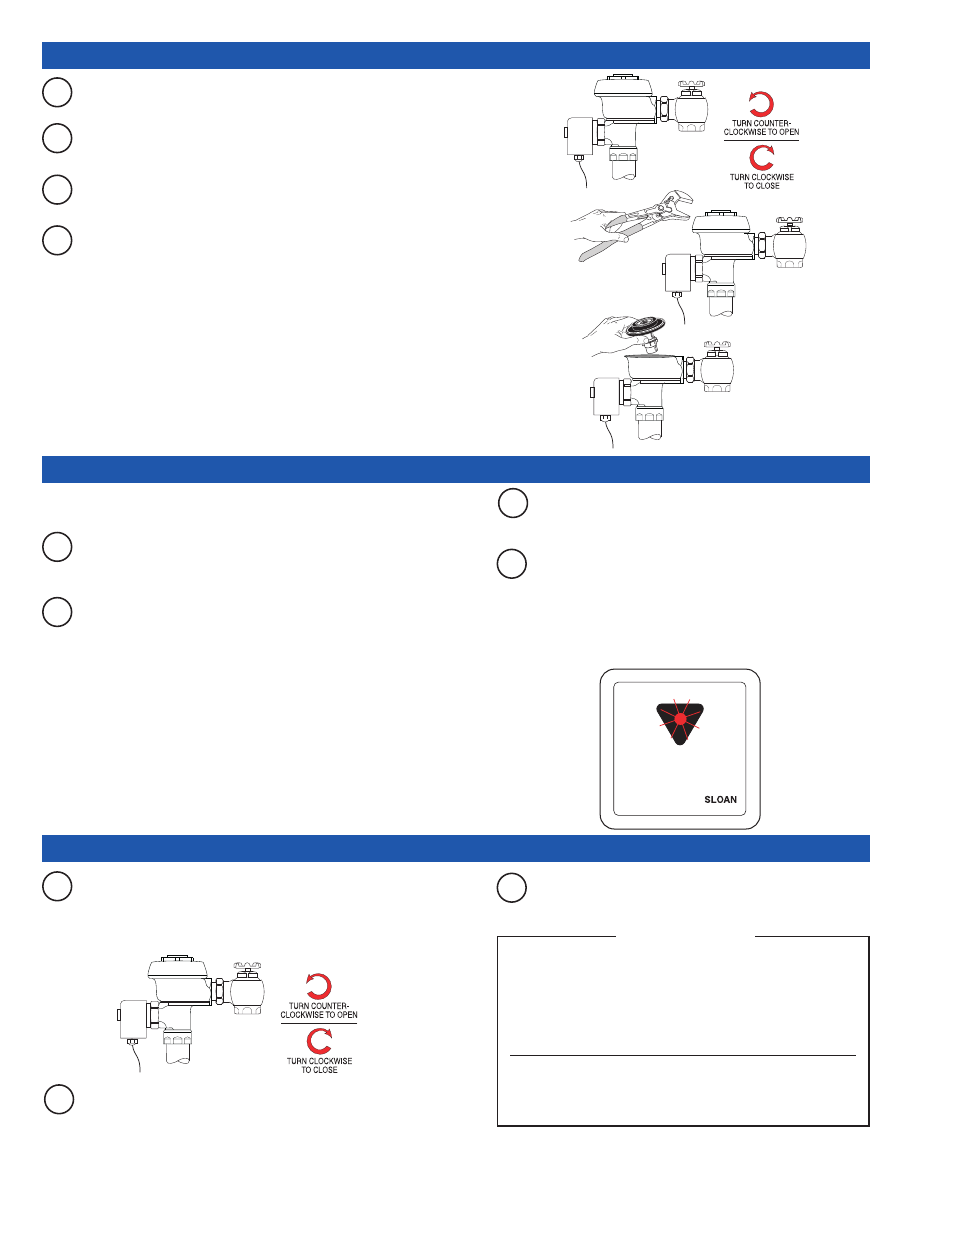
C
Open Control Stop. Turn on water supply to flush line of any debris or
sediment.
B
Remove Flushometer Cover and lift out Inside Parts Assembly. Install
Flushometer Cover wrench tight.
D
Shut off Control Stop, remove Cover and reinstall Inside Parts
Assembly. Install Flushometer Cover wrench tight. Do Not open Control
Stop until Step 10.
A
Make sure Control Stop is CLOSED.
A
Turn Power ON. The self adaptive sensor automatically adapts to the
surrounding environment when 24 volt supply is activated. No manual
adjustments are required.
Note: It is recommended that all electronic connections be tested with the water
supply OFF.
B
Start-up mode will take approximately five (5) minutes to complete its
cycle and is important that no non-permanent target is present at this
time. A continuous red light visible in sensor window indicates sensor is
in the start-up mode. If the red light is flashing, this indicates that the
sensor is picking up a target. Unless this target is a permanent fixture
in the sensor’s environment (i.e., a wall or stall door), it must be
removed from the view of the sensor. If this target is permanent, the
sensor will adapt itself around this target. In this case, the start-up
mode may take up to ten (10) minutes. When the start-up cycle is
completed, no light is visible in sensor window.
Note: If 24 volt power supply is interrupted at any time for more than fifteen (15)
seconds, the start-up mode automatically repeats itself when power is restored.
C
The self-adaptive sensor is equipped with the sentinel flush
feature (automatically flushes every twenty-four (24) hours
after last use).
D
When an object is detected, a steady flashing red light will
appear in the sensor window. After approximately eight (8) to
ten (10) seconds, the light will turn off indicating sensor is
armed and ready to activate solenoid when the object leaves
the detection area. The solenoid will be activated within two (2)
to four (4) seconds after non-detection.
A
Adjust Control Stop to meet the flow rate required for proper cleansing
of the fixture. Open Control Stop COUNTERCLOCKWISE 1/2 turn from
the closed position.
B
Activate Flushometer by placing hand in front of OPTIMA Sensor Lens
for ten (10) seconds and then moving it away.
C
Adjust Control Stop after each flush until the rate of flow
delivered properly cleanses the fixture.
The Royal
®
and Sloan
®
Flushometer is engineered for
quiet operation. Excessive water flow creates noise,
while too little water flow may not satisfy the needs of the
fixture. Proper adjustment is made when plumbing fixture
is cleansed after each flush without splashing water out
from the lip AND a quiet flushing cycle is achieved.
Never open Control Stop to where the flow from the
valve exceeds the flow capability of the fixture. In the
event of a valve failure, the fixture must be able to
accommodate a continuous flow from the valve.
!!! IMPORTANT !!!
7 - FLUSH OUT SUPPLY LINE
8 - POWER, START-UP MODE, AND ACTIVATION/DETECTION
9 - TURN WATER ON AND ADJUST CONTROL STOP