Commercial recorders (e-series), Regular backup, Scheduled backup – OpenEye Gen6 RADIUS-PC User Manual
Page 52
53
Commercial Recorders (E-Series)
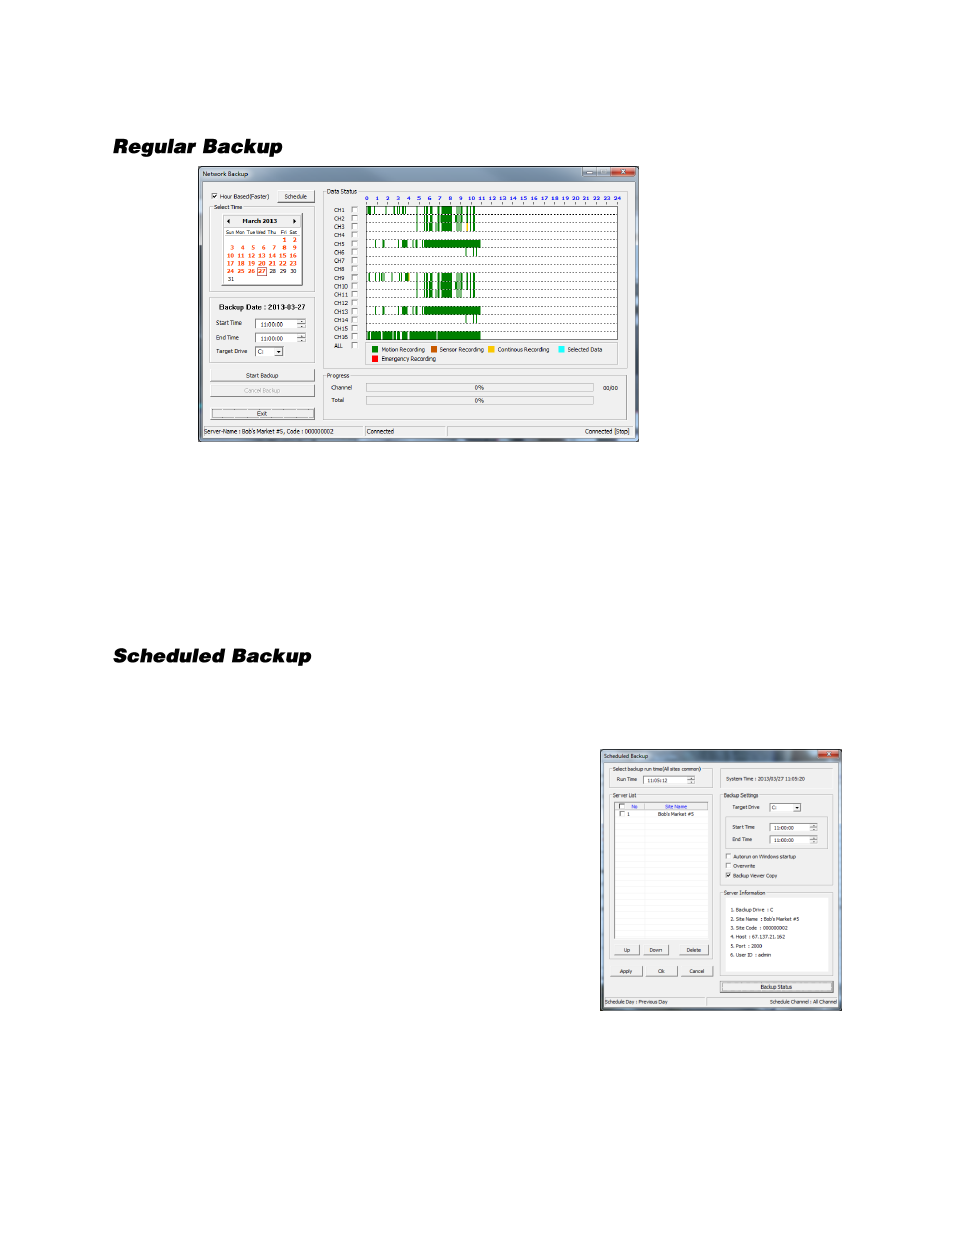
1.
Open the
Network Backup
window. Right-click your desired recorder on the
Server List
and then
click
Network Backup
.
2.
Click on a date on the calendar. Browse to preceding months/years using the arrows.
3.
Type a
Start Time
and an
End Time
or use the arrows to define the time.
4.
Select a backup location from the
Target Drive
list.
5.
Select the check boxes next to the channels to include in the backup or select
All
.
6.
Click
Start Backup
. The
Progress
section will display backup progress.
The Scheduled Backup screen is used for performing bulk backup of video recorded by all cameras for
a selected period, on a regular scheduled basis (1-24 hours).
1.
Open the
Network Backup
window. Right-click your
desired recorder on the
Server List
and then click
Network Backup
.
2.
Click
Schedule
.
3.
Select the recorders that you want to create backup
schedules for.
4.
Select a backup location from the
Target Drive
list.
5.
Set the
Run Time
to define what time of day the system
will perform the backup.
6.
Set the
Start Time
and the
End Time
to define the hours
of each day to include in the backup.
7.
To run a scheduled backup each time the system is
turned on, select
Autorun on Windows startup
.
8.
Click
Apply
to save changes.