3 adjustment of water regulating valve setting, Adjustment of water regulating valve setting – MovinCool Office Pro W20 Service Manual User Manual
Page 25
Operation Section
25
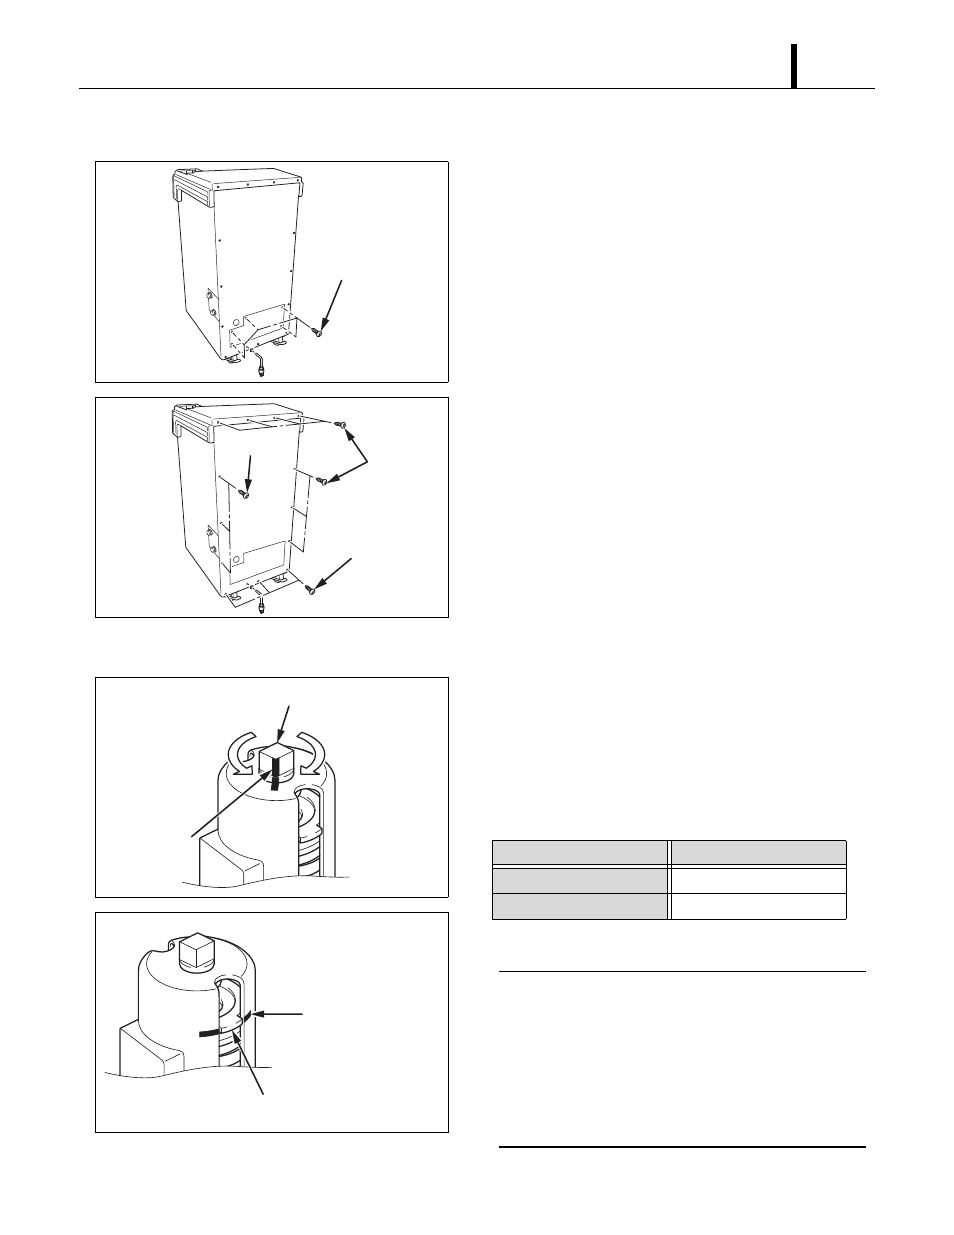
5.3 Adjustment of Water Regulating Valve Setting
1) Stop the unit and unplug the power cord. Then
shut off the water supply.
2) Remove five (5) screws from the service panel on
the rear side of the unit.
3) Remove thirteen (13) screws from the rear panel.
4) Check the valve setting guide table on the inside
panel of the unit to confirm the current valve
setting. If the table is blank, it is the first time
adjustment. If the table shows the previous value
setting, the current setting must be changed back
to the original default setting prior to making any
adjustment.
5) Make sure the adjusting plate is aligned with the
default marking line on the housing. If it is not
aligned, rotate the adjusting bolt with a wrench until
it is aligned. At this position the water regulating
valve is returned to the original default setting.
6) Rotate the adjusting bolt with a wrench to adjust
the valve temperature setting according to the
“Valve Setting Guide Table” on page 26. The
painted line on adjusting bolt and housing is for
rotational reference to complete one rotation
(360 °).
< NOTE >
The default marking line on the housing is for
adjustment reference. The painted line on
adjusting bolt and housing is for rotational
reference. Each completed rotation of the
adjusting bolt is resulting in about 0.04 inch (1
mm) displacement of the adjusting plate.
ILL00147-00
Screws (5)
ILL00148-00
Screws (7)
Screws (3)
Screws (3)
ILL00179-00
Lower
Higher
Painted line
Adjusting Bolt
ILL00185-00
Default Marking Line
Adjusting Plate
Direction of Rotation
Temperature Setting
Clockwise
Lower
Counterclockwise
Higher