Using the web interface – Measurement Computing WEB-TEMP User Manual
Page 12
WEB-TEMP User's Guide
Installing the WEB-TEMP
12
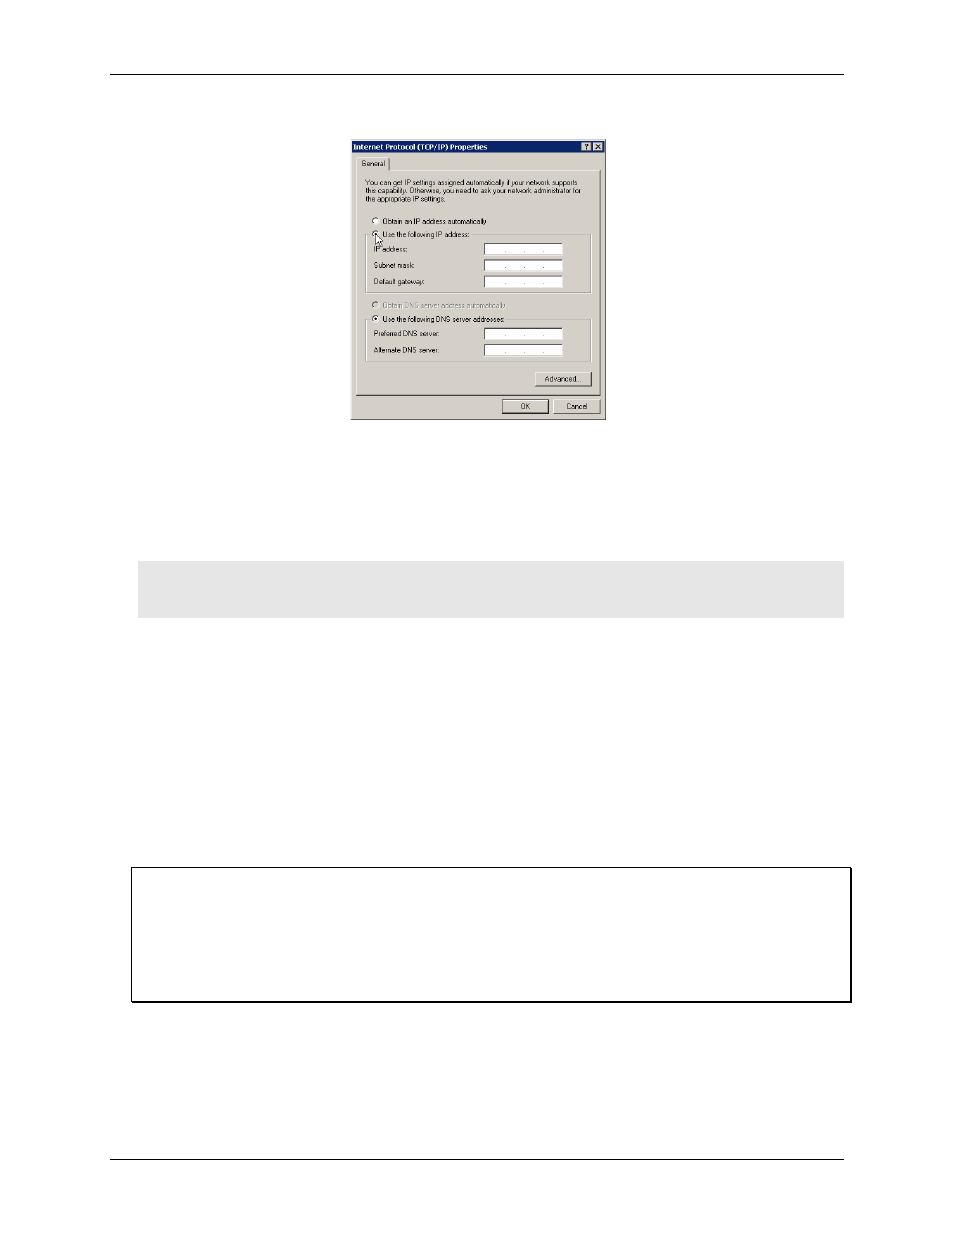
3. Select
Internet Protocol (TCP/IP)
and click
Properties
.
4. Select
Use the following IP address
option and enter the following:
o IP address: Enter 192.168.0.102. Note that the last three digits of this number can be any number
between 11 and 254, inclusive, but must be different from the IP address assigned to the device. The
default IP address set for the WEB-TEMP is 192.168.0.101.
o Subnet mask: Enter 255.255.255.0.
o Default gateway: Enter 192.168.0.1.
Caution! Assigning an arbitrary IP address could result in duplicate IP addresses on the network. This
condition can cause a communication failure that affects both devices. Make sure when
configuring static IP addresses that you set different addresses for each device.
5. Click
OK
.
6. Connect the WEB-TEMP Ethernet port to your Ethernet hub using the supplied cable, or to your computer's
Ethernet port using a CAT-5 or higher crossover cable.
Note
: If you connect to an Ethernet hub, you can use the Ethernet cable shipped with the device. If you
have multiple WEB-TEMP devices, configure each device separately and assign a unique IP address to
each device. You’ll need to run InstaCal to change the IP address from the default 192.168.0.101.
When connected, the
Link/Activity
LED illuminates steady green to indicate that you have established a
valid Ethernet connection, and blinks indicating network traffic. Refer to Figure 11 on page 23 for the
location of the
Link/Activity
LED.
7. Open your browser and enter the URL address that is printed on the device label.
The WEB-TEMP
Measurements
page opens. You can view current measurement data from this page.
Configuring the WEB-TEMP
All hardware options are configurable with InstaCal or the web interface. InstaCal must be used if any of the
network parameters need to be changed, such as the IP address of your device. Configuration settings are stored
in non-volatile memory in EEPROM, and are loaded on power up.
Refer to the sections "Using the web interface" below and "Configuring the WEB-TEMP using InstaCal " on
page 13 for detailed information.
Using the web interface
You can view current measurements and configure hardware options from the device's web interface. The web
interface provides four tabs. Each tab represents an HTML page that is stored on the device.
Measurements
tab (home page) – lists the temperature measurements, digital values, and alarm status read
from each channel on the WEB-TEMP.