Gasboy 1000 Series TopKAT Report Printer User Manual
Page 2
C35854 Rev 7224
Page 2
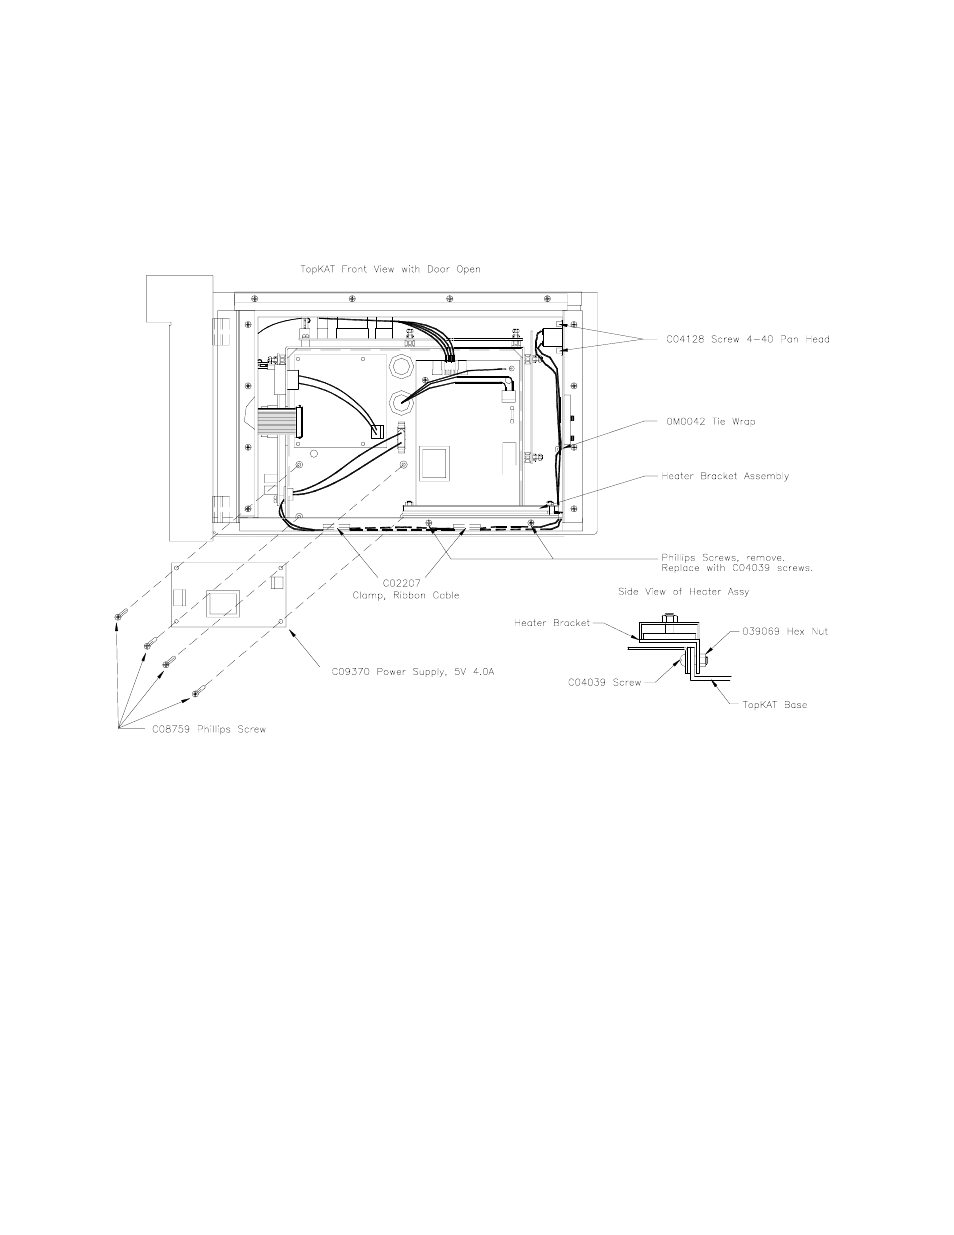
10. Remove the two Phillips screws on the lower right rain gutter and replace with two C04039 screws.
11. Install the Heater Bracket Assy and Thermostat. Use two 039069 hex nuts to secure the bracket to the TopKAT.
Mount the thermostat to the vertical support bracket to the upper right side of the TopKAT and secure with two
C04128 screws. Run the AC power cable through the same bushing as you did with the power supply cable.
Connect one end to the AC input (TB1) of printer supply and the other into the plug located above printer supply.
Apply the C09568 CAUTION HOT decal just to the left of the heater. Use two C02207 clamps to hold the AC wires
down. Secure the AC wiring to the right bracket by threading an 0M0042 tie wrap through the hole on the bracket
(about 4 inches below the thermostat). See the drawing below to aid in this installation.
12. On the TopKAT CPU board, open SW1, switch 3.
13. Turn on the power and check for 5 volts between TP 1(grd) and TP16 (Vcc) on the Printer Controller PCB. Adjust the
supply to 5.05v by turning the potentiometer, located on the upper left corner of the printer power supply. Turn
clockwise to increase voltage and counter-clockwise to decrease the voltage.
14. Reinstall the power supply cover and secure it with the three screws.
15. Refer the TopKAT Operation Manual to adjust contrast and load paper.
16. Close and lock the front and rear doors of the unit.