Gasboy 032867 User Manual
Page 5
MDE-4449B Seal Installation Kits 032867, 054024, 054026, and M08781K001 Installation Instructions · July 2008
Page 5
Installing the 032867, 054024, and 054026 Kits (For 70 Series and 620 Series Pumps)
Installing the 032867, 054024, and 054026 Kits (For 70
Series and 620 Series Pumps)
Notes:1) Before performing pump maintenance or service, refer to
on
.
2) Refer to
for parts identification and assembly order.
3) Refer to
on
for
the exploded view of the seal assembly and pump.
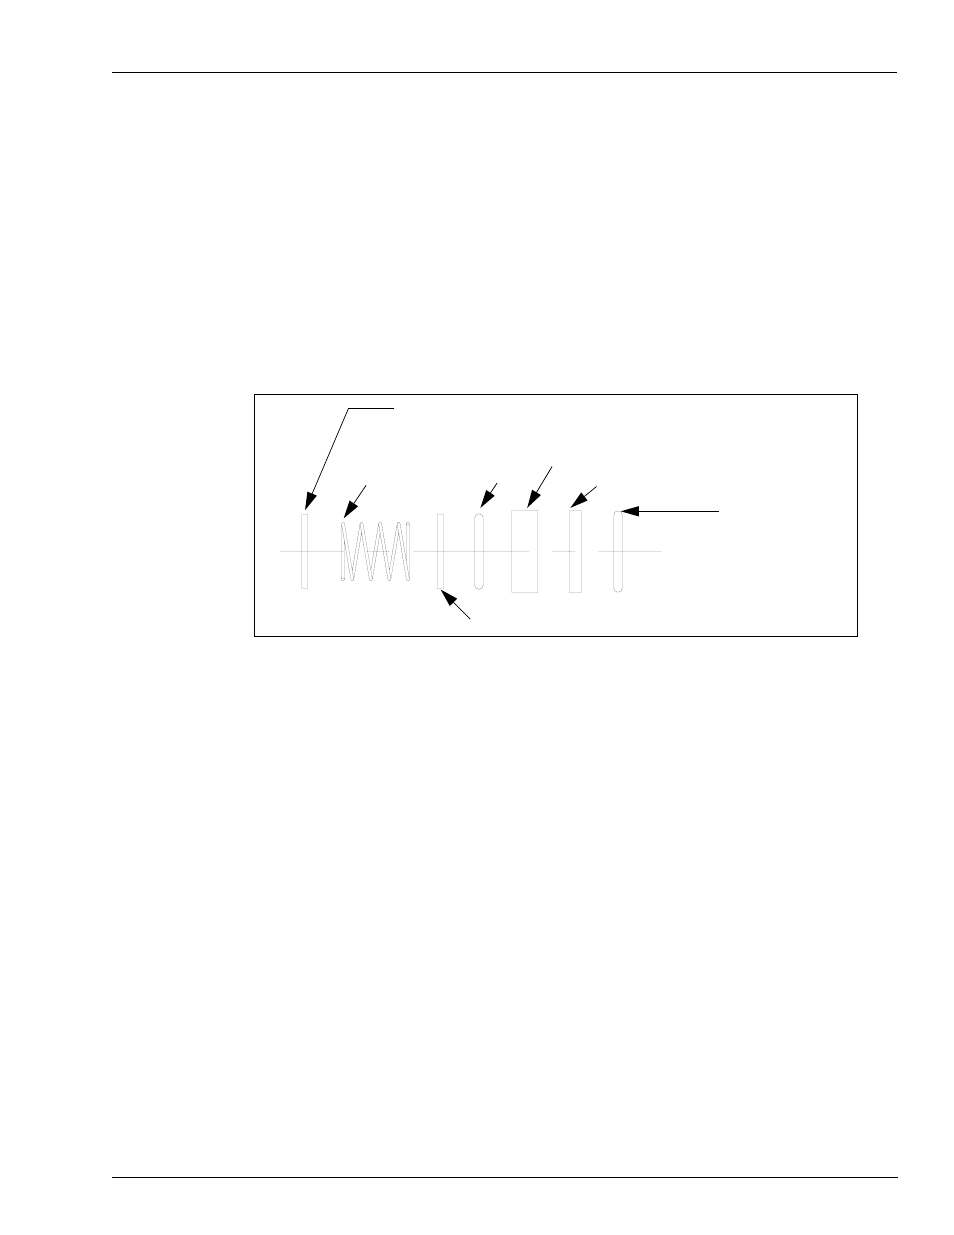
Figure 1: Assembly Order of the Parts
Aluminium Ring (All Except 60 and 460 Series)
Spring
Brass Ring
Carbon Seal Ring
Stationary O-Ring
O-Ring
Aluminium Ring
To install the 032867, 054024 or 054026 Seal Installation kit, proceed as follows:
1
Remove the Pump Cover, Rotor, Vanes, and Shaft Key to expose the Mechanical Seal.
2
Remove the entire seal assembly from the shaft. If the pump is so equipped, it may be
necessary to remove a Snap Ring from the shaft prior to removing the seal. Ensure that you do
not scratch the shaft or motor counterbore surfaces when removing old seal parts.
Note: It is critical that the seal part mating surfaces remain clean and dry. Do not touch or
allow oil of any type to contaminate the carbon or brass mating surfaces. If the seal
inadvertently becomes contaminated, both mating surfaces must be carefully cleaned
with a lint-free cloth and methyl alcohol.
3
Carefully install the Stationary O-Ring and the Carbon Seal Ring into the motor counterbore.
4
Install the Brass Ring, O-Ring, Aluminum Washer, Spring, and second Aluminum Washer, in
that order. If the pump is equipped with a Snap Ring, install it at this time.
5
Reassemble the remaining parts.